
Overview
This edition of Road Note 31 was developed through the High Volume Transport Programme (HVT), managed by DT Global UK. It has been funded by UK aid from the UK government; however, the views expressed do not necessarily reflect the UK government’s official policies.
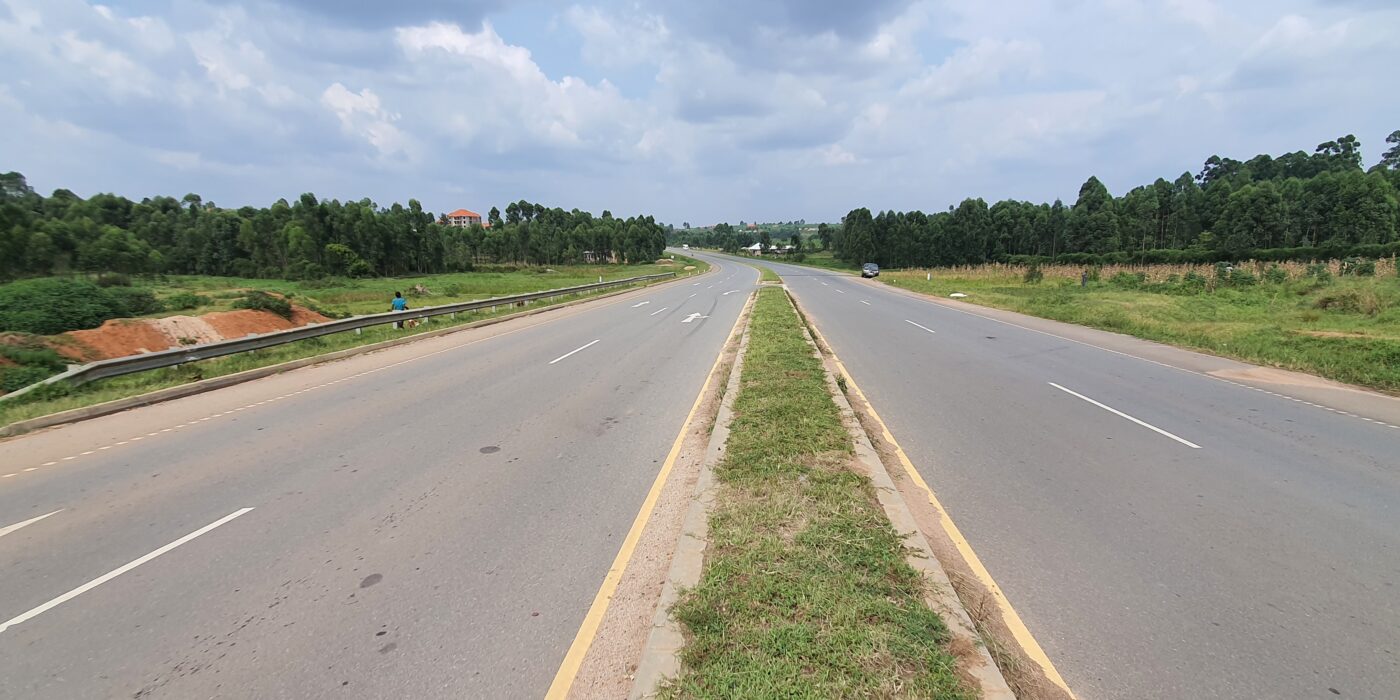
Road Note 31 was first published in 1962 and revised in 1966, 1977 and 1993 to take account of advances in our understanding of the behaviour of road-building materials and their interactions in pavements. Many of these advances have been made by engineers and scientists working in tropical, sub-tropical and temperate climates; but a considerable amount of both fundamental and applied research has been necessary to adapt and develop the knowledge so that it can be used with confidence in tropical and sub-tropical regions. In addition to differences associated with climate and types of materials, problems occasionally arise in some countries from uncontrolled vehicle loading and unreliable road maintenance. At the same time, the level of technology and budget available for construction and maintenance can be relatively low. All this has presented a unique challenge to the highway engineer.
This edition of the Road Note has drawn on the experience of TRL, collaborating with experts and organisations in various parts of the world. It extends the designs of previous editions to cater for design traffic up to 80 million equivalent standard axles and takes into account the effects of climate and high axle loads. Rigid pavement design has been included in this new edition due to the importance of rigid pavements in combatting climate change.
Owing to the growing scarcity of natural gravels, foundation design principles have been included to encourage the use of various combinations of materials and allow for the use of recycled pavement materials within lower pavement layers. The range of structures has been expanded and the chapters on the different types of materials have been enlarged to provide more detailed advice on specifications and techniques. This includes materials such as Enrobé à Module Élevé (EME2 – High modulus asphalt), stone mastic asphalt and recycled pavement materials.
The rehabilitation of road pavements and economic analysis have also been included in this edition due to the importance of these two aspects of road provision in recent years.
Nevertheless, there will be situations and conditions that are not covered in this guide and there will be many examples where local knowledge can be used to refine and improve the recommendations.
Publications with the same themes


Publications with the same study countries


Related news & events
Blog

News
PDF content (text-only)
A Guide to the Structural Design of Surfaced Roads in Tropical and Sub-tropical Regions Integrating Climate Resilience into Road Networks ii Reference No. HVT050 Lead Organisation/ Consultant TRL Limited Partner Organisation(s)/ Consultant(s) - Title RN 31: A Guide to the Structural Design of Surfaced Roads in Tropical and Sub-Tropical Regions Type of document Design Guide Theme Long Distance Transport Sub-theme Policy Regulation TRL Team Leader Andrew Otto Author(s) Rolt, J.; Otto, A.; Ewunetu, M.; Henning, T.; Hewitt, N.; Araya, A.; Cook, J. R.; Bailey, H.; Lekea, A. Technical Review David Hughes, Edward C. Bishop, Robert Geddes, Harold Bofinger, managed by Steve Mills of the University of Birmingham. Project Advisory Group Prof Wynand Steyn, Eng. Irene Simões, Dr Dang Tran Thi Kim, Dr Emeka Agbasi, Eng Jumo Innocent HVT Research Managers Francis Dangare, Abdullah Miah Geographical Location(s) Low and Middle Income Countries - Tropical and Sub-Tropical Keywords Road Note 31, Pavement Design, Tropics and Sub-Tropical Funding UKAid / FCDO Fifth Edition Authors: Rolt, J.; Otto, A.; Ewunetu, M.; Henning, T.; Hewitt, N.; Araya, A.; Cook, J. R.; Bailey, H.; Lekea, A. Internally reviewed by: Workman, R. Editor: Philip Barham Date: December 2022 Cover photo: Illustration of a dual carriageway high volume road iii This edition of Road Note 31 was developed through the High Volume Transport Applied Research Programme (HVT) funded by UKAID through the Foreign, Commonwealth, and Development Office. The HVT programme is managed by DT Global, led by Dr Bernard Obika. The views expressed in this report do not necessarily reflect the UK Government's official policies. This Guide should be used in conjunction with country or regional manuals and specifications. Its use will not necessarily guarantee compliance with legislative, regulatory, or law requirements. The UK Foreign, Commonwealth, and Development Office (FCDO); DT Global; and TRL Ltd do not accept any contractual, tortious or other form of liability for its contents or for any consequences arising from its direct or indirect use. Anyone using the information contained in the document should apply their own skill and judgement to the issue under consideration. When viewing this document electronically, the text underlined can be clicked on to navigate within the document or link to external sources. You can return back to your reading page, after navigating within the document, by clicking on the button. You can also hit the menu button top right of this document to take you to the contents page. All listing on the contents page are also individually linked, taking you to each chapter or section. Using this guide Using This Guide iv Acknowledgements The team is grateful to the following organisations and individuals in gathering and provision of data, collation of data, field and laboratory testing. Administraçaõ Nacional de Estradas (ANE, Mozambique) – The Mozambique National Roads Administration, The Directorate of Roads Vietnam (DRVN), The Uganda National Roads Authority (UNRA), Companhia de Concessões Rodoviárias (Grupo CCR, Brazil) – The Road Concession Company, Brazil, The Center for Innovation, Research and Development in Infrastructure and Road Safety (CIID), Mexico, The Road Development Agency of Zambia (RDA), OTB Engineering, Vietnam, Institute of Transport Science and Technology, Vietnam, Laboratório de Engenharia de Moçamibique, (LEM Mozambique), JJR Mozambique. Individuals: Eng Miguel Coanai, ANE Eng Adelino Serage, ANE Eng Leonel Mohamed, ANE Eng Valeria Cristina de Faria, CCR Eng Paul Garnica, CIID Dr Mark Henry Rubarenzya, UNRA Eng Steven Musumba, UNRA Eng Christopher Ngwira, RDA Eng Tonny R. Mugenyi, MoWT, Uganda. Acknowledgements v Foreword Note: This edition of Road Note 31 was developed through the High Volume Transport Applied Research Programme (HVT) funded by UKAID through the Foreign, Commonwealth, and Development Office. The HVT programme is managed by DT Global, led by Dr Bernard Obika. Foreword This edition of Road Note 31 was developed through the High Volume Transport Programme (HVT), managed by DT Global UK. It has been funded by UK aid from the UK government; however, the views expressed do not necessarily reflect the UK government's official policies. Road Note 31 was first published in 1962 and revised in 1966, 1977 and 1993 to take account of advances in our understanding of the behaviour of road-building materials and their interactions in pavements. Many of these advances have been made by engineers and scientists working in tropical, sub-tropical and temperate climates; but a considerable amount of both fundamental and applied research has been necessary to adapt and develop the knowledge so that it can be used with confidence in tropical and sub-tropical regions. In addition to differences associated with climate and types of materials, problems occasionally arise in some countries from uncontrolled vehicle loading and unreliable road maintenance. At the same time, the level of technology and budget available for construction and maintenance can be relatively low. All this has presented a unique challenge to the highway engineer. This edition of the Road Note has drawn on the experience of TRL, collaborating with experts and organisations in various parts of the world. It extends the designs of previous editions to cater for design traffic up to 80 million equivalent standard axles and takes into account the effects of climate and high axle loads. Rigid pavement design has been included in this new edition due to the importance of rigid pavements in combatting climate change. Owing to the growing scarcity of natural gravels, foundation design principles have been included to encourage the use of various combinations of materials and allow for the use of recycled pavement materials within lower pavement layers. The range of structures has been expanded and the chapters on the different types of materials have been enlarged to provide more detailed advice on specifications and techniques. This includes materials such as Enrobé à Module Élevé (EME2 - High modulus asphalt), stone mastic asphalt and recycled pavement materials. The rehabilitation of road pavements and economic analysis have also been included in this edition due to the importance of these two aspects of road provision in recent years. Nevertheless, there will be situations and conditions that are not covered in this guide and there will be many examples where local knowledge can be used to refine and improve the recommendations. I am confident that the new edition will prove to be as popular with practitioners as its predecessors. Professor Charlotte Watts, PhD CMG FMedSci Chief Scientific Advisor & Director of Research and Evidence Directorate Foreign, Commonwealth & Development Office vi Contents Using This Guide iii Acknowledgements iv Foreword v Contents vi List of Tables ix List of Figures xi Abbreviations and Acronyms xii 1 Introduction 1 1.1 General 1 1.2 Road Deterioration and Variability 1 1.3 Economic Considerations 2 1.4 Effects of Climate 3 1.5 Uncertainty in Traffic Forecasts 3 1.6 The Design Process and How to Use this Road Note 3 1.7 Definitions of the Pavement Structure 4 1.8 Criteria for Choosing Flexible or Rigid Pavements 5 2 Estimation of Design Traffic 6 2.1 Introduction and Scope 6 2.2 Baseline Traffic Flows 8 2.3 Axle Loading 10 2.4 Key Points 13 3 The Subgrade 14 3.1 Introduction 14 3.2 The Subgrade Environment 15 3.3 Subgrade Explorations 16 3.4 Subgrade Assessment for Design 19 3.5 Problem Subgrades 20 3.6 Subgrades Classification 23 3.7 Key Points 23 4 Unbound Pavement Materials 25 4.1 Introduction and Scope 25 4.2 Capping Materials 25 4.3 Sub-base Materials 26 4.4 Roadbase Materials 30 4.5 Key Points 35 5 Hydraulically Bound Materials 36 5.1 Introduction and Scope 36 5.2 Stabilisation Binders 36 5.3 Selection of Type of Treatment 37 5.4 Cement Stabilisation 39 5.5 Lime Stabilisation 40 5.6 Properties of Lime-Stabilised Materials 41 5.7 Pozzolanic Materials 42 5.8 Hydraulic Road Binders 43 5.9 Specification Guidance for Treated Soils 44 5.10 Construction 45 5.11 Quality Control 48 5.12 Key Points 50 Contents vii Contents (continued) 6 Bitumen-Bound Materials 51 6.1 Introduction and Scope 51 6.2 Aggregate Types 51 6.3 Types of Binders 53 6.4 Types of Asphalt 54 6.5 Designs for Rut Resistance 60 6.6 Designs for Durability (Crack Mitigation) 62 6.7 Manufacture and Construction 62 6.8 Climate-Resilient Surfacings 63 6.9 Key Points 68 7 Pavement Drainage and Climate Resilience 70 7.1 Introduction 70 7.2 Adjusting Hydrological Design Standards 71 7.3 Climate-Resilient Road Drainage Systems 73 7.4 Protection from Damage from Extreme Rainfall (Climate Resilience) 79 7.5 Sustainable Drainage Systems (SuDS) 83 7.6 Climate Resilient Drainage in Difficult Terrain 86 7.7 Critical Drainage Issues in Sloping Ground and Mountainous Terrain 90 7.8 Key Points 91 8 Flexible Pavement Design 93 8.1 Introduction and Scope 93 8.2 Foundation Design 93 8.3 Long-life Pavements 94 8.4 Basis of Development of the Pavement Design Catalogues 94 8.5 Basis of the Low Volume Roads Catalogues 95 8.6 Conversion of Roadbase and Sub-base Thicknesses 95 9 Pavement Structure Catalogues 96 10 Design of Rigid Pavements 107 10.1 Introduction and Scope 107 10.2 Introduction to Concrete 107 10.3 Types of Rigid Pavements 109 10.4 Selection of Pavement Type 111 10.5 Design of Rigid Pavements 112 10.6 Concreted Joints, Dowel Bars and Tie Bars 124 10.7 Asphalt Surfacing on Concrete Pavements 129 10.8 Key Points 130 Contents viii 11 Pavement Rehabilitation Approaches 131 11.1 Introduction and Scope 131 11.2 Functional Condition Assessment 131 11.3 Structural Condition Assessment 132 11.4 Drainage and Surface Defects 139 11.5 Bituminous Overlays 140 11.6 Pavement Widening 145 11.7 Rehabilitation of Concrete Pavements 146 11.8 Key Points 147 12 Economic Considerations 148 12.1 Introduction and Scope 148 12.2 Key Inputs for Economic Analysis 148 12.3 Life-Cycle Cost Analysis 149 12.4 Economic Analysis Tools and Decision Criteria 150 12.5 Ranking / Multi-Criteria Analysis 150 13 Ancillary Considerations 150 13.1 Carbon Footprint of Road Pavements 151 13.2 Process for Introducing New Materials 153 14 Appendices 154 Appendix A: Mechanistic-Empirical Pavement Design 154 Appendix B: Materials Moduli for Mechanistic-Empirical Design 158 Appendix C: Chapter 1 References (Introduction) 162 Appendix D: Chapter 2 References (Estimation of Design Traffic) 163 Appendix E: Chapter 3 References (The Subgrade) 164 Appendix F: Chapter 4 References (Unbound Pavement Materials) 165 Appendix G: Chapter 5 References (Hydraulically-Bound Materials) 166 Appendix H: Chapter 6 References (Bitumen-Bound Materials) 168 Appendix I: Chapter 7 References (Pavement Drainage and Climate Resilience) 171 Appendix J: Chapter 8 References (Flexible Pavement Design) 173 Appendix K: Chapter 10 References (Design of Rigid Pavements) 174 Appendix L: Chapter 11 References (Pavement Rehabilitation Approaches) 175 Appendix M: Chapter 12 References (Economic Considerations) 176 Appendix N: Chapter 13 References (Ancillary Considerations) 177 Contents Contents (continued) ix List of Tables Table 2-1: Heavy vehicle classification 6 Table 2-2: Key for tyre types 6 Table 2-3: Recommended relative damage exponents, n 11 Table 2-4: Standard axles for different axle load groups 11 Table 2-5: Traffic load distribution between lanes 12 Table 3-1: The Unified Soil Classification System (USCS) 15 Table 3-2: Examples of zone of influence depths 17 Table 3-3: Zone of influence investigation scenarios 18 Table 3-4: Subgrade soil sensitivity groups 19 Table 3-5: Typical presumptive CBR values 19 Table 3-6: Classification of expansive soils 20 Table 3-7: Summary of mitigation options for expansive clays in road construction 21 Table 3-8: Cover over reactive subgrade 22 Table 3-9: Subgrade classes 23 Table 4-1: Properties of unbound materials 25 Table 4-2: Recommended particle size distributions for crushed rock and high-standard natural gravel sub-base materials (GS1) 27 Table 4-3: Recommended plasticity characteristics for granular sub-bases (GS1 and GS2) 27 Table 4-4: Typical particle size distributions for standard natural gravel sub-base materials (GS2) 28 Table 4-5: Particle size distribution of recycled materials for use as sub-bases 29 Table 4-6: Grading limits for graded crushed stone roadbase materials (GB1,A; GB1,B) 30 Table 4-7: Mechanical strength requirements for the aggregate fraction of crushed stone roadbases (GB1,A; GB1,B) as defined by the Ten Per Cent Fines Test 30 Table 4-8: Recommended particle size distributions for mechanically stable natural gravels and weathered rocks for use as roadbases (GB3) 31 Table 4-9: Typical coarse aggregate gradings for dry-bound and water-bound Macadam (GB2) 33 Table 5-1: Guide to the type of stabilisation likely to be effective 38 Table 5-2: Desirable properties of materials before stabilisation 37 Table 5-3: Conversion factors for cylinder strengths 40 Table 5-4: Suitability criteria and requirements for soil and lime prior to treatment 42 Table 5-5: Characteristic values of the mechanical requirements of HRB 43 Table 5-6: Test standards and HRB requirements for mechanical, physical and chemical properties 43 Table 5-7: Indicative Immediate Bearing Index (IBI) values 44 Table 5-8: Guidance for immediate use by traffic of cement-bound materials 49 Table 6-1: Coarse aggregate properties for bituminous mixes 51 Table 6-2: Fine aggregate properties for bituminous mixes 52 Table 6-3: Changes desired when modifying binders 53 Table 6-4: Asphaltic concrete surfacings 55 Table 6-5: Marshall Test criteria 55 Table 6-6: Voids in the mineral aggregate 56 Table 6-7: EME2 basecourse and roadbase 56 Table 6-8: Bitumen Macadam surfacings 57 Table 6-9: Marshall Test criteria for close-graded bitumen Macadams 57 Table 6-10: Hot rolled asphalt surfacings 58 Table 6-11: Bitumen Macadam roadbase 58 Table 6-12: Rolled asphalt roadbase 58 Table 6-13: Stone mastic asphalt 59 Table 6-14: Criteria for sand-bitumen roadbase materials 59 List of Tables x List of Tables (continued) Table 6-15: Limiting wheel tracking requirements for site classification 61 Table 6-16: Job-mix tolerances for a single test 63 Table 6-17: Manufacturing and rolling temperatures 63 Table 6-18: Climate hazard impacts on road surfaces 64 Table 6-19: Climate resilience technology options for road surfaces 65 Table 6-20: Particle size distribution for EMOGPA 67 Table 6-21: Design performance criteria for EMOGPA 67 Table 7-1: Recommended UK national precautionary sensitivity ranges for peak rainfall intensity, peak river flow, offshore wind and wave height 72 Table 7-2: Advantages and disadvantages of the resistance and resilience strategies for road development on floodplains 80 Table 7-3: Recommended thickness of the layer of capillary cut-off 89 Table 8-1: Pavement foundation classes and stiffness modulus 93 Table 10-1: Main types of concrete pavement – advantages and disadvantages 111 Table 10-2: Loads for axle groups, which cause the same damage as a Standard Axle 113 Table 10-3: Minimum sub-base thickness, by type 115 Table 10-4: Concrete pavement design procedure for JUCP, JRCP AND CRCP 116 Table 10-5: Load Safety Factors (LSF) for concrete pavements 117 Table 10-6: Minimum concrete base (i.e. slab) thickness 117 Table 10-7: Design Catalogue for concrete pavements based on MESA 117 Table 10-8: Coefficients for prediction of equivalent stresses 119 Table 10-9: Coefficients for prediction of erosion factors for undowelled bases 119 Table 10-10: Coefficients for prediction of erosion factors for dowelled or CRCP 120 Table 10-11: Minimum concrete cover to steel reinforcement and tie bars for JRC and CRCP 120 Table 10-12: Estimated values of the coefficient of friction 121 Table 10-13: Main types, and purpose, of concrete joints 124 Table 10-14: Minimum dowel bar sizes for concrete pavements 127 Table 11-1: Deflection measuring methods 133 Table 11-2: Pavement layer strength coefficients 135 Table 11-3: Surfacing defects - roads with thin bituminous seals 138 Table 11-4: Surfacing defects - roads with AC surfacings 140 Table 11-5: Structural Numbers for rehabilitation design or new pavement design 142 Table 11-6: Concrete pavement defects, causes and treatment 146 Table 12-1: Economic analysis techniques 150 Table 13-1: Carbon footprint source for stages of the road life-cycle 151 Table 13-2: Emissions intensities for three calculation tools 152 Table B-1: Factors affecting the resilient modulus of unbound pavement materials 158 Table B-2: Emissions intensities for three calculation tools 159 Table B-3: Elastic moduli for water-bound Macadam layers 160 Table B-4: Range of elastic modulus values for HBMs 160 Table B-5: Equations for elastic modulus of various HBMs 160 Table B-6: Range of Poisson's ratios for various HBMs 161 Table B-7: Estimated moduli of asphaltic materials 161 List of Tables xi List of Figures List of Figures Figure 1-1: The pavement design process 4 Figure 1-2: Definition of pavement layers 5 Figure 3-1: Key layers within a pavement profile 14 Figure 3-2: Zone of influence scenarios (new/upgraded alignment) 17 Figure 3-3: Roadbed - ground level relationships 17 Figure 3-4: Some countermeasures used to increase zone of moisture equilibrium 21 Figure 6-1: Categories of reduced temperature asphalt 60 Figure 6-2: Modified spray bars for the construction of epoxy-modified chip seals 66 Figure 6-3: Fatigue properties of dense-graded mixes with epoxy asphalt 66 Figure 6-4: Cantabro loss results of aged and un-aged open-graded asphalt mixes 66 Figure 7-1: Typical cross section of a road, showing drainage types 73 Figure 7-2: Water ingress on roads without ditches 74 Figure 7-3: Road drainage and crown height arrangement 74 Figure 7-4: Alternative cross section geometry 76 Figure 7-5: Cross section of road showing drainage arrangement 77 Figure 7-6: Moisture cones in a typical road 78 Figure 7-7: Drainage of unpaved raised medians 78 Figure 7-8: Cross section of road that is overtopped by flood water, with erosion protection 81 Figure 7-9: Cross section through a grassed Swale 84 Figure 7-10: Filter drain 84 Figure 7-11: Infiltration basin 85 Figure 7-12: Raised formation level 86 Figure 7-13: Longitudinal subsurface drains / pipes 87 Figure 7-14: Longitudinal and transverse drains 87 Figure 7-15: Controlling capillary rise using a granular layer 89 Figure 7-16: Typical catch water drain arrangement in a box cut 90 Figure 7-17: Control of seepage flow using a perforated pipe 91 Figure 10-1: Jointed unreinforced concrete slab movement and warping (at different temperature gradients) 108 Figure 10-2: Effective increase in subgrade strength due to bound / LCS 114 Figure 10-3: Contraction joint (formed by saw-cut and crack inducer) 125 Figure 10-4: Diagram of an expansion joint 125 Figure 10-5: Tie bar at longitudinal joint 126 Figure 11-1: Schematic of a correlation between deflection and rut depth (example only) 133 Figure 11-2: Schematic of a correlation between deflection and rut depth (example only) 135 Figure 11-3: Example of performance charts 138 Figure 11-4: Relationship between Structural Number and central deflection (example) 141 Figure 11-5: Rut depth / deflection correlation (example) 143 Figure 11-6: Standard deflection and traffic carrying capacity (example) 143 Figure 11-7: Calibration of deflection-life criterion 143 Figure 12-1: Whole-of-life cost for a road 149 Figure 13-1: Total CO2 emissions over a 40 year period for a 1 km long and 13 m wide road during construction, maintenance and operation (lighting, traffic lights, winter treatment) 152 Figure 13-2: Comparing sustainability rating tools in terms of their biases in relation to project stages 153 Figure A-1: Stress/strain locations for mechanistic-empirical analysis 154 xii Abbreviations & Acronyms AASHTO American Association of State Highway and Transportation Officials AFCAP African Community Access Partnership AMI Asphalt Membrane Interlayer ARRB Australian Road Research Board ASTM American Society for Testing and Materials BS British Standard BSI British Standards Institution CBR California Bearing Ratio COVID Coronavirus Disease CPR Concrete Pavement Rehabilitation CRCB Continuously Reinforced Concrete Base CRCP Continuously Reinforced Concrete Pavements CRISPS Climate-Resilient, Sustainable Road Pavement Surfacings CRO Crack, Reseat and Overlay CSIR Council for Scientific and Industrial Research of South Africa CSO Crack, Seat and Overlay DCP Dynamic Cone Penetrometer FCDO Foreign, Commonwealth & Development Office FMA Fibre Mastic Asphalt FWD Falling Weight Deflectometer HFL High Flood Level HMA Hot Mix Asphalt HVAG Heavy Vehicle Axle Group HVR High Volume Road HVT High Volume Transport JRCP Jointed Reinforced Concrete Pavements JUCP Jointed Unreinforced Concrete Pavements LCC Life-Cycle Cost Abbreviations & Acronyms LIC Low Income Country LMIC Low and Middle Income Country LVR Low Volume Road MEAS Modified Epoxy Asphalt Surfaces MECS Modified Epoxy Chip Seals MESA Million Equivalent Standard Axles MoU Memorandum of Understanding ORN Overseas Road Note ORN 31 Overseas Road Note 31 PAG Project Advisory Group PI Plasticity Index PIR Pavement Investigation Research PWD Public Works Department PMU Programme Management Unit RAP Recycled Asphalt Pavement RCA Recycled Concrete Aggregates RCC Roller Compacted Concrete ReCAP Research for Community Access Partnership RN 31 Road Note 31 SEACAP South East Asia Community Access Programme SIDS Small Island Developing States SoK State of Knowledge SuDS Sustainable Drainage Systems TLD Traffic Load Distribution ToR Terms of Reference TRL Transport Research Laboratory of UK, also known as TRL Limited TxDoT Texas Department of Transport UTRCP Ultra Thin Reinforced Concrete Pavement 1Introduction 1 1 Introduction 1.1 General Road Note 31 was first published in 1962 and revised in 1966, 1977 and then in 1993 as the fourth edition. Each edition was published to include the advances in our understanding of the behaviour of roads and road building materials and their interaction in composite pavements. This is the fifth edition which, like its predecessors, has been written to include the advances in knowledge that have been generated by both research and by practical experience, but also to consolidate the established knowledge of the fourth edition, modified where it has been necessary to clarify or improve it. Indeed, recent years have seen some major improvements and changes of emphasis resulting from changes in materials, climate and usage of the roads. Thus, this edition has the following principal differences from the fourth edition. 1. For bitumen surfacing layers, the traditional fatigue process whereby the surfacing fails by cracking caused by the bending of the surface layer under traffic loads is no longer considered the main cause of surface failure. The reason is that the bitumen in the top surface layer ages and becomes brittle quite quickly (essentially oxidises) in hot climates and cracks develop from the top downwards. This process dominates performance to such an extent that the surface layer must be replaced if the pavement is to achieve the required long life. It is essentially a 'sacrificial' layer and does not need to be exceptionally thick if the remainder of the pavement is designed appropriately. 2. The observed behaviour of long-life pavements based on suitable foundations have been established and they show that continuously increasing thicknesses to achieve longer life is not required. 3. Road failures at subgrade level are rare, provided that the drainage and pavement foundation are satisfactory. 4. Climate change is now a serious concern and road design must now consider revised climate factors (e.g. changes in storm levels and frequencies) and also methods of minimising damage created by extreme events (e.g. fast flowing water and erosion). This is complemented by guidance on the design of climate resilient surfacings. 5. Guidance is included on the design of rigid pavements, which is a useful option for the provision of climateresilient roads. This Road Note gives recommendations for the structural design of surfaced roads in tropical and sub-tropical regions. It is aimed at highway engineers responsible for the design and construction of new road pavements and pavement rehabilitation. It is appropriate for roads that are required to carry up to 80 million cumulative equivalent standard axles in one direction. The Note covers the design of strengthening overlays and concrete roads. The document does not, however, cover the design of earth and gravel roads. Design guidance for these types of roads and further guidance on low volume roads can be found in Rural Road Note 01 (Rolt et al., 2020). Although this Note is appropriate for the structural design of roads in urban areas, some of the special requirements of urban roads, such as the consideration of kerbing, subsoil drainage, skid resistance, etc., are not covered. For the design of surface dressings (bituminous seals), the designer is urged to refer to TRL ORN 3 (2000), SANRA TRH 3 (2007), Austroads AGPT04K (2018), TxDoT (2010) and other appropriate country manuals published after 2000. 1.2 Road Deterioration and Variability The purpose of structural design is to limit the stresses in the subgrade induced by traffic to a safe level at which subgrade deformation is insignificant. At the same time, structural design aims to ensure that the road pavement layers themselves do not deteriorate to any serious extent within a specified period of time. One of the difficulties is caused by the variability in material properties and this is exacerbated by variability in construction control that is generally much greater than desired by the design engineer and must be taken into account explicitly in the design process. Only a very small percentage of the area of the road surface needs to show distress for the road to be considered unacceptable by road users. It is therefore the weakest parts of the road, or the extreme tail of the statistical distribution of 'strength', which is important in design. In well controlled full-scale experiments this variability is such that the 10% of the road that performs best will carry about five times more traffic before reaching a defined terminal condition than the 10% that performs least well. Under normal construction conditions this spread of performance is even greater. Some of this variability can be explained through the measured variability of factors known to affect performance. Therefore, if the likely variability is known beforehand, it is possible, in principle, for it to be taken into account in design. It is a false economy to minimise investigations needed to determine this variability. In practice, it is usually only the variability of subgrade strength that is explicitly considered. All other factors are controlled by means of specifications, i.e. by setting minimum acceptable values for the key properties of the materials. It is necessary for specifications to be based on easily measurable attributes of the materials. These attributes may not correlate well with the fundamental mechanical properties on which behaviour depends. 1Introduction 2 There is another cause of variability in pavement performance that designers need to face that is caused by the variability in the damage caused to the road by the different design of truck axles and wheel loading configurations. It is only fairly recently that this variety has increased . Previously the concern was simply for the difference between axles with single dual wheels on each end of the main axle and tandem axles with a twin double wheel at each end of the main axle. The difference in pavement damage created by these twowheel arrangement was determined experimentally and the results have been applied for many years. At the present time the pavement damage caused by the 'super-single axles for example ' now being used on some trucks has not been fully explored but it is higher than on older trucks and is probably not based on the same relatively simple formula. The issue is discussed in more detail in Section 2.3.2, but a conservative approach is recommended. Nevertheless, it is the task of the designer to estimate likely variations in layer thicknesses and material strengths so that realistic target values and tolerances can be set in the specifications. This will ensure that satisfactory road performance can be guaranteed, as far as is possible. The thickness and strength values described in this Road Note are essentially minimum values and therefore only positive tolerances are acceptable in the final specifications. Practical considerations require, however, that they are interpreted as lower ten percentile values, with 90% of all test results exceeding the values quoted. The random nature of variations in thickness and strength that occur when each layer is constructed should ensure that minor deficiencies in thickness or strength rarely, or never, occur consecutively. The importance of good practice in quarrying, material handling and stockpiling to ensure this randomness, and also to minimise variations themselves, cannot be overemphasised. By the nature of the materials used for construction, it is impossible to design a road pavement that does not deteriorate in some way with time and traffic. The aim of structural design is to limit the level of pavement distress, measured primarily in terms of ride quality, rut depth and cracking, to predetermined values. At the end of the design period, a strengthening overlay of some kind is usually applied. In principle, however, roads can be designed to reach a terminal condition, at which point a major refurbishment, or even complete reconstruction, may be necessary. Assessing appropriate remedial treatments for such roads is a difficult task. Most design methods assume that adequate routine and periodic maintenance is carried out during the design period of the road, and that by the end of the design period a relatively low level of deterioration will have occurred. Acceptable levels of surface condition are usually based on the expectations of road users. These expectations have been found to depend on the class of road and the volume of traffic. This means that roads of higher geometric standard, and therefore higher vehicle speed, have lower levels of acceptable pavement distress. The design catalogues in this Road Note are based on terminal conditions. At the terminal condition, it is expected that the pavement will have reached the rut depths given below: • National and trunk roads: 20 mm (95% reliability) • Secondary roads: 20 mm (90% reliability) • Tertiary roads: 30 mm (80% reliability) These ruts are expected due to the dedensification, or a significant loss of strength, of any of the pavement layers, or where the subgrade has deformed. It is expected that the asphalt layers for severe sites shall be designed for rut resistance and durability (see Chapter 6). This is especially emphasised with the rise in the use of super-single (widebase) tyres. Additionally, it is assumed that the pavement will be constructed to specifications, and in accordance with quality control standards. As the road deteriorates with time, however, routine maintenance and reseals are expected to be undertaken. At later stages, more significant maintenance interventions to rehabilitate and strengthen the pavement will be expected. 1.3 Economic Considerations A number of important empirical studies have shown how the cost of operating vehicles depends on the surface condition of the road. The studies have also improved knowledge of how the deterioration of roads depends on the nature of the traffic, the properties of the roadmaking materials, the environment and the maintenance strategy adopted (Parsley & Robinson, 1982; Paterson,1987; Chesher & Harrison, 1987; Watanatada et al., 1987). In some circumstances it is now possible to design a road so that, provided maintenance and strengthening can be carried out at the appropriate time, the total cost of the transport facility can be minimised. This includes all construction costs, maintenance costs and road user costs. These techniques are expected to become more widespread in the future. Furthermore, pavement management systems have been introduced in many countries, enabling road condition to be monitored on a regular basis. The collection of additional information in this way will allow road performance models to be refined. Pavement structural design should then become an integral part of the management system, with design being modified according to expected maintenance inputs. This will enable the most economic strategies to be adopted. While these refinements can be made in the future, the research has provided important guidance on structural designs suitable for tropical and sub-tropical environments. This research has been used, in part, in preparing this edition of Road Note 31. 1Introduction 3 For the pavement structures recommended in this Note, levels of deterioration reached by the end of the design period have been restricted to those that (based on experience) provide acceptable economic designs under a wide range of conditions. It has been assumed that routine and periodic maintenance activities are carried out to a reasonable level. In particular, it has been assumed that periodic maintenance is carried out whenever the area of a cracking or ravelling surface exceeds 15% of a road. For example, for a 10 year design period, one surface maintenance treatment is likely to be required for higher traffic levels; for a 15 year design period, one treatment is likely to be required for lower traffic levels, with two required for higher traffic levels. These are broad guidelines only and the exact requirements will depend on local conditions. 1.4 Effects of Climate Research shows how different types of road deteriorate, demonstrating that some of the most common modes of failure in the tropics are often different from those encountered in temperate regions. In particular, climaterelated deterioration (high average temperature and high rainfall intensity) sometimes dominates performance and research has emphasised the overriding importance of the design of bituminous surfacing materials to minimise this type of deterioration (Paterson, 1987; Smith et al., 1990; Strauss et al., 1984). In Chapter 6, emphasis has been placed on pavement design for mitigating the temperature effects of climate change. High prevailing temperatures might soften bituminous surfacings and cause rutting. Furthermore, cracking as a result of increased oxidation might lead to increased water ingress into the pavement and increased precipitation might decrease adhesion and cause aggregate loss. In Chapter 7, there is an emphasis on mitigating against the effects of increased rainfall quantity and intensity. This includes capillary rise and the subsequent softening of pavement layers, overtopping and pavement washouts, which decrease internal drainage. Advice on the sustainable disposal of road surface runoff water has been provided. Climate also affects the nature of the soils and rocks encountered in the tropics. Soil-forming processes are still very active and surface rocks are often deeply weathered. The soils themselves often display extreme or unusual properties, which can pose considerable problems for road designers. 1.5 Uncertainty In Traffic Forecasts Pavement design depends on the expected level of traffic. Axle load studies and traffic counts are essential prerequisites for successful design. Accurate traffic forecasting remains a difficult task because many of the factors on which it depends can be difficult to predict. For this reason, several techniques are described (in Chapter 2) and sensitivity and risk analyses are recommended. As discussed in Chapter 6, rut-resistant asphalt mixes and mixes with enhanced durability are required to combat the effects of overloading and high tyre pressures and the rise in the use of super-single tyres (wide-base tyres). 1.6 The Design Process and How to use this Road Note There are three main steps to be followed in designing a new road pavement These are: 1. Estimating the amount of traffic and the cumulative number of equivalent standard axles that will use the road over the selected design life; 2. Assessing the strength of the subgrade soil over which the road is to be built; 3. Selecting the most economical combination of pavement materials, layer thicknesses and surfacings that will provide satisfactory service over the design life of the pavement. (It is usually necessary to assume that an appropriate level of maintenance is also carried out). This Note considers each of these steps in turn and puts special emphasis on five aspects of design that are of major significance in designing roads in most tropical countries: • The influence of tropical climates on the moisture conditions in road subgrades; • The severe conditions imposed on exposed bituminous surfacing materials by tropical climates and the implications of this for the design of such surfacings; • The interrelationship between design and maintenance; (if an appropriate level of maintenance cannot be assumed, it is not possible to produce designs that will carry the anticipated traffic loading without high costs to vehicle operators through increased road deterioration); • The high axle loads and tyre pressures that are common in most countries, and the rise in use of super-singles; • The influence of tropical climates on the nature of the soils and rocks used in road building. The overall process of designing a road is illustrated in Figure 1-1. Some of the information necessary to carry out the tasks may be available from elsewhere, e.g. a feasibility study or Ministry records, but all existing data will need to be checked carefully to ensure that they are both up-to-date and accurate. Likely problem areas are highlighted in the relevant chapters of this Road Note. This Road Note can be used as a standalone pavement design guide, or in conjunction with national design manuals and guidelines, i.e. institutional documents that have an approved pedigree, although minor adjustments to items such as traffic classification may be required. The key activities described within each chapter for designing the road are conveniently summarised at the end of each chapter. Key references, where the designer can find further information, if required, are included in the Appendices. There are also Appendices that provide further information and design inputs (e.g. materials moduli, temperature models). These are particularly useful for the purposes of mechanistic pavement design. 1Introduction 4 1.7 Definitions of the Pavement Structure Throughout the text, the component layers of a flexible pavement are referred to in the following terms (see Figure 1-2): Surfacing. This is the uppermost layer of the pavement and normally consists of a bituminous seal or a layer of premixed bituminous material. Where premixed materials are laid in two layers, these are known as the wearing course and the basecourse (or binder course), as shown in Figure 1-2. For concrete pavements the slab acts as both the roadbase and the surfacing. Roadbase. This is the main load-spreading layer of the pavement. It will normally consist of crushed stone or gravel, a blend of gravel and crushed rock, or of gravelly soils, bituminous Macadams, weathered rock, sands and sand-clays stabilised with cement, lime or bitumen. Sub-base. This is the secondary load-spreading layer underlying the roadbase. It will normally consist of a material of lower quality than that used in the roadbase, such as unprocessed natural gravel, gravel-sand or gravel-sandclay. This layer also serves as a separating layer preventing contamination of the roadbase by the subgrade material and, under wet conditions, it has an important role to play in protecting the subgrade from damage by construction traffic. Capping layer (selected material or improved subgrade). Where very weak soils are encountered, a capping layer is sometimes necessary. This may consist of better-quality subgrade or material imported from elsewhere, or existing subgrade material improved by mechanical or chemical stabilisation. Foundation. This is the platform on which the pavement is constructed. It is the combination of imported subgrade and the native subgrade, or the capping layer (selected fill material) and in situ subgrade, or the native subgrade, where it is strong. Native Subgrade. This is the upper layer of the natural soil, which may be local material or soil excavated elsewhere and placed as fill. In either case it is compacted during construction to give added strength. Figure 1-1: The pavement design process CHAPTER Access geotechnical problems Usually carried out as part of feasibility study SURVEY POSSIBLE ROUTES MAIN ACTIVITY SUB ACTIVITIES Search for sources of material Choose route Measure traffic volume by class 2 ASSESS TRAFFIC (Assign traffic class) Measure axle load Choose design life Calculate total traffic Assign climatic regime 3 8, 9, 10 & 11 MEASURE SUBGRADE STRENGTH (Assign subgrade classes) Test soils Define uniform sections Locate sources Chapters 4, 5, 6 & 7 SELECT PAVEMENT MATERIALS Test properties Accept, reject or modify Assess severe sites SELECT PAVEMENT STRUCTURES ECONOMIC ANALYSIS FINAL SELECTION BUILD Review local experience Risk analysis (or full appraisal) Climate resilience enhancements 12 13 Select parameters Consider stage construction Revise designs 1Introduction 5 Figure 1-2: Definition of pavement layers 1.8 Criteria for choosing flexible or rigid pavements The following issues should be considered in the choice between a flexible or a rigid pavement structure: 1. Rigid pavements are an option on roads carrying heavy and overloaded vehicles travelling at slow speed (e.g. climbing lanes), and with many turning movements such as hairpin bends (curve radius less than 30 m) and junctions, and on steep gradients. 2. Jointed rigid pavements are not suitable for use in areas with expansive subgrades but unjointed continuous rigid pavements could be suitable. 3. Comparisons of carbon footprints of the two types of pavement vary depending on several factors (see Chapter 13). 4. For a life-cycle cost comparison, an analysis over a minimum of 40 years should be undertaken. The cheapest option should be selected. 5. Rigid pavements (concrete) can be constructed by comparatively less-experienced personnel than flexible pavements. Rigid pavements can also be constructed with simpler equipment and plant. 6. Availability of materials will largely dictate choice. Where cement is more readily available than bitumen, rigid pavements are preferred, and vice versa. 7. Rigid pavements are less susceptible to failure under high temperature than flexible pavements. 8. Initial construction cost will usually be less for flexible pavements, but they require more frequent periodic maintenance than rigid pavements. 9. Rigid pavements tend to generate more traffic noise than flexible pavements. Despite these considerations, it is often beneficial to use a combination of these two pavement types in a single project. For example, a rigid pavement could be used on climbing lanes while the rest of the carriageway is a flexible pavement. Similarly, outer lanes could be rigid pavements while inner lanes are flexible pavements. Rigid pavements might be more appropriate where water erosion or overtopping of embankments might be a frequent occurrence resulting from climate change. 2Estimation of Design Traffic 1 6 2 Estimation of Design traffic 2.1 Introduction and Scope The deterioration of paved roads caused by traffic results from both the magnitude of the individual wheel loads and the number of times these loads are applied. For pavement design purposes, it is necessary to consider not only the total number of vehicles that will use the road, but also the wheel loads (or, for convenience, the axle loads) of these vehicles. For the purposes of structural design, cars and similar sized vehicles can be ignored and only the total number, and the axle loading, of the heavy vehicles (as per Section 2.1.1) that will use the road during its design life need to be considered. In this context. Heavy vehicles are defined as those having an unladen weight of 3,000 kg or more. In some circumstances, particularly for lightly used roads, construction traffic can be a significant component of overall traffic loading and the designs should take this into account. Thus, traffic counting, vehicle classification, axle load data and traffic forecasting are all required to establish the required structural capacity of the pavement. This involves estimating Annual Average Daily Traffic (AADT) or Average Daily Traffic (ADT) from classified traffic counts for the different vehicle classes currently using the route. Classified vehicle counts can be either manual classified counts or automated traffic counts. 2.1.1 Vehicle Classification Vehicle classification is important in assessing equivalent axle loads and thus the effect of commercial vehicles on the road pavement. Commercial vehicles are generally classified as: 1. Medium Goods Vehicles (MGV), comprising all larger rigid vehicles with two axles and an unladen weight exceeding 3,000 kg; 2. Heavy Goods Vehicles – Type 1 (HGV1), comprising all larger rigid vehicles with three axles and an unladen weight exceeding 3,000 kg; 3. Heavy Goods Vehicles – Type 2 (HGV2), comprising all rigid vehicles with four or more axles and an unladen weight exceeding 3,000 kg; 4. Buses and coaches (PSV), comprising all public service vehicles and work buses with 40 or more seats. Each road agency will have a classification that should be adhered to, but the rise in the use of super-single tyres means that each agency should update their classification to ensure that super-single tyres are being considered. This Road Note recommends the classification in Table 2-1 and the accompanying key in Table 2-2. Table 2-1: Heavy vehicle classification Truck Type Axle Configuration (defined in Table 2-2) Light Truck (2 axles) SAST + SADT Medium/Heavy Truck (3 axles) SAST + TADT Medium/Heavy Truck (3 axles with super-singles) SAST + TAST Medium/Heavy Truck (3 axles no tandem) SAST + SADT + SADT Heavy Truck (4 axles) SAST + SAST + TADT Heavy Truck (4 Axles with super-singles) SAST +SAST +TAST Semi-Trailer (5 axles) SAST + TADT + TADT Semi-Trailer (5 Axles with super-singles) SAST +TAST + TAST Semi-Trailer (6 axles) SAST + TADT + TRDT Semi-Trailer (6 axles with super-singles) SAST +TAST +TRST Tailer (7 axles) SAST +TADT + TADT + TADT Trailer (7 axles with super-singles) SAST + TAST + TAST + TAST Trailer (9 axles) SAST +TADT + TADT + TADT + TADT Trailer (9 axles with super-singles) SAST + TAST + TAST + TAST + TAST Trailer (10 axles) SAST +SADT + SADT + TADT + SADT+ QADT Trailer (10 axles with super-singles) SAST +SAST + SAST + TAST + SAST+ QAST Table 2-2: Key for tyre types Tyre Type Axle Group Dual tyre axles Single Axle with Dual Tyres (SADT) Tandem Axle with Dual Tyres (TADT) Triaxle with Dual Tyres (TRDT) Quad Axle with Dual Tyres (QADT) Super-single (wide base) tyre axles Single Axle with Single Tyres (SAST) Tandem Axle with Single Tyres (TAST) Triaxle with Single Tyres (TRST) Quad Axle with Single Tyres (QAST) 2Estimation of Design Traffic 1 7 2.1.2 Average Daily Traffic (ADT) Average daily traffic (ADT) is the average number of vehicles that travel through a specific point of a road over a short duration (often seven days or less). This is usually the sum of flow for both directions. It is estimated by dividing total daily volumes during a specified time period by the number of days in the period. For long projects, large differences in traffic along the road may make it necessary to estimate the flow at several locations for each direction. It is recommended that traffic counts to establish ADT at a specific site conform to the following practice: 1. The counts are for seven consecutive days. 2. If possible, the seven-day counts should be conducted over 24 hours. 3. Where it is not possible to count traffic for 24 hours on all 7 days, the counts on two of the days should be for a full 24 hours, with preferably at least one 24-hour count on a weekday and one during a weekend. On the other days, 16-hour counts should be sufficient. These should be factored up to 24-hour values in the same proportion as the 16-hour/24-hour split on those days when full 24- hour counts have been undertaken. 4. Counts when travel activity is abnormal for short periods, due to the payment of wages and salaries, public holidays, adverse weather conditions etc., should be avoided. If abnormal traffic flows persist for extended periods, for example during harvest times, additional counts need to be made to ensure this traffic is properly included. For structural design purposes, traffic loading in the heaviest loaded direction is required and for this reason care is always required when interpreting ADT figures. 2.1.3 Annual Average Daily Traffic (AADT) Annual average daily traffic (AADT) counts represent the average 24-hour traffic volume at a given location, averaged over a full 365-day year. This is usually for both directions. AADT is different to ADT because it represents data for the entire year. AADT can be estimated using: 1. A simple average method where AADT is estimated as the total traffic volume passing a point (or through a segment) of a road in both directions for a year, divided by the number of days in the year. This, however, requires traffic volumes for every day of the year. 2. The AASHTO method (average of averages method), which incorporates 84 averages, i.e. seven averages for the days of the week, for each of the 12 months. This method requires daily volumes on at least one of each day of the week within each month. 3. The FHWA AADT method is the FHWA-recommended method for estimating AADT, because it has less bias. It involves computation of AADT in two steps: a. Computation of monthly average daily traffic from available hourly, or other temporal, data; b. Computation of AADT from the twelve available monthly values. It is recommended that country-wide traffic data be collected on a systematic basis using calibrated automated traffic counters, to enable seasonal trends in traffic flows to be quantified. The quality of the statistics on which these factors are based should be checked in the field to improve the accuracy of the estimated AADT. Many developing countries may not have detailed automated traffic data. In this case, AADT can be estimated using short-period traffic counts for ADT, collected as described above. The ADT must be adjusted for daily and monthly/seasonal variations to minimise errors/bias arising from estimating AADT from traffic counts carried out over a short period. The following steps can be used as a guide: 1. Convert the 16-hour counts to 24-hour counts. This involves determining the proportion of 24-hour traffic that occur within the 16 hours, for both a weekday and a weekend day. The 16-hour weekday and weekend counts are then divided by the respective proportions to determine the 24-hour counts, using Equation 2-1. 2. Determine the weekly average daily traffic as the sum of the 24-hour counts over the week, divided by the number of days of the week. 3. Obtain seasonal adjustment factors from the roads agency. 4. Estimate AADT from Equation 2-2 (FHWA, 2018), where F is an adjustment factor/expansion factor for seasonal variations. 2.1.4 Design Life Overseas Road Note 5 (2005) recommends the use of a pavement design life of 15 to 20 years, to match that of the project analysis period (local policy). This minimises problems of forecasting uncertain traffic trends for long periods and eases the calculation of the residual value at the end of the analysis period. Factors to consider in choosing the design period include available finances, the functional importance of the road, traffic volume and the level of uncertainty in forecasting traffic. As a guide, a shorter design life may be used where the predicted traffic growth is low, as there could be a major change in the growth rate. Estimated 24 hr count 16hr count * full 24hr count Count within the same 16 hrs of the 24 hr survey AADT = ADT * F Equation 2-1 Equation 2-2 = 2Estimation of Design Traffic 1 8 Toward the end of the design life (or when periodic maintenance dictates), the pavement will need to be strengthened so that it can continue to carry traffic at an acceptable level of service for a further period. It is assumed that normal maintenance will be carried out during the design life of the road. Condition surveys of pavements should be carried out about once a year as part of the inspection procedures for maintenance. These are used to determine not only the maintenance requirements, but also the nature and rate of change of condition. This helps to identify whether and when the pavement is likely to need strengthening. For heavily trafficked major routes, new design or rehabilitation design should use the principles of long-life pavements in which designs are capable of carrying 80 MESA or more over an extended period, provided that the appropriate replacement of the pavement surface is carried out at the appropriate times. Fortunately, this does not mean that traffic forecasts for much longer periods of time are required because above a critical structural design additional pavement thickness is not required for additional traffic. 2.2 Baseline Traffic Flows Baseline traffic flows are estimated and subsequently used to determine the total traffic over the design life of the pavement. For pavement design, structural thickness is dependent on the number of load repetitions from the tyres of commercial vehicles, i.e. vehicles with an unladen weight exceeding 3,000 kg, the weight of the vehicles and their speed. The contribution of light vehicles to pavement deterioration is negligible, and as such their effect is not considered. Manual classified counts These are labour-intensive and are typically used to count the number of vehicles within each class and to calibrate automated methods. Other uses include determining turning movements, direction of travel, pedestrian movements and vehicle occupancy. The count can be direct either by having enumerators on site or with enumerators viewing video recordings. Manual counts can be recorded using tally sheets, mechanical counting boards or electronic counting boards. 1. Tally sheets – Traffic counts are recorded as tallies on a pre-prepared field form, with a watch or stopwatch used to measure the desired count interval. 2. Mechanical counting boards – These boards consist of counters mounted on a board that record each direction of travel. The counters have push buttons with three to five registers for different vehicle classifications or pedestrians. A stopwatch is required to measure time intervals. 3. Electronic counting boards – These are handheld batteryoperated devices, which have an internal clock that automatically records data within the respective time intervals. The counter automatically summarises data, which can be downloaded to a computer, to save time. Automated traffic counts (ATC) Automated traffic counts are typically used to collect data to determine hourly vehicle patterns, daily or seasonal variations and growth trends. They require less supervision because they are less dependent on humans and are suited for collecting traffic volumes over extended periods of time. Automatic traffic counters are more accurate for detecting vehicular presence than vehicle classification. It is especially important to distinguish vehicles fitted with dual wheels on an axle from those fitted with super-single tyres. ATCs that are able to conduct both traffic counts and vehicle classification include pneumatic tubes, inductive loops, infrared sensors and microwave radar. 1. Pneumatic tubes are portable automatic counters. They are placed on top of the road surface in travel lanes at locations where traffic counting is required and connected to recorders located at the roadside. 2. Inductive loops are embedded in the road. They consist of embedded turned wire, an oscillator and a cable, and an electronics unit inside a traffic counting device placed at the roadside. This system is used for vehicle counts and classification based on the number of axles. Shortcomings include disruption to traffic during installation and damage to the road surface. 3. Infrared devices are available for overhead mounting to view approaching or departing traffic from a sidelooking configuration. These devices can be passive or active. Passive infrared devices detect vehicles by comparing the infrared energy emanating from the road surface with the change in energy caused by the presence of a vehicle. Active infrared devices, on the other hand, detect the presence of vehicles by emitting a low-energy laser beam(s) at the road surface and measuring the time for the reflected signal to return to the device. Vehicle classification is achieved by analysing the vertical profile of vehicles and reconstructing their shape. The device can cover multiple lanes simultaneously and its installation does not damage the pavement. The performance of laser-based devices, however, is affected by lighting conditions, and they perform better during the day than at night (Bellucci & Cipriani, 2010). 4. Microwave radar uses radio waves to detect objects. Microwave radar sensors mounted on the roadside transmit energy toward an area of the roadway from an overhead antenna. When a vehicle passes through the antenna beam, a portion of the transmitted energy is reflected toward the antenna, thus detecting the vehicle. Vehicle data, such as volume, speed, occupancy and length, are then calculated. For the smooth running of ATCs, it is important that counting equipment is neither an obstruction, nor a distraction, to traffic. Other important provisions include protection from vandalism, a power back-up system to enable continuous data collection, the frequent calibration of equipment in accordance with the manufacturer's instructions and adequate data storage. 2Estimation of Design Traffic 1 9 5. Gross Domestic Product – This is normally preferable to extrapolating historical traffic data. Normal traffic growth has a linear relationship with anticipated Gross Domestic Product (GDP). This is normally preferable since it explicitly considers changes in overall economic activity. The disadvantage is that a forecast of GDP is also needed. 6. Origin and destination data – Surveys should be carried out to provide data on traffic diversions that are likely to arise. Significant resources should be assigned to estimating diverted traffic whenever a road is being upgraded. • The growth rate for traffic can be determined from transport demand elasticity using Equation 2-3: where: Transport indicator: number of registered vehicles Economic indicator: Gross Domestic Product (GDP) The growth rate (r) is then determined using Equation 2-4, where GGDP is the GDP growth rate: r = e * GGDP 7. Population growth and density – Traffic is expected to grow at the same rate as the population grows, but population growth is highly uncertain and difficult to predict. 8. Land use – This relates to existing and future land uses within the project influence area that generate traffic and are likely to benefit from the project road. A transport economist may be required to undertake the study. The growth rate is then applied to a base year count and projected forward to the design year. A calculation can then be made of the design traffic for each vehicle type. The growth rate may be different for different vehicle classes. Such projections are based on high, medium and low growth expectations. Generally, it is only safe to extrapolate forward for as many years as there are reliable traffic data from the past, and for as many years as the same general economic conditions are expected to continue. This makes stage construction an attractive option to minimise errors from projecting for too long a period. For major projects such as primary and trunk roads, a transport economist may be required to undertake a study to estimate traffic growth rates. 2.2.1 Traffic Forecasting Pavement design requires that AADT over the pavement design life is forecast. It is therefore important to establish the design period that this entails. Thus, during the design stage of the project, baseline studies must be conducted and a forecast of the AADT at the beginning of the opening year is made. The opening year is the year immediately after construction is completed. Using this AADT, the design traffic is determined, usually for a design period of 15 - 20 years for flexible pavements, and 40 years for rigid pavements. The 15 - 20 year period relates to the general life cycle of asphaltenes in bitumen. Typically, road infrastructure projects take a minimum of five to seven years to plan prior to commencement of construction. Thus, traffic forecasts are required to project growth rates over quite long periods, which creates uncertainty. Developing economies, which are often very sensitive to changes in world prices of just one or two commodities, are particularly affected. It is necessary to separate traffic into the following three categories when forecasting traffic growth: 1. Normal traffic: Traffic that would pass along the existing road or track even if no new pavement were provided. 2. Diverted traffic: Traffic that changes from another route (or mode of transport) to the project road because of the improved pavement, but still travels between the same origin and destination. Where parallel routes exist, traffic will usually travel on the quickest or cheapest route; this may not necessarily be the shortest route. Thus, surfacing an existing road may divert traffic from a parallel, and shorter, route because higher speeds are possible on the surfaced road. 3. Generated traffic: Additional traffic that occurs in response to the provision, or improvement, of the road. Generated traffic arises either because a journey becomes more attractive by virtue of a cost or time reduction, or because of the increased development that is brought about by the road investment. For routes with no options for route switching there is no diverted traffic. For new roads, or where significant upgrades to existing roads and changes in routing are foreseen, coupled with large reductions in journey time, diverted traffic will be a factor in forecast traffic. Generated traffic is only likely to be significant where road investment causes large reductions in transport costs. The following information can be used to infer traffic growth trends: 4. Growth rate based on past traffic data – The most common method of forecasting normal traffic is to extrapolate time series data on traffic levels and estimate the growth rate from this. There can be multiple growth rates over the design period. Historical traffic data can be obtained from routine traffic counts conducted on the road network, weighbridges, central or regional vehicle registries, data from fuel sales. Elasticity of transport demand(e) Percentage change in transport indicators Percentage change in economic indicators = Equation 2-3 Equation 2-4 2Estimation of Design Traffic 1 10 2.3 Axle Loading 2.3.1 Axle Load Surveys If no recent axle load data are available, axle load surveys of heavy vehicles are recommended whenever a major road project is being designed. Ideally, several surveys should be undertaken at periods that reflect seasonal changes in the magnitude of axle loads. Axle loads and gross vehicle weights can be measured using either a static or a dynamic method and must be measured and tallied separately for each direction of travel. Nevertheless, where possible, the axle load survey should be carried out for at least three days (ideally seven days), over 24 hours, and should cover all lanes. The survey days should not, however, be consecutive, since drivers may adjust their load once they know that surveys are being undertaken. Significant differences in axle loads between two traffic streams can occur on roads serving docks, quarries, cement works, etc., where vehicles travelling one way are heavily loaded but are empty on the return journey. In such cases, the results from the more heavily used lane should be used when converting commercial vehicle flows to the equivalent number of standard axles for pavement design. Similarly, a special allowance must be made for unusual axle loads on roads that mainly serve one specific economic activity, since this can result in a particular vehicle type being predominant in the traffic spectrum. This is often the case, for example, in timber extraction areas, mining areas and oil fields. It is also important to note that grossly overloaded vehicles can cause instantaneous ultimate or localised shear failure to the pavement, especially within the influence zone of the subgrade (Shahri, 2017). The material carried by the weighed vehicles must therefore be recorded together with the axle load data. Axle load surveys must be carried out to determine the axle load distribution of a random sample of the heavy vehicles using the road. This sample must include both loaded and empty vehicles, and the mean vehicle equivalency factor must not exclude empty vehicles weighed. The same vehicle classifications should be used for both ADT counts and axle load surveys. Data collected from these surveys are used to calculate the mean number of equivalent standard axles for a typical vehicle in each class. Detailed guidance on carrying out axle load surveys and analysing the results is given in TRL Overseas Road Note 40 (2004). The static method The most accurate methods of measuring axle loads are the static methods. Provided the wheels of the truck are on the same plane, the measurements are very accurate. With this method, vehicles are stopped so that their axle loads can be measured. Static weighbridges include singleplate weighbridges and multi-plate weighbridges, which are fixed in position, and portable weigh pads that allow the weighing of vehicles in locations where there is no permanent weighing infrastructure. Portable weigh pads that enable a small team to weigh 20 - 30 trucks per hour are also available. They are easily transported and can be easily operated at any designated weigh site. Axle weighers comprise a single-axle weigher linked to a console, and function as both static and dynamic systems. Axle weighers require the vehicle to slow down to a walking pace in the dynamic mode. It is recommended that axle load surveys be carried out by weighing a sample of vehicles at the roadside. A maximum of about 60 vehicles per hour should be weighed. The weighing site should be level and, if possible, constructed in such a way that vehicles are clear of the road when being weighed. A level surface ensures that all the wheels of the vehicle being weighed are level; this eliminates errors that can be introduced by even a small twist or tilt of the vehicle. More importantly, a level surface eliminates the large errors that can occur if all the wheels on one side of multiple axle groups are not kept on the same horizontal plane. The load distribution between axles in multiple axle groups is often uneven, so each axle must be weighed separately. The duration of the survey should be based on the same considerations as for traffic counting, as outlined in Section 2.1.2. The surveys should be carried out separately from axle load measurements undertaken for the purpose of enforcement, to ensure that representative data are obtained. During static measurements, the following additional information can be obtained: • The freight being transported; • Origin – Destination (O-D) data; • The tyre/wheel configuration, the tyre sizes and compliance with recommended tyre pressures. Excess tyre pressures should be noted. The dynamic method This method involves the use of Weigh in Motion (WIM) technology without the need to stop vehicles or divert them from the flow of traffic. Typical Weigh-in-Motion systems include three basic elements: a set of two or more lines of axle load sensors, inductive loops for vehicle detection and a signal processing unit with computer algorithms for determining and assigning the loads to specific axles. Axle load sensors of such systems are embedded in the pavement of the road, perpendicular to the direction of traffic. They are, however, associated with low accuracy (Burnos et al., 2007; Gajda et al., 2016). There are three types of WIM system: low-speed WIM that operate with vehicle speeds of less than 10 km/h, high-speed WIM that have no speed limitations and multi-sensor WIM that have more than two lines of axle load sensors. Multi-sensor WIM systems enable the collection of larger axle load samples, and therefore a more accurate estimation of the static component of the axle load. Other WIM systems include bridge WIM, which are integrated in a bridge structure, and on-board WIM, which are installed on a vehicle. . Low-speed WIMs should be used when low vehicle numbers are to be weighed, high-speed and multi-sensor WIMs should be used when high vehicle numbers are to be weighed. Errors of up to 5% can occur when using low-speed WIMs and up to 10% when using high-speed WIMs. For critical projects, it is essential to calibrate them with static weighing systems. 2Estimation of Design Traffic 1 11 2.3.2 Axle Equivalency The damage that vehicles cause to a road depends on the axle loads of the vehicles. For pavement design purposes, the damaging power of axles is related to a 'standard' axle of 8.16 tonnes (80 kN), using equivalence factors that have been derived from axle load surveys (Highway Research Board, 1962; Paterson, 1987). Computer programs have been written to assist with the analysis of the results from axle load surveys. These programs provide a detailed tabulation of the survey results and determine the mean equivalence factors for each vehicle type, if required. Standard spreadsheet programs can be used. If such programs are not available, static axle load data are used to determine the vehicle damage factor (Equivalent Standard Axles (ESAs) per vehicle class). Real axle loads are converted to ESAs using Equation 2-5. It is recommended that, due to differences in vehicle classifications, usage, degrees of overloading and legal limits that are likely to occur across different regions, vehicle damage factors are computed for each vehicle class travelling in each direction, as opposed to using average vehicle damage factors for different vehicle classes. Where: EF: load equivalency factor, in ESAs P: axle load, in kg or kN n: relative damage exponent SA: standard axle load as per Table 2-4. It should be noted that this equation is applicable only up to a maximum axle load of 13 tonnes. Fortunately, in most countries the legal axle load is less than 13 tonnes. This means that when axles bearing more than 13 tonnes are weighed, there may be a need to revise them to 13 tonnes or to the enforceable legal limit. The measured axle loads should be recorded in the axle load survey and the designer should decide whether to rationalise them. Equally, when a large proportion of axles weighed are below the legal limit, there may be a benefit in rationalising them to the legal limit, to cater for any future changes in the road's function. According to AASHTO (1993), the load equivalency factor (EF) increases approximately as a function of the ratio of any given axle load to the standard 80 kN single axle load, raised to the fourth power. As such, the value of 4 is often used for the exponent n. This value varies, however, with the structural number and terminal serviceability. Recommended relative damage, according to van Zyl & Freeme (1984), and exponential values for different roadbase / sub-base combinations are presented in Table 2-3. Austroads (2019) uses a damage exponent of 12 for cemented treated roadbases. Because of the risk of cemented bases failing, their use in this Road Note has been limited to a maximum of 17 MESA. For vehicles with multiple axles, i.e. tandems, triples etc., each axle in the multiple group is considered separately. The EFs for all the axles of each vehicle are then summed to calculate the EF per vehicle. The EF should be computed in axle load groups using the standard axles presented in Table 2-4. These standard axle load values replace the 80 kN (8160 kg) used in Equation 2-5. Equation 2-5 EF (for loads in kg) (for loads in kN) = P SA n or EF = P 80 n Table 2-3: Recommended relative damage exponents, n Pavement roadbase/sub-base Recommended n value Granular/granular 4 Granular/cemented 3 Cemented/cemented 4.5 Bituminous/granular 4 Bituminous/cemented 4 Table 2-4: Standard axles for different axle load groups Tyre Type Axle Group Standard Axle Load (kN) Dual tyre axles Single Axle with Dual Tyres (SADT) 80 Tandem Axle with Dual Tyres (TADT) 135 Triaxle with Dual Tyres (TRDT) 182 Quad Axle with Dual Tyres (QADT) 226 Super-single (wide base) tyre axles Single Axle with Single Tyres (SAST) 58 Tandem Axle with Single Tyres (TAST) 98 Triaxle with Single Tyres (TRST) 132 Quad Axle with Single Tyres (QAST) 164 2Estimation of Design Traffic 1 12 5. Data from the lane with the highest traffic loading, as determined, are then used to calculate the total traffic over the design life. Equation 2-6 is used in this calculation. The results are usually presented in units of millions of equivalent standard axles. In case there are several growth rates within the design period, Equation 2-6 should be applied for each growth rate period with the sum determining the design value. Where: a: current average annual daily traffic loading in ESA per day (one way) b: annual growth rate, as a percentage c: design life, in years d: number of years to start of design life In most countries, the axle load distribution of the total population of heavy vehicles using the road system remains roughly constant from year to year. Although there may be long-term trends resulting from the introduction of new types of vehicle or from changes in vehicle regulations and their enforcement, the effect is negligible. It is therefore customary to assume that the axle load distribution of the heavy vehicles will remain unchanged for the design life of the pavement and that it can be determined by undertaking surveys of vehicle axle loads on existing roads of the same type and that serve the same function. In most developing countries, the probable errors in these assumptions for a design life of 15 to 20 years are unlikely to result in a significant error in design. 2.3.3 Determination of Cumulative Equivalent Standard Axles It is necessary to express the total number of commercial vehicles that will use the road over its design life (years) in terms of the cumulative number of equivalent standard axles (ESA), to determine the cumulative axle load damage that a pavement should sustain during its design life. For rigid pavements, a different approach (other than ESAs) is used (see Chapter 10). These values are then used in conjunction with traffic forecasts to determine the predicted cumulative equivalent standard axles that the road will carry over its design life. The following procedure should be followed to determine the cumulative equivalent standard axles over the design life of the road: 1. Determine the daily traffic flow for each class of vehicle weighed, using the results of traffic surveys and any other recent traffic count information that is available. 2. Determine the average daily one-directional traffic flow for each class of vehicle. 3. Determine the mean equivalency factor of each class of vehicle in each direction, from the results of the axle load survey and any other surveys that have recently been carried out. Table 2-5 can be used as a guide for the distribution of heavy vehicles between lanes. 4. The products of the cumulative one-directional traffic flows for each class of vehicle over the design life of the road and the mean equivalence factor for that class should then be calculated and added together, to give the cumulative equivalent standard axle loading for each direction. The larger of the two directional values should be used for design purposes. Cross section Paved width, w Corrected design traffic loading – E80 Explanatory notes Single carriageway w < 3.5 m (e.g. agricultural roads with passing places provided) Double the sum of ESAs in both directions The driving pattern on this cross section is highly channelised 3.5 m < w < 4.5 m (e.g. agricultural roads with passing places provided) The sum of ESAs in both directions Traffic in both directions use the same lane, with slight lateral wander compared with roads less than 3.5 m wide 4.5 m < w < 6 m 80% of the sum of ESAs in both directions To allow for overlap in the centre section of the road 6 m or wider Total E80 in the heaviest loaded direction Minimal traffic overlap in the centre section of the road Dual carriageway Less than 2,000 commercial vehicles per day in one direction 90% of the total ESAs in the direction Most of the heavy vehicles will travel in one lane, effectively More than 2,000 commercial vehicles per day in one direction 80% of the total ESAs in the direction Most of the heavy vehicles will still travel in one lane, effectively, but greater congestion leads to more switching Total cumulative ESA = * a*365*100 b c+d b 100 1+ d b 100 — 1+ Equation 2-6 Table 2-5: Traffic load distribution between lanes 2Estimation of Design Traffic 1 13 2.4 Key Points 1. The designer should determine the design period (years) to be used for the pavement design. The recommended ranges are 15 - 20 years for flexible pavements and 40 years for rigid/concrete pavements. 2. Conduct baseline classified/categorised traffic counts for at least seven days. To enable the traffic flows to be used in the rigid pavement design method presented in this Road Note, the classification should differentiate between axle load groups that use super-single tyres (wide-base tyres). An example classification is presented in Table 2-1. Where the road does not yet exist, the estimate should be based on the traffic that would divert from adjacent roads, and from generated traffic. 3. Traffic counts can be automated or manual, but manual counts are required for calibrating most automated methods. 4. Obtain seasonal factors from the national road*s agency. Compute the ADT and apply the seasonal factors to convert to AADT for the design lane (Equation 2-1 and Equation 2-2). 5. Determine the growth rates to be used for the design. For simple projects this should be done through historical trends for existing or nearby roads, weighbridges, central or regional vehicle registry or through Gross-Domestic Product (GDP) predictions (Equation 2-4). For complex projects, such as primary and trunk roads, it is prudent to involve a transport economist in determining growth rates. Growth rates are usually different for different vehicle classes, and through segments of the design period. 6. Axle load surveys should be conducted for use in the determination of the mean (average) vehicle equivalence factors (Equation 2-5) of each heavy vehicle class. This is determined by the selection of the appropriate damage exponent from Table 2-3. For roads with more than 25% of trucks fitted with super-single tyres (wide-base tyres), the standard axles in Table 2-4 should be used. 7. The design cumulative equivalent axles should then be computed using Equation 2-6 and Table 2-5. 8. For multilane roads, the traffic flow should be calculated per lane. The pavement design should then be based on the heaviest loaded lane. Roads with two carriageways can be designed with different pavements. 9. The computation of the design traffic for a rigid pavement presented in this Road Note is based on the Austroads approach and therefore utilises cumulative heavy vehicle axle groups (HVAG) (not cumulative ESAs), and is presented in Chapter 10 (Table 10-6). Nevertheless, a catalogue based on MESA for the design of rigid pavements is also included for use in cases where there may not be sufficient data to determine cumulative HVAG. 10. A spreadsheet accompanying this Road Note can be used for computation of the design traffic for the design of both rigid and flexible pavements. 3 2 1The Subgrade 14 3 The Subgrade 3.1 Introduction The subgrade (and capping layer, where required) is recognised as the foundation layer for the pavement and the assessment of its working condition is a critical element of the pavement design process. Its fitness for purpose may be considered a combination of its material characteristics, its moisture condition, its geometry and its working environment, which includes the stresses to which it is subjected during the pavement design life. In view of the core purpose of this layer it is referred in this chapter and elsewhere in this document as the pavement "foundation" which may comprise different subgrade material components. This Chapter provides guidance on the assessment of subgrade material strengths and thicknesses. Advice is also presented on the factors that influence the performance of foundation together with recommendations on the mitigation of adverse impacts. 3.1.1 Definitions To prevent any misunderstanding arising from the wording around subgrade, its components and its location, the following definitions, in conjunction with Figure 1-2 and Figure 3-1, are proposed for use: • Native (or in situ) Subgrade. In situ soil or rock, at the base of a cutting, for example. This is the layer that is sampled to determine the design subgrade class (Chapter 8 and 9).This should be prepared by scarification (usually to 150 – 300 mm), shaping, and compaction to at least 93% maximum dry density by modified proctor (BS Heavy) to form the road bed. Existing pavement layers on which a road refurbishment or upgrade is proposed may be considered as in situ subgrade if they are of sufficient quality. • Imported Subgrade. Material imported from borrow-pit or earthwork excavation, and then placed and compacted to act as a pavement foundation material. • The Roadbed / finished grade level. The level on which the pavement and its foundations are constructed. • The Foundation/Subgrade. The layer on which the Upper Pavement Layers (Base, Subbase) are founded. It may comprise one or more of the following; native (in situ) subgrade, imported subgrade; and capping layer. • Sub-foundation. Soil or rock materials, imported or in situ, below the normally defined Foundation or Material Depth. • Material Depth (MD). The depth below the finished level of the road down to which soil characteristics have a significant impact on pavement behaviour. • Foundation Depth. The materials underlying the subbase to a depth "MD" whose strength and stiffness make contributions to the performance of the overlying pavement as whole. • Capping Layer. An additional subgrade layer placed over in situ/native subgrade or imported subgrade of insufficient strength for the proposed pavement design requirements. • Additional Zone of Influence. Any zones or layers within the Sub-Foundation that are considered to be sufficiently, weak, susceptible to volume change, or voided such as to pose a significant risk to the pavement's fitness for purpose. Figure 3-1: Key layers within a pavement profile Material Depth (MD) Road bed Foundation depth (FD) BASE SUBBASE FOUNDATION Capping layer, imported subgrade or in situ subgrade SUB-FOUNDATION Earthwork, cutting, in situ soil rock 3.1.2 Subgrade Tasks Subgrade performs the following tasks during the construction and design life of the pavement: • Ensuring a uniform load-bearing layer for the full width of the carriageway; • Creating a platform to ensure the quality of sub-base compaction above; • Facilitating drainage in the overlying pavement layers; • Facilitating access during the construction process that does not damage the road foundation. Assessment of subgrade material, either in situ or imported, should take these objectives into account (Austroads, 2017; SANRA, 2013; DoT, South Africa, 1996). 3 2 1The Subgrade 15 3.2 The Subgrade Environment The pavement subgrade can be considered to work within a framework of factors that together make up a working environment (Cooke et al., 2013) that influences their performance as a sustainable foundation to the overlying pavement. 3.2.1 Traffic Traffic and subgrade strength are the critical elements that govern the structural design and performance of flexible and rigid pavements. Traffic has been discussed in Chapter 2. 3.2.2 Road Classification Road classifications, based on task or function, provide a practical guidance framework for initially selecting and costing appropriate road options. Road classification can provide initial guidance on the likely requirements for depth and width of the subgrade zone of influence. An appreciation of the governing road classification is an initial step within the project cycle for subgrade assessment. 3.2.3 Standard Specifications The nature and engineering character of imported and in situ subgrade materials are fundamental aspects of the foundation assessment and input into design. Subgrade material may be geotechnically defined using the Unified Soil Classification (USC) system (Table 3-1.- Major divisions Group symbol Group name Coarse grained soils >50% retained on 0.075mm sieve Gravel >50% of course fraction retained on 4.75mm sieve Clean gravel <5% passes 0.075mm sieve GW Well graded gravel, fine to coarse gravel GP Poorly graded gravel Gravel with fines >12% passing 0.075mm sieve GM Silty gravel GC Clayey gravel Sand >50% of course fraction passes 4.75mm sieve Clean sand SW Well graded fine to coarse sand SP Poorly graded sand Sand with >12% passing 0.075mm sieve SM Silty sand SC Clayey sand Fine grained soils >50% passes 0.075mm sieve Silt and clay Liquid limit<50% Inorganic ML Silt Organic CL Clay Silt and clay Liquid limit >50% Inorganic MH Silt with high plasticity: elastic silt CH Clay with high plasticity: fat clay Organic OH Organic silt, organic clay Organic Soils Pt Peat Table 3-1: The Unified Soil Classification System (USCS) Norbury, 2010). It may be more appropriate to consider the AASTHO method of soil classification into groups A1 to A7, which directly divides soils into excellent to poor subgrade materials (USDI, 1998). Caution is urged, however, in using direct correlation systems when dealing with tropical weathered soils, which may not follow established sedimentary soil behaviour patterns. Formal classification should be supported by standard index properties such as grading, plasticity and CBR%. 3.2.4 Pavement Type Different pavement types (flexible or rigid) impart different levels of stress on the subgrade for the same level of traffic. Pavement type might also affect the subgrade in different ways according to whether it has a deep or shallow design, or whether it has a long-life design. 3.2.5 Climate Current and future climate (in particular, rainfall regimes) influence the supply and movement of surface water and groundwater and have a direct impact on the pavement foundation. Climate also influences decisions on whether the foundation is assessed under 'dry' or 'wet' road environments. The intensity and duration of both current and future rainfall are more relevant than absolute rainfall figures when considering, or anticipating, changes in foundation condition. Parameters such as future maximum five-day, and maximum one-day, rainfall figures are more relevant than mean monthly and mean annual figures. Considerations for drainage and climate-resilient design are discussed in Chapter 7. Abbreviations: G: Gravel, S: Sand, M: Silt, C: Clay, O: Organics, P: Poorly graded, W: Well graded, H: High plasticity, L: Low plasticity 3 2 1The Subgrade 16 3.2.6 Water Table and Moisture Condition Changes in water table and near-surface moisture condition (equilibrium moisture content) can initiate significant changes in foundation strength and underlying layers below the subgrade. A further discussion on moisture condition assessment and its implications is provided in Section 3.3.2. 3.2.7 Material Properties The nature, and engineering characteristics, of imported and in situ subgrade materials are fundamental aspects of the subgrade assessment and an important design consideration. The California Bearing Ratio (CBR) is the primary property used for defining the strength subgrade. The CBR of material in a modified (heavy) compaction, four-day soaked, condition is normally used as the default property. The use of a natural (unsoaked) condition may be adopted only if there is sufficient evidence to justify its adoption, for example, for a road in a consistently dry climate where there is no risk of flooding. Similarly, a 10-day soaked model (as recommended by ARRB) may be adopted, but only if there is sufficient evidence to suggest that it is appropriate (Queensland Gov., 2021; Austroads, 2017) and where it is shown that the CBR values change significantly between the 4- and 10-day soak. Light compaction as a defining characteristic is no longer in common use, because of its incompatibility with the compactive effort delivered by modern construction plant. The combination of light compaction specifications for earthworks and subgrade materials and heavy compaction of upper pavement layers leads to potential confusion and quality control issues. The sole use of modified or heavy compaction using the 4.5 kg rammer, or equivalent vibratory procedure where appropriate, is recommended. Other key defining geotechnical properties are grading, swelling and plasticity. The plasticity index (PI) and grading are usefully combined into either the Plasticity Product (PP) or the Plasticity Modulus (PM) where: PM = PI (Ip) x % soil < 0.425 mm PP = PI (Ip) x % soil < 0.075 mm These indices give a more useful indication of the behaviour of the soil material as whole than the PI by itself, and they are recommended for use in appropriate materials specifications. Further detail on subgrade materials can be found in Section 3.3.5. 3.2.8 Terrain Terrain reflects geological and geomorphological history and has a direct impact on the method of soil investigation that is used for the road's vertical alignment and associated earthworks. This is discussed further in Section 3.3.2. 3.2.9 Sub-foundation Conditions In some specific cases, where materials are very weak, compressible or susceptible to moisture changes, the properties of the sub-foundation soil (zone of influence below the formation) or rock profile below the specified zone of influence depth "D" may need to be assessed. It is possible that mitigation measures might need to be considered. 3.2.10 Construction and Maintenance Regimes Good practice construction should ensure the road design is applied in an appropriate manner and prevents damage to the road foundations from damage during construction of overlying layers. On-going maintenance, particularly in terms of side drainage and pavement surfacing are an essential element in ensuring the pavement foundation remains Fit for Purpose throughout its design life. 3.3 Subgrade Explorations 3.3.1 Aims Soil profiles are frequently variable in nature and reflect the changes in topography, geology, and drainage conditions that can occur along an existing or proposed road alignment (Austroads, 2017). Hence the selection of pavement foundation characteristics requires adequate investigation; the fundamental aims of which are: • Define a general Ground Model along the length of the alignment in terms of topography, soil-rock profiles, hydrology and potential geotechnical hazards in the sub-foundation; • Define the design life working condition of the proposed subgrade in terms of strength (CBR%) under equilibrium moisture content; • Define the geotechnical properties of proposed subgrade materials; • Identify any weak materials or materials with problems within the zone of influence; • Identify any problem materials below the zone of influence (sub-foundations) that may have an impact on the performance of the subgrade or pavement. 3.3.2 Investigation Programme Pavement foundation investigations should fit in with, and be complementary to, the main project investigations for alignment, materials, earthworks and structures and follow established stages within the Project Cycle, from Planning, through Feasibility and Final Engineering Design to Construction and Maintenance. Specifically, the subgrade investigations may comprise the following principal elements: Initial investigations (Feasibility Stage). These should aim at stablishing the general Ground Model for the pavement foundations and should comprise both deskstudy work and fieldwork. The former should gather relevant data on existing road performance and designs as well collating information on existing standards and specifications. The fieldwork will comprise pitting, sampling, testing and probing to establish the general characteristics of the main soil profiles and determine the likelihood of potential hazards. The spacing of these initial investigation points should be governed by changes in apparent material types, with a maximum spacing of around 1,000 m. 3 2 1The Subgrade 17 Design investigations (Final Engineering Stage). These should provide the detail of pavement foundation characteristics in terms of strength and/or elastic moduli. For new alignments this is likely to be achieved by a combination of pitting and laboratory index testing, with in situ testing, such as Dynamic Cone Penetrometer (DCP), as appropriate. The use of a Falling Weight Deflectometer (FWD) or Light falling Weight Deflectometer (LWD) on existing pavements or earthworks that are to be overlain can provide valuable data. Spacing of the sampling points will be a function of the longitudinal variability of the soil profiles but will normally be much closer than for the initial investigations (see Sections 3.3.5 and 3.3.6). Specialised follow-up investigations. These may be required to further investigate the nature and extent of problem materials. They could comprise the specialist testing of weak, compressible or expansive foundation materials along with possible probing to establish their extent (Jones & Jefferson, 2012; Gourley & Schreiner, 1993; Weston, 1980). 3.3.3 Investigation Depths and Nature The thicknesses of imported or in situ materials to be investigated are defined by Material Depth or Foundation Depth. Both are generally agreed as being influenced by road classification and pavement type. There is less general agreement on the detail of these depths, which may also have to consider a wider zone of influence if the occurrence of weaker, compressible, or expansive layers or voids are suspected. The zone of influence (Figure 3-2) can also be considered a function of the road classification and pavement type. Table 3-2 presents examples of depth details. The longitudinal geometry of the zone of influence, and hence its materials and their properties, are functions of the road's vertical alignment and the consequent earthworks, i.e. whether the road is in a cutting, on an embankment or at grade (Figure 3-2). Country / Source Road Classification Foundation Depth (mm) Material Depth (mm) Vietnam MoT Main roads 300-400 900 Uganda Main roads 550 800-1000 Queensland DoR Main roads 1500* Austroads Main roads 1000* South Africa A High volume 1000-1200 B High volume 800-1000 Table 3-2: Examples of zone of influence depths Figure 3-2: Zone of influence scenarios (new/upgraded alignment) SCENARIO A EFFECTIVE SUBGRADE SCENARIO B SCENARIO A SCENARIO C New alignment Ground Surface Zone of influence * Includes a zone of influence for weak materials (CBR,2-5%) Sources: MoT (2006), MoWHC (2005), Queensland (2021), Austroads (2017), SANRA (2013) Figure 3-3: Roadbed - ground level relationships Material Depth Road bed Base & subbase Foundation Existing ground level Material Depth Base & subbase Foundation Existing ground level Embankment fill Base & subbase Foundation Base of cut Existing ground level Road bed Excavated Material Depth SENARIO A SENARIO B SENARIO C 3 2 1The Subgrade 18 3.3.4 Fieldwork Planning The nature of the subgrade field investigations is governed by the nature of the relationship between the roadbed and the existing ground level; as indicated in Figure 3-2 and Figure 3-3 as summarised in Table 3-3. A consequence of this relationship is that changes in vertical alignment after initial investigations and during the design phase may necessitate additional investigation and/or appraisal of pavement foundation conditions. Field testing is applicable to situations where the support values from the in situ subgrade soil conditions are expected to be similar to those of the proposed pavement. Laboratory testing is applicable both in that situation and also when subgrade support is to be determined from first principles. General principles on the extent and nature of field investigations are covered in Davis (2012). 3.3.5 In Situ Testing In situ testing may be used to determine foundation strength or moduli in situations where soils similar to those of for the road being designed have existed under a sealed pavement for at least two years, and are at a density and moisture condition similar to those likely to occur in service. The principal in situ test used in subgrade material assessment is the Dynamic Cone Penetrometer (DCP) whose penetration rates can be correlated with CBR. The general methodology for DCP testing and interpretation is contained with the guide to the UK DCP 3.1 Software (TRL, 2006). A simplified approach to DCP testing is contained within ORN 18: A guide to the pavement evaluation and maintenance of bitumen-surfaced roads in tropical and sub-tropical countries (TRL, 1999). The main application of the DCP with respect to pavement foundations, within the constraints indicated in Table 3-3, are as follows: Scenario Description Investigation-Testing Implications Pavement on New Alignment Pavement on Existing Alignment A Alignment at or near existing surface Test pit sampling and testing. DCP-CBR testing for in situ conditions is relevant for identifying weak or problem materials. They may also be used to correlate CBR results for different pit sampling locations. Test pit sampling and testing. DCP-CBR testing for in situ conditions is relevant. B Alignment on embankment (>1m) Test pitting for subgrade sampling irrelevant. Testing on material from cut or borrow required. DCP-CBR testing only relevant after embankment fill is placed and compacted. Test pit sampling and testing of existing embankment. DCP-CBR testing for in situ condition of embankment is relevant. C Alignment in cut (>1m) Test pitting for subgrade sampling only relevant for material within 2 m of surface. In situ testing irrelevant. Drilling may give indication of in situ "native" subgrade condition Test pit sampling and testing of existing roadbed material. DCPCBR testing for in situ condition is relevant. Table 3-3: Zone of influence investigation scenarios • Definition of thickness and strength of existing pavement layers, including subgrade. • Variation in the nature and strength of existing natural ground. • Identification of near-surface soft or weak areas. • Verification of strength and thickness of new placed and compacted pavement and foundation layers. The DCP instrument with an extension rod of 400 mm can be used to a depth of 1200 mm, although further extension rods could be attached, this practice is not generally recommended. Deeper probing can be achieved by utilising the DCP from the base of excavated trial pits. It is essential that the potential effects of any weak layers below the design subgrade level are considered in the pavement design process, particularly for low-strength materials occurring to depths of about 1 - 2m. The recommended test intervals are 200 m intervals for project level explorations and 500 m for network planning explorations. The FWD option may also be used in pavement foundation assessment to assess existing pavement layers for comparison and correlation purposes in a precedent design strategy (see Section 3.5.2). The apparatus normally comprises a vehicle-mounted or towed device that records pavement surface deflection bowls at discrete test points on the pavement surface. A load is applied to the pavement surface through a standard loading plate, normally 300 mm in diameter, by a falling weight with a variable drop height while the FWD is at rest. (ASTM D4694-09, 2020). There is an option to use a light falling weight deflectometer (LWD) but the investigation depths are limited. The following spacing for FWD points should be considered (AASHTO, 2001): • Network (planning) level: 200 to 500 m intervals; • Project (design) level: 50 to 200 m intervals; • Detailed project level: 10 to 50 m intervals. 3 2 1The Subgrade 19 3.3.6 Sampling and Laboratory Testing The recommended subgrade sampling interval is 250 m for trunk roads and primary roads, and 500 m for secondary and tertiary roads. For feasibility studies, these intervals might be longer. From each point, adequate samples should be collected to enable strength (three- or six-point CBR tests) and classification tests (Atterberg Limits, sieve analysis, moisture content, consolidation, etc.) to be carried out. Test pits, for the collection of subgrade samples, should be of sufficient depth to enable samples to be taken from up to 300 mm below the design formation level. In all circumstances, test pits should be at least 1.5 m deep. Safety issues should be considered with deeper test pits; alternatively, use of a standard penetrometer (SPT) or auguring should be considered. Using laboratory soil classification test results, uniform sections of in situ subgrade should be determined through a process of computation and grouping. The 10th percentile CBR value (for trunk roads, the fifth percentile may be used) for each uniform section should then be used for design purposes. At least 10 readings are required for each uniform section. Uniform sections should be of sufficient length to minimise frequent construction changes but not so long that the economic benefits of stronger sections are lost. For weak spots and sub-sections, cutting and replacing with imported subgrade may improve the subgrade design class. The coefficient of variation ((standard deviation/mean) x 100%) of the CBR values for each uniform section should be less than 30% in all cases, otherwise the section extents should be adjusted until this criterion is achieved. Replacing weak spots with imported material and then excluding them from the computation often improves the coefficient. 3.4 Subgrade Assessment For Design 3.4.1 Empirical Assessment Based on Testing An important step in assessing foundation conditions is the division of the total road length into homogeneous sub-sections for design purposes. The sub-sections should be selected on the basis that the condition and type of the subgrade materials is likely to be reasonably uniform. A subgrade design CBR can then be determined for each identifiable unit that has been defined on the basis of topography, drainage and soil type. The CBR test results taken along the alignment, and /or on material from borrow areas, are the principal means of empirical assessment. When a statistical analysis of CBR data is used to determine the design CBR, this should be undertaken by calculating the lower 10th percentile, or 5th percentile (depending on the reliability level chosen), of the laboratory CBR test results. The design CBR is then the percentile value obtained. Use of an average CBR value for design is not considered appropriate. The sensitivity of the subgrade strength/stiffness to changes in moisture content should be considered (see Table 3-4). Material Classification codes Sensitivity Sandy soils SW, SP Small fluctuations in moisture content produce little change in volume or strength/stiffness. Silty soils SM, SC, ML Small fluctuations in moisture content produce little change in volume but may produce large changes in strength/stiffness. Typically, these soils attract and retain water through capillary action, and do not drain well. Clay soils CL, CH Small fluctuations in water content may produce large variations in volume, and there may be large changes in strength/ stiffness, particularly if the moisture content is near or above optimum. Typically, these soils attract and retain water through matrix suction Table 3-4: Subgrade soil sensitivity groups Material Definition Typical CBR % values to be assumed Description Classification Excellent to good drainage Fair to poor drainage Highly plastic clay CH 5 2-3 Silt ML 4 2 Silty-clay; Sandy-clay CL 5-6 3-4 Sand SW, SP 10-18 10-18 Table 3-5: Typical presumptive CBR values Source: Austroads, 2017 As a further check on the subgrade strength, the CBR values should be reviewed during the construction phase, which may occur quite a long time after the initial testing. This should identify any areas that may have become soft spots and need strengthening or replacing. 3 2 1The Subgrade 20 3.4.2 Assessment by Precedent Use of this approach involves the assessment of subgrades on the basis of geotechnical, topographic and drainage information, together with some routine soil classification tests, if possible. Once these factors are assessed, a presumptive design CBR is assigned (Table 3-5) on the basis of previous test data and performance for similar soils in similar conditions. There may be significant experience and performance data relevant to the subgrade under consideration within similar climatic and topographic areas. In situ testing on previously constructed pavements within similar geotechnical environments can provide valuable data. Use of this information, particularly at Planning or Feasibility Stages may give early design indications and reduce the cost of subgrade evaluation. 3.4.3 Pavement Moisture Condition and Drainage Under consistent hydrological condition the pavement and its foundation may reach an equilibrium moisture condition, particularly under the central region of the pavement. There may be significant fluctuations between the central region and the outer edges. In areas of intense rainfall, infiltration can have a major influence on the subgrade material moisture conditions and hence their support to the overlying layers. Additionally, in environments where the water table fluctuates seasonally, the foundation moisture condition may reflect these fluctuations across the pavement. Cross-section designs can have a considerable impact on the pavement moisture regimes, with relatively high permeability pavement materials either 'boxed' into the surrounding natural materials or flanked by less permeable shoulder materials can inhibit drainage unless appropriate pavement drainage is provided. Moisture condition change and water table fluctuations might be controlled by installing appropriate pavement and subsoil drains. However, subsoil drains are effective only when subgrade moisture is subject to hydrostatic head (positive pore pressures). In some tropical wet regions, it is possible for silts and clays to have equilibrium moisture content above optimum moisture content and because pore pressures are not positive, the materials cannot be drained. Care must be taken not to make unrealistic assumptions about the effect of subsurface drains on subgrade moisture condition. Moisture condition change and water table fluctuations might be controlled by installing appropriate pavement and subsoil drains, as described in Section 7.4. Subsoil drains are, however, effective only when subgrade moisture is subject to hydrostatic head (positive pore pressures). In some tropical wet regions, it is possible for silts and clays to have an equilibrium moisture content above the optimum moisture content and, because pore pressures are not positive, the materials cannot be drained. 3.5 Problem Subgrades 3.5.1 Volume Change As a consequence of changes in moisture content, subgrades and possibly foundations below the zone of influence, with reactive clays can experience considerable volume change that can disrupt the pavement in a number of ways, including: • surface deformation, causing increased roughness and potential ponding of water; • pavement layer deformation, that can cause loss of density and loss of strength; • cracking that can allow moisture infiltration and loss of strength. • Mitigation options include one or more of the following: • reducing entry of water; • reducing volume change; • programming future repairs and/or overlays. The magnitude of volume change depends on the following: • potential swell of the subgrade foundation material; • extent (width and depth) of expansive materials; • magnitude of change in moisture content. Further classification of expansive soils is shown in Table 3-6 (Austroads, 2017). Expansive Classification Liquid Limit % Plasticity Index % Plasticity Product1 Swell % in CBR Mould2 Very high > 70 > 45 > 3,200 > 5.0 High > 70 > 45 2,200- 3,200 2.5-5.0 Moderate 50-70 25-45 1,200- 2,200 0.5-2.5 Low < 50 < 25 < 1,200 < 0.5 Table 3-6: Classification of expansive soils Notes: 1. PP = PI x % soil < 0.075 mm (75 micron) 2. Soil at OMC compacted at 98% MDD with 4-day soak, 4.5 kg surcharge Source: Austroads, 2017 3 2 1The Subgrade 21 Options Summary Description 1. Do nothing If minor impact anticipated on pavement, rely on periodic maintenance. This is for those clays classified as "Low" expansivity. 2. Shift road alignment Re-align road onto areas of non-problem soil. 3. Removal and replacement For clays classified as "High" or "Very High" expansivity, dig out of the material and replace with inert or encapsulated material, Depth of dig out will be a function of the variation in swell potential and the depth of moisture content variation. An additional precaution is to treat with lime, any extra material that is not removed. Rockfill and sandbags (DONOU Technology for low volume roads) is useful in waterlogged areas prior to application of other soil. 4. Nonexpansive cover layers For clays classified as "Moderate" expansivity. Use of improved subgrade, but is extended to include side-slopes and the toe of embankments. Cover material should ideally be a plastic gravelly soil. The road section should have sealed shoulders and flatter embankment side slopes (1:4 to 1:6) (see Figure 3-4). 5. Surcharge Placing of sufficiently high embankment of non-expansive material over expansive material such as to inhibit heave. 6. Moisture control Range of options: • 2m wide sealed shoulders • Impermeable full width sub-base • No vegetation allowed on shoulders • 5% crossfall on shoulder • Drains to be lined, if unlined to be at least 4 m from embankment toe and shallow • Pre-wetting (2 - 3 months) to induce equilibrium moisture content before constructing the pavement. • Minimising or preventing moisture change using waterproofing membranes and/or vertical moisture barriers • The clay beneath culverts must be replaced with an inert material, all joints must be carefully sealed to avoid leakage and inlets and outlets must be well graded to avoid ponding. 7. Chemical stabilisation a. Modification of excavated expansive material by mixing with cement or lime. Choice of lime or cement is based on plasticity and fines content, For Ip. > 20% lime is recommended. b. Formation of cement stabilised and strengthened layer within pavement or earthworks to resist swelling pressures. c. Other approved options – See Chapter 5 for a detailed discussion on stabilisation options. 8. Mechanical stabilisation Mixing of potentially expansive material with inert material (e.g. sand/silt) to render the subsequent mass less potentially expansive. 9. Geotextiles Geomembranes used as impermeable barriers to vertical and horizontal moisture movement, although problems have been reported with placement, durability and possible hydrogenesis Table 3-7: Summary of mitigation options for expansive clays in road construction ZONE OF MOISTURE EQUILIBRUIM Replace clay with inert material Flattened side slopes Sealed shoulders NORMAL GROUND LEVEL Lined concrete drain ZONE OF SEASONAL MOISTURE MOVEMENT Flattened side slopes 1 2 3 2 4 Figure 3-4: Some countermeasures used to increase zone of moisture equilibrium Source: ReCAP, 2019 3 2 1The Subgrade 22 3.5.3 Other Problem Subgrades Dispersive and erodible soils These soils have a higher than usual concentration of active sodium, which affects the way they react with water, resulting in increased erosion. The countermeasures for avoiding dispersive soil damage in the road foundation are relatively simple: • Avoid its use as imported material; • Remove and replace it if it is in the subgrade; • Good management of water and drainage (see Section 7.5); • Treatment with lime or gypsum may allow the calcium ions to replace the sodium ions and reduce the problem. (CSIR, 2019). • Side drains in dispersive / erodible soil sections should be avoided. If this is not feasible, they should be as shallow as possible and located as far away as practicable from the toe of the embankments; • Subsurface drains must not be in contact with dispersive / erodible materials; • Where subsoil drainage is required to penetrate subgrades consisting of these materials, a barrier of low permeability, non-dispersive soil at least 100 mm thick, or an impermeable membrane, must be provided between the drain and the subgrade soils • Covering the soil with non-erodible materials and vegetation; • Back-filling the channels and gullies, once erosion has occurred, with less erodible material and redirecting water flows. Collapsible soils These are soils that possess sensitive porous textures with high void ratios and relatively low densities. At their natural moisture content and under their natural loading they are stable, but will collapse when wetted or when a sufficient load is applied to them. They may possess high apparent strength but are susceptible to large reductions in void ratio (collapse) on wetting, especially under load, when the metastable texture collapses as the bonds between the grains break down. If potentially collapsible soils are identified within or below the foundation layers, the following actions may be employed (CSIR, 2019): • Remove, if feasible; • Wet vibratory compaction to collapse the soils; • High energy impact compaction (jf water is scarce). Peat or soft organic soil It could be the case that a layer of very weak material (such as peat or soft organic soil) is encountered during subgrade exploration and sampling. The following options are available. The options should be compared and the most economical one or combination chosen. • If the layer is of limited depth or quantity then it should be excavated to spoil and replaced with suitable borrow material. In any case, material excavated to spoil can be used to replace material taken from borrow pits – in an environmentally friendly way. • If the quantity of deleterious material is large, then where possible, the road alignment should be changed. • Where changing the alignment is not feasible, then side drains should be provided, a geogrid and a pioneer layer is then applied before upper pavement layers are constructed. To dry-out the soil and provide a stable working platform, the soil should be treated with lime (for clayey materials) before application of the geogrid and pioneer layer. 3.5.2 Other Mitigating Options As well as reducing the entry of water into the subgrade, the following measures can be implemented as appropriate to aid in minimising volume changes: • Embankment containment (zonal embankments); • Providing an adequate thickness of cover over the reactive subgrade; • Using lime stabilisation/modification of expansive clay subgrade; • Compacting the untreated subgrade as close to equilibrium moisture content as possible; • Avoiding the planting of trees or shrubs adjacent to the pavement. Table 3-7 lists in more detail the above options, based on Nelson & Miller (1992) and Weston (1980) and as more recently summarised by SANRA (2013) and Jones & Jefferson (2012). Cover over the reactive subgrade is recommended for all pavements where the untreated subgrade material has a swell greater than or equal to 0.5%, as shown in Table 3-8. Untreated Subgrade Swell (%) Minimum Cover Over Reactive Subgrade (mm) ≥ 7.0 Geotechnical assessment required ≥ 5.0 to < 7.0 1,000 ≥ 2.5 to < 5.0 600 ≥ 0.5 to < 2.5 150 Table 3-8: Cover over reactive subgrade 3 2 1The Subgrade 23 3.7 Key Points 1. The subgrade is recognised as the foundation layer for the pavement and the assessment of its working condition is a critical element of the pavement design process. Its fitness for purpose as the pavement foundation is a combination of its material characteristics, its moisture condition, its geometry and its working environment, which includes the stresses to which it is subjected during its design life. 2. There is need for clarity on terminology to prevent any misunderstanding arising from the wording around subgrade, its components and its location; proposals are defined in Figure 3-1. 3. Subgrade components can be considered to work within a framework of factors that together make up a working environment that influences their performance as a sustainable foundation to the overlying pavement. Key issues within this framework are: traffic, road classification, specifications, pavement type, climate, water table, material properties (Table 3-1), terrain, sub-foundation layers, construction and maintenance regimes. 4. Soil profiles are frequently variable in nature and reflect changes in topography, geology and drainage conditions along an existing or proposed road alignment. Alignment investigations for pavement foundations, comprising both desk study work and fieldwork, should be built around the development of a Ground Model from information gathered in key feasibility, design and construction phases. 5. Pavement foundation investigations should fit in with, and be complementary to, the main project investigations for alignment within the general project cycle. Desk study work should gather relevant data on existing road performance and designs, as well as collate information on existing standards and specifications. The fieldwork will comprise pitting, sampling, in situ testing and laboratory testing to establish the detail of pavement foundation characteristics in terms of strength and/or elastic moduli. Specialised follow-up investigations may be required to further define the nature and extent of problem materials. 6. The depth and nature of the field investigations will be a function of Material Depth or Foundation Depth and the relationship of the existing vertical alignment and the proposed vertical alignment, i.e. whether the road will be in a cutting, on an embankment or at grade. (Table 3-2, Table 3-3, Figure 3-2 and Figure 3-3). Subgrade Class CBR Value (%) Range S1 < 3 S2 3 – 4 S3 5 – 7 S4 8 – 14 S5 15 – 30 S6 > 30 Table 3-9: Subgrade classes • In cases where the soil, especially peat, has already been pre-consolidated and a layer or material exists over it, the material should not be excavated. Additional material (suitable capping – see Chapter 9 for capping options) should be constructed over it before upper pavement layers are constructed upon it. A geogrid may also be used to further enhance the strength of the underlying layers. 3.6 Subgrade Classification The structural catalogues used in this Note require that the assessed subgrade strength for design is assigned to one of six strength classes that reflect the relationship between layer thickness design and subgrade strength, as defined by CBR. The classes are defined in Table 3-9. With modern compaction plant, a relative density of 93% of the density obtained in the heavier compaction test should be achieved without difficulty. Compaction will not only improve the subgrade bearing strength, but also reduce permeability and subsequent compaction by traffic. As discussed in Section 3.2.7, the moisture content of samples should be based on specimens soaked until no further swell occurs –it should be noted that swell can continue even beyond the common four days of soaking. This moisture content is used to enhance climate-resilient design. 3 2 1The Subgrade 24 7. The principal in situ test in subgrade material assessment uses the Dynamic Cone Penetrometer (DCP), whose penetration rates can be correlated with CBR, after taking account of moisture condition. The FWD or LWD option may also be used in pavement foundation assessment to assess existing pavement layers for comparison and correlation purposes in a precedent design strategy. 8. The recommended sampling interval at the engineering design stage for in situ subgrade is 250 m for trunk roads and primary roads, and 500 m for secondary and tertiary roads. 9. Adequate samples should be collected to enable strength (three- or six-point CBR tests) and classification tests (Atterberg Limits, sieve analysis, moisture content) to be carried out. It is recommended that the compaction effort used in the determination of the CBR be the Heavy Compaction Test using a 4.5 kg rammer. CBR is normally measured in 4-day soaked condition unless there is evidence to the contrary. 10. Soils have a variable sensitivity to moisture content change, as outlined in Table 3-4. 11. Pavement foundation assessment can be either an empirical process based on in situ and laboratory testing, or an analysis based on precedent, involving a presumptive design CBR being assigned on the basis of previous test data and performance for similar soils in similar conditions (Table 3-5). 12. Under consistent hydrological conditions the pavement and its foundation may reach an equilibrium moisture content. In areas of intense rainfall, infiltration can have a major influence on the subgrade material moisture conditions and hence their support to the overlying layers. 13. Moisture condition changes and water table fluctuations might be controlled by installing appropriate pavement and subsoil drains. Subsoil drains are, however, effective only when subgrade moisture is subject to hydrostatic head (positive pore pressures). 14. As a consequence of changes in water content, subgrades, and possibly materials below the zone of influence, can experience considerable volume change that can disrupt the pavement (Table 3-6). Mitigation options include one or more of the following, as summarised in Table 3-7: • Reducing the entry of water; • Inhibiting swell; • Embankment containment (zonal embankments); • Providing an adequate thickness of cover over the reactive subgrade; • Using lime stabilisation/modification of expansive clay subgrade; • Compacting the untreated subgrade as close to equilibrium moisture content as possible; • Avoiding the planting of trees or shrubs adjacent to the pavement; • Programming future repairs and/or overlays. 15. Additional problem materials such as dispersive, collapsible and organic soils are identified and potential remedial measures outlined. 16. A weak or very compressible layer (such as soft organic soil or peat) could be encountered during subgrade exploration and sampling. The following options are available and these should be compared, with the most economical option, or combination of options, chosen: • Excavation and replacement; • Road alignment change; • Use of chemical stabilisation and/or geogrid. 17. Cover over the reactive subgrade is recommended for all pavements where the untreated subgrade material has a swell greater than or equal to 0.5%, as shown in Table 3-8. 18. Capping can be provided where the in situ untreated subgrade is weaker than is required by the selected pavement design charts. For very weak materials with CBR < 5.0%, there are specifically recommended capping thicknesses in Chapter 9. 19. The structural catalogues used in this Note require that the assessed subgrade strength for design is assigned to one of six strength classes that reflect the relationship between layer thickness design and subgrade strength, as defined by CBR (Table 3-9). 4 3 2 1Unbound Pavement Materials 25 4 Unbound Pavement Materials 4.1 Introduction and Scope Unbound pavement material is a term that describes a general type of pavement course, which does not act as a bound course. Unbound materials include both granular and modified granular materials in which modification is through the addition of small amounts of stabilising agents (e.g. lime or cement) to improve stiffness or to correct other deficiencies in properties (e.g. high plasticity) without causing a significant increase in tensile capacity from hydraulic bonding (i.e. producing a bound material). Despite this modification (enhancement), the material still behaves like a granular material and should be classified and treated as such. This chapter provides guidance on the selection of unbound materials for use as capping, sub-base and roadbase layers. The main categories, with a brief summary of their characteristics, are shown in Table 4-1. It is their function to spread traffic loads so that the subgrade and fill layers are not overstressed. Pavement design is undertaken by two main methods: empirical and mechanistic-empirical. With empirical methods, pavement design is based on the exact materials and layer thicknesses that have been known to work for given traffic levels and subgrades. With mechanisticempirical methods, the pavement is designed on the basis of limiting computed (or estimated) stresses and strains, at critical points in the pavement structure, to levels that are below those corroborated by empirical evidence. For the empirical design catalogues presented in Chapter 9, unbound granular materials are characterised in terms of their California Bearing Ratio (CBR). When the mechanistic design procedure is to be used, granular materials are characterised by their elastic parameters (modulus and Poisson's ratios); the resilient/stiffness modulus of the unbound pavement materials is briefly discussed along with their empirical characteristics. Code Description Summary of specification GB1,A High-quality, fresh, crushed rock Dense graded, unweathered crushed stone, non-plastic parent fines GB1,B Crushed rock, gravel or boulders Dense grading, PI < 6, soil or parent fines GB2 Large-size aggregate roadbases Macadam properties as for GB1,B (see text), PI < 6 GB3 Natural coarsely graded granular material, including processed and modified gravels Dense grading, PI < 6 CBR after soaking > 80 GS1 Crushed rock, gravel or high-quality natural gravel CBR after soaking > 45 GS2 Natural gravel CBR after soaking > 30 GC Gravel or gravel-soil CBR after soaking > 15, LL < 40, PI < 20 G8 Soil CBR after soaking > 8 LL < 50, PI < 25 Table 4-1: Properties of unbound materials Notes. These specifications are sometimes modified according to site conditions, material type and principal use (see text). GB = Granular roadbase, GS = Granular sub-base, GC = Granular capping layer. 4.2 Capping Materials The objective of a capping (selected) layer is to provide a platform for the sub-base and roadbase layers, and sometimes even another selected layer. These materials are often required to provide sufficient cover on weak subgrades. This platform should be relatively uniform in strength and density, with a specified minimum bearing capacity, such that the performance of the overlying pavement is as uniform as possible. They are used in the lower pavement layers as a substitute for a thick sub-base to make use of locally available sources of suitable capping material, such as alluvial gravel, and consequently reduce costs. A cost comparison should be conducted to assess their cost-effectiveness. Typical pavement designs in the (sub-)tropics require this layer to be constructed with a dense graded gravel or gravel-soil, as summarised in Table 4-1 (the rows labelled "GS2", "GC", "G8"). As the capping layers are usually compacted in lifts of 150 - 200 mm, the largest allowable particle size should not exceed 100 and 130 mm, respectively (two-thirds of layer thickness). 4 3 2 1Unbound Pavement Materials 26 4.2.1 Bearing Capacity The strength of capping materials (CBR 8%, 15%, 30%) is determined at the highest anticipated moisture content during the service life of the road, as measured on samples compacted in the laboratory at a specified field density. Taking into account climate change effects, this can range from 4 - 10 days of soaking (or until no further swell is measured on the sample). This density is usually specified as a minimum of 95% of the maximum dry density in the British Standard (Heavy) Compaction Test (BS EN 1377- 4), 4.5 kg hammer or ASTM Test Method D 1557 (Heavy Compaction). When estimating the likely soil moisture conditions, the designer should take into account the functions of the overlying sub-base layer and its expected moisture condition and the moisture conditions in the subgrade. If either of these layers is likely to be saturated during the life of the road, then the selected layer should also be assessed in this state. Recommended gradings or plasticity criteria are not given for these materials. It is, however, desirable to select reasonably homogeneous materials, since this often enhances overall pavement behaviour. When unbound materials are wetted, their bearing strength decreases. It is beneficial to select materials that show the lowest decrease in bearing strength when wetted. 4.2.2 Construction Platform In many circumstances, the requirements of a capping are governed by its ability to support construction traffic without excessive deformation or ravelling. A good quality capping is therefore required where loading or climatic conditions during construction are severe. Suitable material should possess properties similar to those of a good surfacing material for unpaved roads. The material should be well graded and have a plasticity index at the lower end of the appropriate range for an ideal unpaved road wearing course in prevailing climatic conditions. If suitable materials are unavailable, trafficking trials should be conducted to determine the performance of alternative materials under typical site conditions. 4.3 Sub-base Materials The sub-base is an important load spreading layer in the completed pavement. It enables traffic stresses to be reduced to acceptable levels in the subgrade. The sub-base also acts as a working platform for the construction of the upper pavement layers and as a separation layer between subgrade and roadbase. Under special circumstances it may also act as a filter or as a drainage layer. In wet climatic conditions, the most stringent requirements are dictated by the need to support construction traffic and paving equipment. In these circumstances the subbase material needs to be more precisely specified. In dry climatic conditions, in areas of good drainage and where the road surface remains well sealed, unsaturated moisture conditions prevail and sub-base specifications may be relaxed. The selection of sub-base materials will therefore depend on the design function of the layer and the anticipated moisture regime, both in service and at construction. 4.3.1 Crushed Rock or Crusher-Run In this Note, this is classified as graded crushed rock subbase (GS1-A) or a Crusher-Run. This type of material can be derived from crushing and screening natural granular material, rocks or boulders and may contain a proportion of natural, fine aggregate. Sub-bases consist of high-quality crushed rock that provide a stiff, yet adequately flexible, layer, to resist and spread the high stresses applied by traffic in the upper portions of the pavement structure. Specified crushed rock materials for a higher-quality subbase have a minimum soaked CBR of 45%, at a density specified to be at least 97% of the maximum dry density in the British Standard (Heavy) Compaction Test, 4.5 kg hammer or ASTM Test Method D 1557 (Heavy Compaction). The sub-base material shall comply with one of the gradings shown in Table 4-2 corresponding to maximum nominal sizes 37.5 mm and 28 mm. The crushed rock sub-base shall be well-graded, with a smooth, continuous grading within the limits shown in Grading B and C, which are tighter limits for specific normal size aggregate, reflecting the greater control that is possible with crushed stone. The minimum Grading Modulus shall be 1.5. After crushing, the material should be angular in shape, with a Flakiness Index (BS EN 933-3) of less than 35%. If the amount of fine aggregate produced during the crushing operation is insufficient, non-plastic angular sand may be used to make up the deficiency. Crushed stone sub-base shall have a Plasticity Index of less than 6. 4 3 2 1Unbound Pavement Materials 27 ISO sieve size (mm) Percentage by mass of total aggregate passing test sieve Natural Gravel Crushed Rock A B (37.5 mm) C (28 mm) 63 100 50 100 37.5 80-100 95-100 100 20 60-100 60-80 70-85 9.5 40-60 50-65 4.75 30-90 25-40 35-55 2.36 15-30 25-40 1.0 17-75 0.425 10-55 7-20 12-25 0.075 5-25 5-15 5-15 Table 4-2: Recommended particle size distributions for crushed rock and high-standard natural gravel sub-base materials (GS1) 4.3.2 Natural Gravels For the purposes of this Note, natural gravel sub-bases are classified as GS1-B and GS2. These are described as follows: High standard natural gravel sub-base (GS1-B) This sub-base category includes a wide range of materials, including weathered hard rock, quartzitic gravels, lateritic, calcareous and river gravels and other transported gravels, and granular materials resulting from the weathering of rocks. A natural gravel sub-base material improved by blending with crushed rock aggregate can also be considered in this category, provided that it is blended with no more than 50% crushed aggregate. Table 4-2 shows particle size distributions for suitable materials. Specific high-standard natural gravel materials for use as a sub-base in this category must have a minimum soaked CBR of 45%, usually at a minimum density of 95% of the maximum dry density in the British Standard (Heavy) Compaction Test, 4.5 kg hammer or ASTM Test Method D 1557 (Heavy Compaction). In situ, compaction should be to a minimum of 97% maximum dry density. Climate Liquid Limit Plasticity Index (Plasticity Modulus) Linear Shrinkage Moist tropical and wet tropical < 35 < 6 (250) < 3 Seasonally wet tropical < 45 < 12 (400) < 6 Arid and semi-arid < 55 < 20 (650) < 10 Table 4-3: Recommended plasticity characteristics for granular sub-bases (GS1 and GS2) The material should be well graded and have a plasticity index at the lower end of the appropriate range in the prevailing climatic conditions. These considerations form the basis of the criteria presented in Table 4-3. Material meeting the requirements for severe conditions will usually be of higher quality than the standard sub-base. Standard natural gravel sub-base (GS2) This category includes a wide range of materials, including weathered hard rock, quartzitic gravels, lateritic, calcareous and river gravels and other transported gravels, and granular materials resulting from the weathering of rocks. Red angular sands (due to their self-cementing properties) have proven to be useful as a sub-base material, despite the maximum particle size being less than 5 mm (Table 4-4). More details on their specification can be found in Pinard et al. (2014). The minimum soaked Californian Bearing Ratio (CBR) shall be 30%, at a density that is at least 95% of the maximum dry density in the British Standard (Heavy) Compaction Test, 4.5 kg hammer or ASTM Test Method D 1557 (Heavy Compaction). To achieve the required bearing capacity, and for uniform support to be provided to the upper pavement, limits on soil plasticity and particle size distribution may be required. Materials that meet the recommendations of Table 4-3 and Table 4-4 will usually be found to have adequate bearing capacity. The minimum Grading Modulus shall be 1.5, except where a material, having a lower Grading Modulus (but not less than 1.2), is approved for use by the project engineer. Moreover, the Plasticity Index (PI) in moist/wet tropical and seasonal wet tropical conditions can be relaxed to < 10 and < 15, respectively, when approved by the engineer. Alternatively, the Plasticity Modulus (PM = Plasticity Index x percentage of particles passing the 425 µm sieve), as shown in Table 4-3, can be used instead of PI only. Plasticity Product (Plasticity Index measured on a 75 µm sieve x percentage of particles passing the 75 µm sieve) can also be used as a criterion. A maximum value of 90 is permissible. For pedogenic materials (e.g. laterites and calcretes), the following plasticity limits apply: PI < 20, LL and swell = N/A. 4 3 2 1Unbound Pavement Materials 28 In the construction of low volume roads, local experience is often invaluable and a wider range of materials may often be found to be acceptable as shown in Chapter 9 Chart F. 4.3.3 Recycled Materials The production of demolition and construction waste has been increasing gradually in recent years. The use of these materials as recycled pavement materials in new roadway construction has also become more common in the last twenty years. Recycled roadway materials are typically generated and reused at the same construction site, providing increased savings in both money and time. The most widely used recycled materials are recycled asphalt pavement (RAP) and recycled concrete aggregate (RCA) and burnt bricks. RAP is produced by removing and reprocessing existing asphalt pavement, while RCA is produced from the demolition of concrete structures such as buildings, roads and runways. These materials have typically passed through at least one process, e.g. crushing, burning or separation, resulting in a relatively processed material with a high embodied energy content. The use of such materials in road construction has a number of energy, environmental and other benefits. Because of their nature (many are extremely fine grained) and possible properties (they contain soluble salts, acids and unstable components), however, many of these materials are unattractive to road engineers, despite their potential economic and environmental benefits. When using such materials in road construction, a good understanding of their properties and potential problems is necessary before they can be considered as substitutes for conventional construction materials. The main requirement for such materials is that they conform to standard specifications for soils, gravels and aggregates. To confirm this, each material should be classified as an equivalent of a soil, gravel or aggregate, and the relevant properties should be identified in terms of conventional unbound roadbase and sub-base materials. The production of RAP and RCA results in an aggregate that is well graded and of high quality (FHWA, 2008). The aggregates in RAP are coated with asphalt cement (paving grade bitumen) that reduces the water absorption qualities of the material (Guthrie et al., 2007). In contrast, the aggregates in RCA are coated with a cementitious paste that increases the water absorption qualities of the material (Poon et al., 2006). Production of recycled materials RAP and RCA are two materials commonly used as an alternative to conventional granular aggregate in roadway construction and rehabilitation. There is some ambiguity regarding the nomenclature involved in the production of RAP. RAP refers to the removal and reuse of the hot mix asphalt (HMA) layer of an existing roadway. Recycled pavement material (RPM) is a term used by some investigators to describe pavement materials reclaimed through a less precise process. This process involves the ISO Sieve size (mm) Percentage by mass of total Fine-grained sand sub-base 50 100 Sieve size (mm) % passing 37.5 80-100 2.0 100 20 60-100 1.0 85-99 4.75 30-100 0.425 55-90 1.18 17-75 0.150 25-45 0.3 9-50 0.075 0-10 0.075 5-25 Table 4-4: Typical particle size distributions for standard natural gravel sub-base materials (GS2) HMA, with either part of the roadbase layer or the entire base course layer, with part of the underlying sub-base/ subgrade, being reclaimed for use. Unless specified, these two distinct recycled asphalt materials will be collectively referred to as RAP. Recycled asphalt pavement (RAP) is typically produced through milling operations, which involve the grinding and collection of the existing HMA. RPM is typically pulverised using full-size recycler, or portable asphalt recycling, machines. RAP can be stockpiled but it is most frequently processed immediately and reused in situ. Typical RAP gradations resemble a crushed natural aggregate, with a higher content of fines resulting from degradation of the material during milling and crushing operations. The inclusion of subgrade materials in RPM can also contribute to higher fines content. Milling produces a finer gradation of RAP than crushing (FHWA, 2008). Recycled concrete aggregates (RCA) production involves crushing to achieve gradations comparable to typical roadway aggregate. Fresh RCA contains much debris and reinforcing steel that must be removed prior to placement. RCA is very angular in shape, with a lower particle density and greater angularity than would normally be found in traditional virgin roadbase aggregates. Residual mortar and cement paste found on the surface of RCA contributes to a rougher surface texture, a lower specific gravity and higher water absorption than is found with typical roadway aggregates. Researchers have investigated the use of RCA in roadbase or sub-base courses to provide a viable option. RCA is used predominantly in pavement construction as a replacement for conventional aggregates. Molenaar and Niekerk (2002) investigated the engineering properties of RCA and suggested that good-quality roadbase or sub-base can be built from these materials. 4 3 2 1Unbound Pavement Materials 29 Engineering properties of RAP Engineering properties of RAP of particular interest, when it is used in granular roadbase and sub-base applications, include gradation, bearing strength, compacted density, moisture content, permeability and durability. The key design parameter for incorporating processed RAP into granular roadbase and sub-base materials is the blending ratio of RAP to conventional aggregate that is needed to provide adequate bearing capacity. The ratio can be determined from laboratory testing of RAP aggregate blends, using the CBR test method or previous experience. Bearing capacity decreases with increasing RAP content. Since the quality of virgin aggregates used in asphalt concrete usually exceeds the requirements for granular aggregates, there are generally no durability concerns regarding the use of RAP in granular roadbase and sub-bases. Conventional pavement structural design procedures can be employed for granular roadbase and sub-bases containing recycled unbound materials. Recycled materials can be used in roadbases, sub-bases, non-trafficked shoulders and capping/selected layers for any traffic class. The constituent (percentage, by mass) of materials equivalent to GS1- and GS2-type sub-base materials are either of the following: • A blend in which at least 70% (by mass) of the material is recycled and the rest is either natural gravel or crushed rock; • 100% recycled unbound granular materials; • 100% RCA; • A maximum of 40% RAP. The coarse and fine component properties of recycled material for sub-bases may be further specified as follows: • For coarse component properties for recycled materials in use in sub-bases, the flakiness index shall be ≤ 40%; • For fines component properties for recycled materials in use as GS1 sub-bases, the Liquid Limit (LL) shall be ≤ 35% and the Linear Shrinkage (LS) shall be 1.5 – 4.5%. For materials in use as GS2 sub-bases, the Liquid Limit (LL) shall be ≤ 40% and the Linear Shrinkage (LS) shall be 1.5 – 6.5%; • The California Bearing Ratio (four days soaked) requirements: ≥ 45 for recycled materials in use as GS1 sub-bases and ≥ 30 for recycled materials in use as GS2 sub-bases; • Where the recycled material is to be in direct contact with galvanised or aluminium components, the pH value of the recycled material blend shall have a maximum value of 11. Alternatively, the metallic components shall be adequately protected from contact with the material, to the satisfaction of the project engineer. The particle size distribution (grading) for recycled material for use as a sub-base is specified in Table 4-5. In addition to the requirements of Table 4-5, the grading curve for the material shall be smooth. Sieve size (mm) Percentage by mass of total aggregate passing test sieve 75 100 37.5 85-100 20 60-90 10 30-70 5 15-45 0.6 0-22 0.075 0-10 Table 4-5: Particle size distribution of recycled materials for use as sub-bases 4.3.4 Filter Materials Filter materials may be required to protect a drainage layer from blockage by a finer material or to prevent the migration of fines and the mixing of two layers. The two functions are similar, except that, for use as a filter, the material needs to be capable of allowing drainage to take place, meaning that the amount of material passing the 0.075 mm sieve must be restricted. Table 4-5 shows typical particle size distribution for sub-bases (GS) that will meet strength requirements. The following criteria should be used to evaluate a sub-base as a separating or filter layer: • The ratio D15 (coarse layer) / D85 (fine layer) should be less than 5 Where: • D15: the sieve size through which 15% (by weight) of the material passes • D85: the sieve size through which 85% passes • The ratio D50 (coarse layer) / D50 (fine layer) should be less than 25 For a filter to possess the required drainage characteristics a further requirement is that the ratio D15 (coarse layer) / D15 (fine layer) should lie between 5 and 40. These criteria may be applied to the materials at both the roadbase/sub-base and the sub-base/subgrade interfaces. Further details can be obtained in the appropriate references, e.g. NAASRA (1983). 4 3 2 1Unbound Pavement Materials 30 4.4 Roadbase Materials A wide range of materials can be used as unbound roadbase, including crushed quarried rock, crushed stones/ boulders, screened natural gravels, mechanically stabilised (blended) natural gravels and modified or naturally occurring 'as dug' gravels. Their suitability for use depends primarily on the design traffic level of the pavement and climate but all roadbase materials must have a particle size distribution and particle shape which provide high mechanical stability. The material should contain sufficient fines (the material passing through the 0.425 mm sieve) to produce a dense material when compacted. If several types of roadbase are suitable, the final choice should take into account expected levels of future maintenance and total costs over the expected life of the pavement. The use of locally available materials (natural gravels) is encouraged, particularly where there are low traffic volumes (i.e. traffic classes T1 to T3). Mechanical stabilisation can be achieved by blending two or more complementary materials (e.g. a plastic material with a non-plastic material) in an optimum way to achieve a target specification for the roadbase or sub-base. This should be considered ahead of chemical modification. The more economical and pragmatic option should then be chosen. When using locally available materials, it is important to consider the results of performance studies and any special design features that ensure their satisfactory performance. When considering the use of natural gravels, several samples should be tested (at least 10) from each source to ensure that their inherent variability is taken into account in the selection process. For lightly used roads the requirements set out below may be too stringent. In such cases, reference should be made to specific case studies, preferably of roads in similar conditions. 4.4.1 Crushed Rock (Graded Crushed Stone) Graded crushed stone (GB1,A and GB1,B) Two types of material are defined in this category. One is produced by crushing fresh, quarried rock (GB1,A). This may be an all-in product, usually termed a 'crusher-run', or the material may be separated by screening and recombined to produce a desired particle size distribution. The other type is derived from crushing and screening natural granular material, rocks or boulders (GB1,B); this may contain a proportion of natural, fine aggregate. Typical grading limits for these materials are shown in Table 4-6. After crushing, the material should be angular in shape, with a Flakiness Index (BS EN 933-3) of less than 35%. If the amount of fine aggregate produced during the crushing operation is insufficient, non-plastic angular sand may be used to make up the shortfall. In constructing a crushed stone roadbase, the aim should be to achieve low permeability while maintaining good compaction and high stability under traffic. To ensure that the materials are sufficiently durable, they should satisfy the criteria given in Table 4-7. These are a minimum Ten Per Cent Fines Value (TFV) (BS ISO 20290-4) and limits on the maximum loss in strength following a period of 24 hours of soaking in water. Likely moisture conditions in the pavement are taken into account in broad terms, based on climate. Other simpler tests, e.g. the Aggregate Crushing Value (BS ISO 20290-3), may be used in quality control testing, provided a relationship between the results of the chosen test and the TFV has been determined. Tests can establish good correlations between individual material types but these need to be determined locally. The highest quality crushed stone material (GB1,A) must have a very tightly controlled grading, to ensure that an in situ compaction density, normally 86 to 88% of apparent relative density, can be achieved. Table 4-6: Grading limits for graded crushed stone roadbase materials (GB1,A; GB1,B) Table 4-7: Mechanical strength requirements for the aggregate fraction of crushed stone roadbases (GB1,A; GB1,B) as defined by the Ten Per Cent Fines Test Notes 1. Corresponds approximately to the UK specification for wet-mix Macadam (UK Department of Transport, 1986). Notes 2. For paver-laid materials a lower fines content may be accepted. Climate Typical annual rainfall (mm) Minimum 10% fines values (kN) Minimum ratio wet/ dry test (%) Moist tropical and wet tropical and seasonally wet tropical >500 110 75 Arid and semi-arid <500 110 60 BS test sieve (mm) Percentage by mass of total aggregate passing test sieve Nominal maximum particle size 37.5 mm(1) 28mm 20 mm 50 100 37.5 95-100 100 - 28 - - 100 20 60-80 70-85 90-100 10 40-60 50-65 60-75 5 25-40 35-55 40-60 2.36 15-30 25-40 30-45 0.425 7-19 12-24 13-27 0.075(2) 5-12 5-12 5-12 0.075 5-25 5-15 5-15 4 3 2 1Unbound Pavement Materials 31 When dealing with materials originating from the weathering of basic igneous rocks, the recommendations in Section 4.4.2 should be used. The fine fraction of a GB1,A material is expected to be non-plastic, with a maximum allowable PI of 4. For GB1,B materials, the maximum allowable PI is 6. When producing these materials, the percentage passing the 0.075 mm sieve should be chosen according to the grading and plasticity of the fines. For materials with non-plastic fines, the proportion passing the 0.075 mm sieve may approach 12%. If the PI approaches the upper limit of 6 it is desirable for the fines content to be restricted to the lower end of the range. To ensure this, a maximum Plasticity Product (PP) value of 45 is recommended, where PP = PI x (percentage passing the 0.075 mm sieve). To meet these requirements, it may be necessary to add a low proportion of hydrated lime or cement, to alter the properties of the fines to be compliant with the specifications. These materials may be deposited and spread using a grader, but it is preferable to use a paver machine, to ensure that the completed surface is smooth and has a tight finish, to reduce the possibility of segregation and to reduce edge wastage of expensive processed roadbase material associated with using a grader. The material is usually kept wet during transport and laying, to reduce the likelihood of particle segregation. The in situ target dry density of the placed material shall be measured. This should preferably be a minimum of 86% of the apparent dry density. If not, then it should be a minimum of 100% of the maximum dry density obtained in the British Standard (Heavy) Compaction Test, 4.5 kg rammer or the British Standard Vibrating Hammer Test (BS EN 13286-4). The compacted thickness of each layer should not exceed 200 mm. When constructed to specifications, crushed stone roadbases will have CBR values well in excess of 100%. In these circumstances there is no need to carry out CBR tests. 4.4.2 Natural Gravels Normal requirements for natural gravels and weathered rocks (GB3). A wide range of materials, including lateritic, calcareous and quartzitic gravels, river gravels and other transported gravels, or granular materials resulting from the weathering of rocks, can be used successfully as roadbases for low volume roads (Chapter 9 Chart E, design traffic classes T1 to T3). Table 4-8 contains three recommended particle size distributions for suitable materials corresponding to maximum nominal sizes of 37.5 mm, 20 mm and 10 mm. Only the two larger sizes should be considered for traffic in excess of 1.5 million equivalent standard axles. To ensure that the material has maximum mechanical stability, the particle size distribution should be approximately parallel with the grading envelope. To meet the requirements consistently, screening and crushing of the larger sizes may be required. The fraction coarser than 10 mm should have 40% of its particles with angular, irregular or crushed faces. The mixing of materials from different sources may be warranted, to achieve the required grading and surface finish. This may involve adding fine or coarse materials or combinations of the two. All grading analyses should be done on materials that have been compacted. This is especially important if the aggregate fraction is susceptible to breakdown under compaction and in service. For materials whose stability decreases with breakdown, aggregate hardness criteria based on a minimum soaked Ten Per Cent Fines Value of 50 kN or a maximum soaked Modified Aggregate Impact Value of 40 may be specified (British Standard 812, Part 112, 1990). The fines of these materials should preferably be nonplastic but should normally never have a PI in excess of 6. As an alternative to specifying PI, a Linear Shrinkage not exceeding 3 may be specified. Table 4-8: Recommended particle size distributions for mechanically stable natural gravels and weathered rocks for use as roadbases (GB3) BS test sieve (mm) Percentage by mass of total aggregate passing test sieve Nominal maximum particle size 37.5 mm 20mm 10 mm 50 100 37.5 80-100 100 - 20 60-80 80-100 100 10 45-65 55-80 80-100 5 30-50 40-60 50-70 2.36 20-40 30-50 35-50 0.425 10-25 12-27 12-30 0.075 5-15 5-15 5-15 0.075(2) 5-12 5-12 5-12 0.075 5-25 5-15 5-15 4 3 2 1Unbound Pavement Materials 32 If the PI approaches the upper limit of 6 it is desirable that the fines content be restricted to the lower end of the range. To ensure this, a maximum Plasticity Product (PP [Equation 4-1]) of 60 is recommended, or a maximum Plasticity Modulus (PM [Equation 4-2]) of 90, where: PP = PI x (percentage passing the 0.075 mm sieve) Equation 4-1 PM = PI x (percentage passing the 0.425 mm sieve) Equation 4-2 If difficulties are encountered in meeting the plasticity criteria, consideration should be given to modifying the material by adding a small percentage of hydrated lime or cement. For pedogenic materials (e.g. laterites and calcretes), the following plasticity limits apply: PI < 15%, P0.075 < 15, LL < 40 and swell < 10%. When used as a roadbase, the material should be compacted in situ to a density equal to or greater than 98% of the maximum dry density achieved in the British Standard (Heavy) Compaction Test, 4.5 kg rammer or ASTM Test Method D 1557 (Heavy Compaction). In the laboratory, the material should have a minimum CBR of 80% after compaction to 95% of the maximum dry density achieved in the British Standard (Heavy) Compaction Test, 4.5 kg rammer and four days' immersion in water (British Standard 1377, Part 4, 1990). Arid and semi-arid areas In low rainfall areas in the tropics, typically with a mean annual rainfall of less than 500 mm, and where evaporation is high, moisture conditions beneath a well-sealed surface are unlikely to rise above the optimum moisture content determined in the British Standard (Heavy) Compaction Test. In such conditions, high strengths (CBR > 80%) are likely to develop, even when natural gravels containing a substantial proportion of plastic fines are used. In these situations, for the lowest traffic categories (TI, T2), the maximum allowable PI can be increased to 12 and the minimum soaked CBR criterion reduced to 60% at the expected field density. Materials of basic igneous origin Materials in this group are sometimes weathered and may release additional plastic fines during construction or in service. Problems are likely to worsen if water enters the pavement and this can lead to rapid and premature failure. The state of decomposition also affects their long-term durability when stabilised with lime or cement. The group includes common rocks such as basalts and dolerites but also covers a wider variety of rocks and granular materials derived from their weathering, transportation or other alteration (British Standards Institution, 1975; Weinert, 1980). Normal aggregate tests are often unable to identify unsuitable materials in this group. Even large, apparently sound particles may contain minerals that are decomposed and potentially expansive. The release of these minerals may lead to a consequent loss in bearing capacity. There are several methods of identifying unsound aggregates. These include petrographic analysis to detect secondary (clay) minerals, the use of various chemical soundness tests using, for example, sodium or magnesium sulphate (British Standard 812 Part 121, 1990), the use of dye adsorption tests (Sameshima & Black, 1979) or the use of a modified Texas Ball Mill Test (Sampson & Netterberg, 1989). Indicative limits based on these tests include (i) a maximum secondary mineral content of 20%, (ii) a maximum loss of 12% or 20% after five cycles of the sodium or magnesium sulphate tests, respectively, (iii) a Clay Index of less than 3 and (iv) a Durability Mill Index of less than 90. In most cases, it is advisable to seek expert advice when considering their use, especially when new deposits are being evaluated. It is also important to subject the material to a range of tests, to consistently identify problem materials (see Table A4.1.5 - 15 COTO, 2020). Materials of marginal quality In many parts of the world, 'as-dug' gravels that do not normally meet the normal specifications for roadbases have been used successfully. They include lateritic, calcareous and volcanic gravels. In general, their use should be confined to the lower traffic classes (i.e. T1 and T2) unless local studies have shown that they have performed successfully at higher traffic levels. Successful use often depends on specific design and construction features and climate conditions. It is not possible to give general guidance on the use of all such materials and the reader is advised to consult the appropriate source references (e.g. CIRIA, 1988; Lionfanga et al., 1987; Netterberg & Pinard, 1991; Newill et al., 1987; Rolt et al., 1987). The calcareous gravels, which include calcretes and marly limestones, deserve special mention. Typically, the plasticity requirements for these materials can be increased by up to 50% above the normal requirements in the same climatic area, without any detrimental effect on the performance of otherwise mechanically stable bases. This is provided that the characteristics and specifications of all other materials do not vary. Strict control of grading is also less important and deviation from a continuous grading is tolerable. 4.4.3 Large-size Aggregate Roadbases Although conventional-size aggregates have been used for roadbase layer construction, use of unconventionally large aggregates (generally with a top size ≥ 75 mm) for base and sub-base layer construction is emerging as a promising alternative to conventional aggregates. The amount of energy that is used to break up rocks or stones to obtain conventional-size aggregates can be significantly reduced with the direct use of large stones for roadbase layer construction. This section deals with dry or waterbound Macadam and emerging approaches for large-size aggregates. 4 3 2 1Unbound Pavement Materials 33 Dry-bound and water-bound Macadam (GB2). Dry-bound Macadam is a traditional form of construction, formerly used extensively in the United Kingdom. It is comparable in performance with a graded crushed stone. It has been used successfully in the tropics and is particularly applicable in areas where water is scarce or expensive to obtain. The material is also suitable where labour-intensive construction is an economic option. They consist of nominal single-sized crushed stone and non-plastic fine aggregate (passing through the 5.0 mm sieve). The fine material should preferably be well graded and consist of crushed rock fines or natural, angular pit sand. The dry-bound Macadam process involves laying singlesize crushed stone of either 37.5 mm or 50 mm nominal size in a series of layers, to achieve the design thickness. The compacted thickness of each layer should not exceed twice the nominal stone size. Each layer of coarse aggregate should be shaped and compacted, and then the fine aggregate should be spread onto the surface and vibrated into the interstices to produce a dense layer. Any loose material remaining is brushed off and final compaction carried out, usually with a heavy smooth-wheeled roller. This sequence is then repeated until the design thickness is achieved. To aid the entry of the fines, the grading of the 37.5 mm nominal size stone should be toward the coarse end of the recommended range. Economy in the production process can be achieved if layers consisting of 50 mm nominal size stone and layers of 37.5 mm nominal size stone are both used. This allows the required total thickness to be obtained more precisely and better overall use made of the output from the crushing plant. Water-bound Macadam is similar to dry-bound Macadam. It consists of two components, namely a relatively singlesized stone with a nominal maximum particle size of 50 mm or 37.5 mm and well graded fine aggregate (grouting sand) that passes through the 5.0 mm sieve. The coarse material is usually produced from quarrying fresh rock. The crushed stone is laid, shaped and compacted, and then fines are added, rolled and washed into the surface to produce a dense material. Care is needed in this operation to ensure that water-sensitive plastic materials in the sub-base or subgrade do not become saturated. The compacted thickness of each layer should not exceed twice the maximum size of the stone. The fine material should preferably be non-plastic and consist of crushed rock fines or natural, angular pit sand. Typical grading limits for the coarse fraction of GB2 materials are given in Table 4-9. The grading of M2 and M4 corresponds with nominal 50 mm and 37.5 mm single-sized roadstone (BS EN 13043:2002) and these are appropriate for use with mechanically crushed aggregate. M1 and M3 are broader specifications; M1 has been used for hand-broken stone but, if suitable screens are available, M2, M3 and M4 are preferred. Aggregate hardness, durability, particle shape and in situ density should each conform to those given above for graded crushed rock. Oversize aggregate/cobbles used in road Large-stone aggregate roadbases such as Telford and Armourstone have been used as unconventional roadbases for many years. In recent years, large-size aggregates have become popular for use in roadbase and sub-base layer construction. Large-size aggregates can perform as well as, or even better than, conventional-size aggregates; therefore, they are promising alternatives to conventionalsize aggregates (Kazmee et al., 2016; Cetin et al., 2021). Telford Construction Type is more suited to areas where readily worked stone and labour are generally available for the construction of low-volume roads. These roads might be unsealed or sealed with thin bituminous surfacing. Construction involves placing, by hand, a 100 to 200 mm layer of broken stone pieces onto a prepared, shaped and level soil formation (at least CBR 15%). Finer stone is then rammed into the interstices so that the large stones are completely covered. Table 4-9: Typical coarse aggregate gradings for dry-bound and water-bound Macadam (GB2) BS test sieve (mm) Percentage by mass of total aggregate passing test sieve Grouting Sand M1 M2(1) M3 M4(2) Sieve Size (mm) % passing 75 100 100 100 - 2.0 100 50 85-100 85-100 85-100 100 1.0 85-99 37.5 35-70 0-30 0-50 85-100 0.425 55-90 28 0-15 0-5 0-10 0-40 0.150 25-45 20 0-10 - - 0-5 0.075 0-10 Notes (1.) Corresponds to nominal 50 mm single-sized roadstone. Notes (2.) Corresponds to nominal 37.5 mm single-sized roadstone. To aid the entry of fines, the coarser end of this grading is preferred. 4 3 2 1Unbound Pavement Materials 34 Armourstone can be natural, manufactured or recycled coarse aggregates mainly used in marine works and civil engineering works such as road construction. Armourstone grading in some standards, such as European Standard EN 13383-1 2013, is designated with a nominal upper and lower mass or sieve size limit. Armourstone coarse grading designation has a nominal upper limit defined by a sieve size from 90 mm to 250 mm; light grading is defined by a mass from 25 kg to 500 kg and heavy grading is defined by a mass of more than 500 kg. Emerging Large-size Aggregates (LSA) When aggregates with an upper sieve size (D) exceeding 90 mm are used in road structures, many specification standards do not apply. Unlike rockfill, the material would be uniformly graded within the range 20 to 180 mm. For this reason, alternative methods are emerging for reliable and efficient quality assessment of LSA. For properties such as particle size distribution (PSD), some countries (e.g. Norway) have developed a simplified method (Fladvad & Ulvik, 2021; NS 3468, 2019) that has introduced the term 'sievability'; a sievable aggregate has D < 180 mm and a non-sievable aggregate has D ≥ 180 mm. For non-sievable aggregates, the maximum particle size is the largest width measured on a single rock particle. For such non-sievable aggregates, alternative methods can be employed to determine PSD based on Digital Image Processing (DIP). DIP for the analysis of aggregate gradation has been the focus of several research studies over the last few decades (e.g. Franklin et al., 1996; Mora et al., 1998; Pan & Tutumluer, 2005). DIP is a valid emerging tool for gradation analysis that is independent of the maximum particle size in the aggregate. It also offers gradation assessment of nonsievable aggregates. 4.4.4 Recycled Materials The engineering properties of RAP that are of particular interest when it is used in granular roadbase applications include gradation, bearing strength, compacted density, moisture content, permeability and durability. As discussed in Section 4.3, the key design parameter for incorporating processed RAP into granular base materials is the blending ratio of RAP to conventional aggregate that is needed to provide adequate bearing capacity. The ratio can be determined from laboratory testing of RAP aggregate blends using the CBR test method, a similar test or previous experience. The bearing capacity decreases with increasing RAP content. Conventional pavement structural design procedures can be employed for granular roadbases containing recycled unbound materials. Recycled materials can be used in roadbases for a design traffic load not exceeding 3 million equivalent standard axles. Recommended Constituents for recycled unbound materials equivalent to GB1,B, GB2 and GB3 type roadbase materials; a recycled material blend with limits of constituents (percentage by mass) more than or equal to 70% recycled material. Where the maximum limit of the constituents in the recycled material are (percentage by mass): 100% recycled unbound granular materials, 100% RCA, 20% RAP or 30% asphalt coated aggregates. The recommended constituents of recycled unbound materials equivalent to roadbase materials GB1,B, GB2 and GB3 can be any of the following: • A blend in which at least 70% (by mass) of the material is recycled and the rest is either natural gravel or crushed rock; • 100% recycled unbound granular materials; • 100% RCA; • A maximum of 20% (by mass) RAP, with the rest either natural gravel, crushed rock or other recycled material; • A maximum of 30% (by mass) asphalt-coated aggregates, with the rest either natural gravel, crushed rock or other recycled material. Component property requirements for recycled material for bases may be further specified as follows: • Coarse component properties for recycled materials in use in the sub-bases: the Flakiness Index shall be ≤ 30%. • Fines component properties for recycled materials in use as GB1,B and GB2 roadbases: the Liquid Limit (LL) shall be ≤ 30% and Linear Shrinkage (LS) 1.0 - 3.5%; for recycled materials in use as GB3 roadbases: the Liquid Limit (LL) shall be ≤ 35% and Linear Shrinkage (LS) 1.5 - 4.5%. • The California Bearing Ratio (four days soaked) requirements: ≥ 80 for recycled materials in use as GB1,B and GB2 roadbases, and ≥ 65 for recycled materials in use as GB3 roadbases. • Where the recycled material is to be in direct contact with galvanised or aluminium components, the pH value of the recycled material blend shall have a maximum value of 11. Alternatively, the components shall be adequately protected to avoid contact with the material, to the satisfaction of the project engineer. RAP can be used as a roadbase if its particle size distribution (or grading) meets the specifications for grading and density that are normally applied to conventional unbound roadbase materials. 4 3 2 1Unbound Pavement Materials 35 4.5 Key Points 1. Unbound materials include both granular and modified granular materials in which modification is through the addition of small amounts of stabilising agents (e.g. lime, cement or other stabilising agent) to enhance properties (e.g. high plasticity) without causing a significant increase in tensile capacity from hydraulic bonding (i.e. producing a bound material). 2. Selection of the appropriate unbound material for use in road pavements is governed by the strength (measured by CBR or Resilient Modulus), plasticity and particle size distribution of the material. 3. For crushed rock and coarse granular materials, the bulk strength is usually not measured, provided that the particle strength, particle size distribution and plasticity characteristics are measured. 4. This chapter is arranged as 'modules' with each pavement layer given a section with materials specifications that apply to that layer. 5. Materials classes and a brief description of the materials is provided in Table 4-1. They can be obtained from fresh quarried and crushed rock, weathered hard rock, natural gravels, soils, recycled concrete aggregates (RCA) and recycled asphalt pavements (RAP). 6. In many circumstances, the requirements of a capping are governed by its ability to support construction traffic without excessive deformation or ravelling. A good quality capping is therefore required where loading or climatic conditions during construction are severe. 7. Sub-base materials include weathered hard rock, natural gravels (e.g. laterites, ferricretes, calcretes, siltcretes, etc) and recycled materials. In this Road Note they are labelled GS1 and GS2. The specifications are presented in Table 4-2, Table 4-3, Table 4-4 and Table 4-5. To enhance climate resilience, GS1 should be used instead of GS2. 8. Roadbase materials include fresh quarried and crushed rock, crushed weathered hard rock, processed gravels/stones and recycled materials. In this Road Note they are labelled GB1-A, GB1-B, GB2 and GB3. The specifications are presented in Table 4-6, Table 4-7 and Table 4-8. The materials can be uniformly graded or gap-graded (Macadam, and large aggregate bases). For low volume roads, natural gravels (e.g. laterites, calcretes, siltcretes, etc.) are suitable for use in the roadbase (G45 and G60 – see Chapter 9, Chart F). 9. For basic igneous rocks, rapid degradation in service can occur. They have to be subjected to several durability tests (see COTO, 2020, Table A4.1.5-15). 10. Specifications for unbound materials can be adjusted on site at the discretion of the supervising engineer, upon consent of the responsible road agency, based on local experience with the prior use of these materials in similar conditions. The Plasticity Modulus, in particular, can be used in place of Plasticity Index. This is presented in Section 4.3.2. 11. For mechanistic empirical design, the resilient modulus of the materials is required. These are presented in Appendix B. Hydraulically Bound Materials 36 5 4 3 2 1 5 Hydraulically Bound Materials 5.1 Introduction and Scope This chapter provides guidance on the use of hydraulically bound materials (HBM) in the roadbase, sub-base, capping and selected fill layers of pavements. HBM normally comprise an aggregate or soil, water and a hydraulic binder such as cement, lime, fly ash, granulated slag, pozzolans, or combinations thereof, which stabilises the material. The stabilising process involves the addition of a stabilising agent to the soil, intimate mixing with sufficient water to achieve the optimum moisture content, compaction of the mixture and final curing to ensure that the strength potential is realised. Many natural materials can be stabilised to make them suitable for road pavements, but this process is only economical when the cost of overcoming a deficiency in one material is less than the cost of importing another material that is satisfactory without stabilisation. It should be noted that stabilisation agents (lime, cement, ground-granulated blast furnace slag, pulverised fly ash) may be used to improve the plasticity of granular materials, or the subgrade without significant strength improvement. The material still retains its granular behaviour in such cases and thus should retain its classification as an unbound material. However, for purposes of differentiation, they may be referred to as hydraulically-improved materials or lightly-bound materials. Stabilisation can enhance the properties and performance of road materials and pavement layers in the following ways: • In the subgrade and formation layers, stabilisation has shown improved material properties for subgrade CBR and modulus, and shear strength, which has resulted in improved constructability and reduced heave and shrinkage. • For granular stabilised materials, increased CBR (> 30%) are obtained with improved pavement modulus, shear strength and resistance to aggregate breakdown. • After curing, modified materials show improved pavement layer modulus, reduced sensitivity to loss of strength arising from increasing moisture content, and improved long-term rut resistance. The improvement in rut resistance is greater for lightly bound cemented materials. • Bound cemented materials have shown increased UCS (> 2 MPa) and increased pavement modulus. Associated with these desirable qualities are several possible problems: • Traffic, thermal and shrinkage stresses can cause stabilised layers to crack; • Cracks can progress through the surfacing and allow water to enter the pavement structure; • At low binder contents, pavement layers may be subject to erosion where cracks are present; • If carbon dioxide has access to the material, the stabilisation reactions are reversible and the strength of the layers can decrease due to carbonation; • Construction operations require more skill and control than for the equivalent unstabilised material. Methods for dealing with these problems are outlined in Section 5.10. The minimum acceptable strength of a stabilised material depends on its position in the pavement structure and the level of traffic. It must be sufficiently strong to resist traffic stresses, but upper limits of strength are usually set to minimise the risk of reflection cracking. 5.2 Stabilisation Binders The binders commonly used in road stabilisation include: • Lime; • Cement; • Ground Granulated Blast Furnace Slag (GGBFS); • Pulverised fly ash; • Lime combined with cement; • Lime or cement combined with Ground Granulated Blast Furnace Slag (GGBFS); • Lime or cement combined with fly ash; • Hydraulic road binders; • Foamed bitumen stabilisation. For guidance on this refer to SABITA (2020), Asphalt Academy (2009), Ramanujan, Jones & Janosevic (2009), Jenkins & Ebels (2007) and CSIR Transportek (1998). • There are now many non-conventional binders in existence and in development (mostly proprietary); examples of this are nano-silanes and compaction agents. These should be evaluated for specific materials and sites through trial sections and should be proven to perform better than, or as well as, conventional stabilisers or neat materials before they are used. Their use should also be economically viable. Hydraulically Bound Materials 37 5 4 3 2 1 5.3 Selection of Type of Treatment The selection of stabiliser is based on the plasticity and particle size distribution of the material to be treated. The steps involved in selecting suitable binders involve: 1. Conducting material classification tests to determine the particle size distribution and Atterberg limits of the material. 2. Choosing suitable stabiliser options; the appropriate stabiliser can be selected according to the criteria shown in Table 5-1 (on page 38). 3. Determining the amount of stabiliser; this may require checking with local suppliers or manufacturers. 4. Conducting a cost analysis of the viable alternatives, to guide the final choice of stabiliser to be used. The quality of the material to be stabilised should meet the minimum standards set out in Table 5-2. Stabilised layers constructed from these materials are more likely to perform satisfactorily, even if they are affected by carbonation during their lifetime (Section 5.10.3). Materials that do not comply with Table 5-2 can sometimes be stabilised, but more additive will be required and the cost and risk from cracking and carbonation will increase. Some aspects of construction must also be considered when selecting the stabiliser. It is not always possible to divert traffic during construction and the work must then be carried out in half-widths. The rate of gain of strength in the pavement layer may sometimes need to be rapid so that traffic can be routed over the completed pavement as soon as possible. Under these circumstances, cement stabilisation, with a faster curing period, is likely to be more suitable than lime stabilisation. BS test sieve (mm) Percentage by mass of total aggregate passing test sieve CB1 (UCS 3.0- 6.0 MPa) CB2 (UCS 1.5- 3.0 MPa) CS (UCS 0.75- 1.5 MPa) For roadbase For roadbase For sub-base 53 100 100 37.5 85-100 80-100 20 60-90 55-90 5 30-65 25-65 2 20-50 15-50 0.425 10-30 10-30 0.075 5-15 5-15 Maximum allowable value Liquid limit 25 30 - Plastic index 6 10 20 Linear shrinkage 3 5 - Table 5-2: Desirable properties of materials before stabilisation Note: It is recommended that materials should have a coefficient of uniformity of 5 or more. Hydraulically Bound Materials 38 5 4 3 2 1 AASHTO Soil Class USCS Soil Class Type of stabilising additive recommended Restriction on LL and PI of soil Restriction on % passing No. 200 sieve Remarks A-1 or A-3 SW or SP 1. Bituminous 2. Portland Cement 3. Lime-cement-fly ash PI not to exceed 25 A-2 or A-3 SW-SM or SP-SM or SW-SC or SP-SC 1. Bituminous PI not to exceed 10 2. Portland Cement PI not to exceed 30 3. Lime PI not to exceed 12 4. Lime-cement-fly ash PI not to exceed 25 A-2 SM or SC or SM-SC 1. Bituminous PI not to exceed 10 Not to exceed 30% by weight 2. Portland Cement ...a 3. Lime PI not less than 12 4. Lime-cement-fly ash PI not to exceed 25 A-1 GW or GP 1. Bituminous Well graded material only 2. Portland Cement Material should contain at least 45% by weight passing No. 4 sieve 3. Lime PI not to exceed 25 A-1 GW-GM or GP-GM or GW-GC or GP-GC 1. Bituminous PI not to exceed 10 Well graded material only 2. Portland Cement PI not to exceed 30 Material should contain at least 45% by weight passing No. 4 sieve 3. Lime PI not to exceed 12 4. Lime-cement-fly ash PI not to exceed 25 A-1 or A-2 GM or GC or GM-GC 1. Bituminous PI not to exceed 10 Not to exceed 30% by weight Well graded material only 2. Portland Cement Material should contain at least 45% by weight passing No. 4 sieve 3. Lime PI not less than 12 4. Lime-cement-fly ash PI not to exceed 25 A-3 or A-4 SP or SPSM or SPSC or GP or GP-GM or GP-GC 1. Granular PI ≤ 10 or PI ≤ 6 and PI x% passing No. 200 sieve ≤ 60 A-6 or A-7 CH or CL or MH or ML or OH or OL or ML-CL 1. Portland Cement LL < 40 and PI < 20 Organic and strongly acid soils falling within this area are not susceptible to stabilisation by ordinary means 2. Lime PI not less than 12 Table 5-1: Guide to the type of stabilisation likely to be effective Source: Modified after Kestler (2009) PI ≤ 20 + 50-percent passing No. 200 sieve 4 Note a: Equation 5-1 Hydraulically Bound Materials 39 5 4 3 2 1 5.4 Cement Stabilisation Soil cement stabilisation comprises cement-modified soils (CMS), cement-stabilised subgrades (CSS) and cementtreated base (CTB), with increasing cement content. CMS is a mixture of in situ soil, water and a small proportion of cement, resulting in an unbound or slightly bound material with improved engineering properties. These properties include reducing the plasticity and shrink/swell potential of unstable, highly plastic, wet or expansive soils and increasing the bearing capacity. CSS is a mixture of in situ soil, water and a moderate proportion of Portland Cement that produces a semi-bound to bound material. CSS not only provides all of the benefits of CMS, but also substantially increases soil stiffness and strength to the point where the treatment provides structural benefits for the pavement. Cement-treated base is a mixture of soil/aggregate, water and sufficient Portland Cement to form a fully bound material that meets project-specific requirements for minimum durability and strength. 5.4.1 Cement Stabilisation Mix Design Process The mix design process for cement-stabilised mixes includes the following steps: 1. Determining the soil condition. Natural moisture content and soil classification tests will have to be conducted to determine the Atterberg limits and particle size distribution. The American Association of State Highway and Transportation Officials (AASHTO) soil classification system and the Unified Soil Classification System (USCS) are two of the most commonly-used classification systems. 2. Determining the cement type and estimated dosage rate. Samples will have to be prepared with three different cement contents. 3. Determining chemical compatibility (if necessary). This involves conducting other tests for soil pH, organic content (especially for clay soils) and sulphate content. • Low-pH material can reduce the effect of cement stabilisation in CSS mixtures. If the existing soil has a pH of 5.3 or less (Robbins & Mueller, 1960), the soil may not react normally with cement. Cement can, however, still be used to neutralise the soil and raise the pH level. • Organic content of 20,000 ppm (2.0%) or more (Robbins & Mueller, 1960) can prevent a cementstabilised mixture from hardening and may require that a higher cement content be added to the soil for stabilisation. • Sulphate-rich soils react with cement (a calciumbased additive) to cause heaving in the treated soil and hence the pavement structure. If the subgrade soil has a soluble sulphate content of less than 3,000 ppm (0.3%), sulphate-induced heave is not a problem. Higher soluble sulphate content of up to 8,000 ppm (0.8%) may be satisfactorily treated with cement. Several different cement types can be used to mitigate sulphate issues in soil. These include, according to ASTM C150, Type II (with moderate sulphate resistance) and Type V (with high sulphate resistance); according to ASTM C595, these include blended hydraulic cements of Type MS (moderate sulphate resistance) and Type HS (high sulphate resistance). Additional testing should be conducted to confirm that sulphate-induced heave will not be an issue. • Limiting values of swelling due to the presence of sulphates are defined through swelling measured in accordance with BS EN 13286-47 for CBR and swelling. 4. Determining the Atterberg limits (shrinkage limit, plastic limit and liquid limit) of the three different cement content samples. 5. Determining optimum moisture content and maximum dry density of the three different cement content samples. 6. Determining unconfined compressive strength (optional for CMS) at three and seven days. 7. Verifying the required (mix design) cement content. 5.4.2 Selection of Cement Content The cement content determines whether the characteristics of the mixture are dominated by the properties of the original soil or by the hydration products. As the proportion of cement in the mixture increases, so the strength increases. Strength also increases rapidly with time during the first one or two days after construction. Thereafter, the rate slows down, although strength gain continues provided the layer is well cured. The choice of cement content depends on the strength required, the durability of the mixture and the soundness of the aggregate. The minimum cement content, expressed as a percentage of the dry weight of soil, should exceed the quantity consumed in the initial ion exchange reactions. Until research into the initial consumption of cement (ICC) is completed, it is recommended that the percentage of cement added should be equal to, or greater than, the ICL (which identifies the amount of stabiliser needed to bring the pH of the treated material above 12.4, to stop the secondary minerals in the sample from weathering further and reducing the strength of the treated material. If there is any possibility that the material to be stabilised is unsound, (e.g. weathered basic igneous materials), then the Gravel ICL Test (NITRR, 1984) is preferred. In this test, the aggregate is ground to release any active clay minerals and the total sample tested. The durability of the stabilised mixture that satisfies the strength requirements for the particular layer should also be assessed. Mixtures produced from sound materials complying with the minimum requirements of Table 5-2 can be assumed to be durable if they achieve the design strength. Mixtures produced from other materials should be checked using the wet-dry brushing test (ASTM D559), Hydraulically Bound Materials 40 5 4 3 2 1 which gives a good indication of the likelihood that a stabilised material will retain adequate strength during its service life in a pavement (Paige-Green et al., 1990). Additional stabiliser, over and above that determined through the ICL test, is normally incorporated to take account of the variability in mixing that occurs on site. If good control is exercised over construction operations, an extra 1% of stabiliser is satisfactory for this purpose. 5.4.3 Preparation of Specimens The optimum moisture content and the maximum dry density for mixtures of soil plus stabiliser are determined according to BS 1924 for additions of 2, 4, 6 and 8% of cement. These specimens should be compacted as soon as the mixing is completed. Delays of the order of two hours occur in practice and changes taking place within the mixed material result in changes in their compaction characteristics. To determine the sensitivity of the stabilised materials to delays in compaction, another set of tests must be conducted after two hours have elapsed since the completion of mixing. Samples for the strength tests should also be mixed and left for two hours before being compacted into 150 mm cubes at 97% of the maximum dry density obtained, after a similar two-hour delay, according to the British Standard (Heavy) Compaction Test, 4.5 kg rammer. These samples are then moist cured for seven days and soaked for seven days, in accordance with BS 1924. Two methods of moist curing are described in the Standard. The preferred method is to seal the specimens in wax but, if this is not possible, they must be wrapped in cling film and sealed in plastic bags. The specimens should be maintained at 25°C during the whole curing and soaking period. When the soaking phase is complete, the samples are crushed, their strengths are measured and an estimate is made of the cement content needed to achieve the target strength. These have been provided in Table 5-2 for CB1, CB2 and CS. If suitable moulds are not available to produce cube specimens, then 200 mm x 100 mm cylinders, 115.5 mm x 105 mm cylinders or 127 mm x 152 mm cylinders may be used, with the results multiplied by the conversion factors shown in Table 5-3, to calculate equivalent cube strengths. Table 5-3: Conversion factors for cylinder strengths Sample Type Correction Factor 200 mm x 100 mm diameter 1.25 115.5 mm x 105 mm diameter 1.04 127 mm x 152 mm diameter 0.96 As an alternative, the strength of stabilised sub-base material may be measured by the CBR test, if the stabilisation is to improve an unmodified material to meet the specifications of an unbound material. Whatever the case, the minimum quantity of stabiliser to be used should result in a material with pH greater than 12.4 to minimise the risk of strength reduction due to carbonation. When the plasticity of the soil makes it difficult to pulverise and mix intimately with the cement, its workability can be improved by first pre-treating the soil with 2 to 3% of lime, lightly compacting the mixture and leaving it to stand for 24 hours. The material is then repulverised and stabilised with cement. If this method is used, the laboratory design procedure is modified to include the pre-treatment phase before testing, as described above. The high cost of double treatment typically makes this procedure prohibitively expensive and would only be used as a last resort when other alternatives (design or material) have been fully evaluated and compared. 5.5 Lime Stabilisation 5.5.1 Types of Lime Lime is divided into two types: calcium lime, which consists mainly of calcium oxide (CaO) and/or calcium hydroxide (Ca(OH)2), and dolomitic lime, which consists mainly of calcium magnesium oxide (CaO.MgO) and/or calcium magnesium hydroxide (Ca(OH)2 MgO). Lime is usually in the form of quicklime (oxide form) or hydrated lime (hydroxide form). Quicklime has a much higher bulk density than hydrated lime and it can be produced in various aggregate sizes. It is less dusty than hydrated lime, but the dust is much more dangerous as it causes severe irritation when inhaled or comes into contact with moist skin or eyes and as such requires strict safety precautions are necessary when it is used. The most common form of commercial lime used in lime stabilisation is hydrated calcium lime. BS EN 459-1:2015 requires the minimum available lime, which is defined as calcium oxide (for quick lime) and calcium hydroxide (for hydrated lime), that is not combined with other constituents, to be 80, 65 and 55 for CL 90, CL 80 and CL 70 types of calcium lime, respectively. Quicklime is an excellent stabiliser if the material is very wet. When quicklime comes into contact with wet soil, it absorbs a large amount of water as it hydrates. This process is exothermic and the heat produced acts as a further drying agent for the soil. The removal of water and the increase in plastic limit cause a substantial and rapid increase in the strength and trafficability of the wet material. In many parts of the world, lime has been produced on a small scale for many hundreds of years to make mortars and lime washes for buildings. Different types of kilns have been used and most appear to be relatively effective. Trials have been carried out by TRRL in Ghana (Elks, 1974) to determine the output possible from small kilns and to assess the suitability of lime produced without commercial process control for soil stabilisation. Small batch kilns have subsequently been used to produce lime for stabilised layers on major road projects. Hydraulically Bound Materials 41 5 4 3 2 1 5.5.2 Lime Stabilisation Mix Design Process The lime stabilisation mix design process follows the following steps: 1. Evaluating material soil characteristics, such as particle size distribution and plasticity index, to gain a general understanding of its suitability for lime stabilisation. 2. Perhaps conducting other tests to determine organics content and sulphates. • Soils with organic content greater than 1 to 2%, by weight, may not achieve the required UCS for lime stabilised soils. • Soils containing less than 0.3% soluble sulphates can be successfully stabilised using lime, but a minimum of 24 hours of mellowing (period of time between mixing and compaction) is recommended, while soils with soluble sulphates of 0.3 to 0.8% require mellowing and additional moisture to reduce the sulphate content to acceptable levels (< 0.3%). The mellowing time and additional moisture are determined in the laboratory on representative samples for particular levels of lime content. It is recommended that the moisture content and lime content that correspond to the least mellowing time be used. Mellowing time reduces with increased moisture content. An effort should be made, therefore, to optimise mellowing time with the time required for drying the soil, to attain optimum moisture content for compaction. It is recommended that site trials are conducted to validate the laboratory mix design. For soils with sulphate content above 0.8%, where no treatment is not an option, replacement or blending the soil with granular material is recommended. 3. Determining the minimum amount of lime (ICL) required for stabilisation. Following the test procedure in BS 1924-2 or ASTM D6276 (2019), this shall correspond to the lowest percentage of lime in soil that produces a laboratory pH of 12.4 4. Determining the optimum moisture content and maximum dry density of the lime-treated sample. When using quicklime, it is recommended that sample be stored for 20-24 hours, to ensure hydration. 5. Determining the unconfined compressive strength, to evaluate the lime-stabilised soil strength for long-term durability within its exposure environment, with special attention paid to extended soaking. If the soils to be stabilised are expansive, they should be evaluated using capillary soaking and expansion measurements. 5.5.3 Selection of Lime Content The procedure for selecting the lime content follows the steps used for selecting cement content and should, therefore, be carried out in accordance with BS 1924. The curing period for lime-stabilised materials is 21 days of moist cure, followed by seven days of soaking. There is also an optimum lime content (OLC) at which the lime percentage versus strength curves for a given soil and curing conditions peak. The OLC is dependent on the soil type, the curing period and the lime type (Thompson, 1967). In tropical and sub-tropical countries, the temperature of the samples should be maintained at 25°C, which is near to the ambient temperature. Accelerated curing at higher temperatures is not recommended, because the correlation with normal curing at temperatures near to the ambient temperature can differ from soil to soil. At high temperatures, the reaction products formed by lime and the reactive silica in the soil can be completely different from those formed at ambient temperatures. 5.6 Properties Of Lime-Stabilised Materials Lime has the effect of soil drying, soil modification and soil stabilisation when added to soil. Lime stabilisation occurs when lime reacts with clay minerals to produce long-term strength and a permanent reduction in shrinking, swelling and soil plasticity, as well as resistance to volume change during prolonged soaking. Lime-stabilised soils experience both drying and modification. When lime is added to a plastic material, it first flocculates the clay and substantially reduces its plasticity index. This reduction in plasticity is time dependent during the initial weeks and has the effect of increasing optimum moisture content and decreasing maximum dry density in compaction. The compaction characteristics are therefore constantly changing with time, and delays in compaction cause reductions in density and consequent reductions in strength and durability. The workability of the soil also improves as the soil becomes more friable. If the amount of lime added exceeds the ICL, the stabilised material will generally be non-plastic or only slightly plastic. Both the ion exchange reaction and the production of cementitious materials increase stability and reduce volume change within the clay fraction. It is not unusual for the swell to be reduced from 7 or 8% to 0.1% on the addition of lime. The ion exchange reaction occurs quickly and can increase the CBR of clayey materials by a factor of two or three. The production of cementitious materials can continue for ten years or more but the strength developed will be influenced by the materials and the environment. The elastic modulus behaves in a similar way to strength and continues to increase for a number of years. Between one month and two to three years, there can be a four-fold increase in the elastic modulus. Typical requirements of soil prior to treatment and calcium lime are presented in Table 5-4. Hydraulically Bound Materials 42 5 4 3 2 1 Table 5-4: Suitability criteria and requirements for soil and lime prior to treatment Component Criterion Threshold Soil Gradation If possible, < 63 mm If possible p0.063mm > 12% Plasticity index If possible, PI > 5% Content in organic substances Embankment < 4% Subgrade < 2% Sulphates and sulphurs(1) Embankment < 0.1% Subgrade < 0.25% Volumetric swelling, Gv Embankment < 10% Subgrade < 5% Quick lime - Q (ground) Fineness (degree of pulverisation) Category 1; Category 2 Content in free calcium oxide (%CaO) CL 90-Q; CL 80-Q Water reactivity test ≤ 600C within 25 minutes Hydrated lime - S (powder) CL 90-S; CL 80-S Note: (1) a total content of sulphur salts lower than 0.25% is typically acceptable for subgrade, while higher contents up to 1% require a specific study of the behaviour of the mixtures (NLA, 2004) Source: Celauro et al. (2012) 5.7 Pozzolanic Materials Pozzolanic additive is a siliceous or alumino-siliceous material that may be combined with lime or cement to form cementitious binders and include ground granulated blast furnace slag (GGBFS) and fly ash. Pozzolanic additives chemically react, at ordinary room temperatures, with calcium hydroxide released by the hydration of cement or lime, in the presence of moisture, to form compounds possessing cementitious products. 5.7.1 Soil Stabilisation with Ground Granulated Blast Furnace Slag (GGBS) Ground granulated blast furnace slag (GGBS) is a by-product of the manufacture of iron. GGBS for soil stabilisation hardens by hydraulic reaction and shall conform to BS EN 15167-1. Slag-bound granular mixtures are hydraulically bound granular mixtures whose performance relies on blast furnace and/or steel slag. The mixture may include an activator such as quick lime and hydrated lime of type CL90 or CL80, gypsum, air-cooled slag or other similar products containing lime and/or sulphate, to enhance its activity in the stabilisation process. Strength development is slower than with the mixture of lime and cement, which allows for more time for construction operations. Stabilisation with GGBS has the effect of reducing the plasticity index, increasing maximum dry density and reducing the optimum moisture content in soft soils (Al-khafaji et al., 2017; Padmaraj & Chandrakaran, 2017). GGBS is effective in the stabilisation of sulphate-rich soils to improve sulphate heave resistance, but it requires additional lime content to act as an activator. For cohesive soils, the GGBS shall be added separately after the lime. This is done so that the lime can improve the clay, making it lose its cohesion and allowing full mixing of the binder. While significant resistance can be achieved with a GGBS:lime ratio of 1:1, GGBS-lime ratio blends in the range of 3:1 to 6:1 can be considered for mix trials (Nidzdam & Kinuthia, 2010). Greatest resistance can be obtained with GGBS:lime ratios of 5:1 or higher (Higgins, 2005). 5.7.2 Soil Stabilisation with Lime Bagasse Ash In many tropical countries there are substantial quantities of bagasse (the fibrous residue from the crushing of sugar cane) and husks from rice. Both are rich in silica. When burnt, their ash contains a substantial amount of amorphous silica, which reacts with lime (Cook & Suwanvitaya, 1982; Mehta, 1979). On its own, bagasse ash is pozzolanic and requires the addition of lime to enhance the hydraulic reaction in the presence of soil and water. Combinations of bagasse ash and lime have been used to improve the properties of both expansive soils and black cotton soils (Hasan et al., 2016; Osinubi et al., 2009). The mixture of bagasse ash and lime has the effect of reducing the Atterberg limits of the soil and increasing its strength properties as measured by CBR. Consolidation characteristics of expansive soils also improve with the addition of lime and bagasse ash (Manikandan & Moganraj, 2014). It is advisable to allow for long curing periods during construction, as the strength gain increases with time. Mix ratios of 1:2 and 1:3 for lime to bagasse ash can be considered during the mix design process. As a guide, the lime content should not exceed the initial consumption of lime (ICL). The combination of bagasse and lime is more effective when the lime content is less than, or equal to, the ICL content (James & Pandian, 2018). Once the lime content has been determined, mix designs can be adjusted to determine the optimum amount of bagasse ash required. Hydraulically Bound Materials 43 5 4 3 2 1 5.7.3 Soil Stabilisation with Lime Rice-husk Ash Rice husk ash (RHA) is produced by the burning of rice husks. RHA contains a high percentage (approximately 85 to 90%) of amorphous/reactive silica (Rao, Pranav & Anusha, 2011). Because RHA is pozzolanic (due to its high silica content), a hydraulic binder such as lime must be added to form cementitious products, to improve soil strength. Mixtures of lime and rice-husk ash in the proportion 2:3 are the most stable and have the highest strength but durability may be improved by increasing the lime content to give a 1:1 mixture. It is also important to note that, for the same lime content, an increase in RHA content results in increased optimum moisture content and a decrease in maximum dry density. Lime-RHA stabilisation results in increased CBR and UCS for stabilised expansive soils. Lime and ricehusk ash mixtures gain strength quickly during the early period of curing but little additional strength is obtained after 28 days of moist curing. Long-term strength depends on the stability of the calcium silicate hydrates. Under certain conditions, lime leaching can occur so that, eventually, strength will be reduced, but the presence of excess lime (free lime) can stabilise the calcium silicate hydrate. 5.8 Hydraulic Road Binders Hydraulic road binders (HRBs) are cementitious powders made from more than 10% (by mass) Portland Cement clinker and other constituents, such as natural pozzolana, natural calcined pozzolana, limestone, siliceous fly ash, calcareous fly ash and burnt shale, among others. Additives to improve the manufacture, or the properties, of HRB may be added but these shall not exceed 1%, by mass, of the binder. HRBs are suitable for the stabilisation of roadbases, sub-bases and earthworks. HRBs have the advantage of reduced setting time, thereby providing longer working times and reduced shrinkage cracking through drying (approximately 40 – 80% less than cement), which reduces further with less cement content in the HRB (Wang, 2019). HRBs also have the potential to be more cost-effective and environmentally friendly than cement. 5.8.1 Classification of Hydraulic Road Binders HRBs are divided into normal hardening HRBs and rapid-hardening HRBs. Normal hardening hydraulic road binders are classified as N 1, N 2, N 3, and N 4 (BS EN 13282-2:2015), while rapid-hardening hydraulic road binders are classified as E 2, E 3 and E 4, with E 4 further subdivided into E 4-RS for rapid setting (BS EN 13282-1:2013). The number on each classification represents the strength class. Each class shall conform to the requirements given in Table 5-5. Table 5-6 shows the tests that are required to determine the suitability of HRBs for soil stabilisation. Table 5-5: Characteristic values of the mechanical requirements of HRB Normal-hardening hydraulic road binders Rapid-hardening hydraulic road binders Strength class Compressive strength in MPa at 56 days (BS EN 13282-2:2015) Strength class Compressive strength in MPa (BS EN 13282-1:2013) At seven days At 28 days N 1a ≥ 2.5 ≤ 22.5 E 2 ≥ 5.0 ≥ 12.5 ≤ 32.5 N 2 ≥ 12.5 ≤ 32.5 E 3 ≥ 10.0 ≥ 22.5 ≤ 42.5 N 3 ≥ 22.5 ≤ 42.5 E 4 ≥ 16.0 ≥ 32.5 ≤ 52.5 N 4 ≥ 32.5 ≤ 52.5 E 4-RS ≥ 16.0 ≥ 32.5 - Note: a – A loading rate of (400 ± 40) N/s shall be used when testing specimens of strength class N1 Table 5-6: Test standards and HRB requirements for mechanical, physical and chemical properties Property Test Standard Requirement as per BS EN 13282- 2:2015 (Normal-hardening HRBs) Requirement as per BS EN 13282- 1:2013 (Rapid-hardening HRBs) Compressive strength EN 196-1 Meet the requirements of the respective strength class as shown in Table 5-5 Fineness residue, by mass, at 90 μm (%) EN 196-6 ≤ 15 Initial setting time (min) EN 196-3 ≥ 150 ≥ 90 (E 2, E 3, E 4) ≤ 90 (E 4-RS) Soundness (expansion) (mm) EN 196-3 ≤ 30 ≤ 10 Sulphate content (%) EN 196-2 ≤ 4.0a ≤ 4.0b Note: a A sulphate content greater than 4.0% may be accepted for HRB containing burnt shale or calcareous fly ash or more than 60% (by mass) of granulated blast furnace slag. b A sulphate content of up to 7.0% (by mass) for E 4 and E 4-RS, or 9.0% for E 2 and E 3, may be accepted for HRB containing burnt shale or calcareous fly ash or more than 65% (by mass) of granulated blast furnace slag. Hydraulically Bound Materials 44 5 4 3 2 1 5.8.2 Mix Design Process HRBs are industrially produced and supplied ready for use in road works. Most HRBs manufactured by cement companies are rapid-hardening. HRB bound mixtures comprise aggregates, HRB binder and water. Retarders are also used sometimes, as an additive. The mix design process follows the same steps as in cement stabilisation. The mixture, however, needs to be selected from four types: • HRB bound granular mixture 1. A 0/31,5 mm mixture with a grading determined in accordance with EN 933-1; • HRB bound granular mixture 2. A granular mixture with minimum compacity requirement of 80% at the maximum modified Proctor dry density and three subtypes, depending on the aggregate size (2-0/20, 2-0/14, 2-0/10); • HRB bound granular mixture 3. A granular mixture with a maximum nominal size of D equal to, or less than, 6.3 mm with an immediate bearing index (IBI) requirement; • HRB bound granular mixture 4. A mixture where the grading, including upper and lower limits, determined in accordance with EN 933-1, is declared by the supplier. The selected mixture shall conform to the requirements of BS EN 14227-5. It is also recommended that the proportioning of the constituents in the laboratory mixture, including water content, expressed as a percentage, by dry mass, of the total dry mass of the mixture, and the dry density of the mixture, be declared 5.9 Specification Guidance For Treated Soils Specifications for hydraulically bound mixtures may provide requirements for fresh mixtures, mechanical performance and resistance to water. The specific values for each requirement are provided in BS EN 14227-15; a summary of the requirements is provided below: • The specifications for water content, degree of pulverisation, IBI, moisture condition value and the workability period of fresh mixtures of hydraulically bound mixtures need to conform to the requirements of BS EN 14227-15; • The mechanical performance of the hydraulically bound mixture may be classified by one of the following methods based on laboratory test results: • California Bearing Ratio (CBR), determined in accordance with BS EN 13286-47 and a surcharge of 4.5kg • Compressive strength, Rc, determined in accordance with BS EN 13286-41 • A combination of tensile strength, Rt, and the modulus of elasticity, E • Resistance to water specifications include requirements for strength after immersion in water, linear swelling after soaking in water and volumetric swelling after immersion in water. • The following requirements for cohesive soils obtained from Britpave (2004) may also be used as a guide and can be adjusted, as appropriate, for each contract: • A compressive strength of 0.5 to 1.5 MPa can be specified for the performance of test specimens. • A target stiffness of 1,000 to 2,000 MPa, measured using the Nottingham Asphalt Tester (NAT), can be specified, but it is recommended that a design stiffness of 500 MPa be used for pavement design of treated cohesive soils or other fine-grained materials (TRL Report 408, 1999). • The trafficability of fine- and medium-grained mixtures can be quickly assessed using the Immediate Bearing Index (IBI), which is dependent on the material properties of the treated soil. The IBI therefore should be site- and material-specific. The IBI test is a CBR test conducted immediately after sample preparation on only the bottom of the CBR specimen, without surcharging. • For a treated clay mixture, the IBI is determined on samples compacted into CBR moulds, using standard compactive effort and with optimum moisture content • For treated sand mixtures, the IBI is determined on samples compacted into CBR moulds, using modified compactive effort and with optimum moisture content Indicative values for IBI values to be attained before a road is opened to traffic are presented in Table 5-7. These figures should be used in the context of the thickness of the layer provided and ground conditions. Table 5-7: Indicative Immediate Bearing Index (IBI) values Soil before treatment IBI value Soil with > 35% exceeding 63 microns and plasticity index > 12 10 Soil with > 35% exceeding 63 microns and plasticity index < 12 15 Soil with 12 - 35% exceeding 63 microns 25 Soil with < 12% exceeding 63 microns 35 Natural sands and gravel sand mixtures or similar 50 Source: Britpave, 2004 Hydraulically Bound Materials 45 5 4 3 2 1 5.10 Construction 5.10.1 General Methodology The construction of stabilised layers follows the same procedure, whether the stabilising agent is cement, lime, mixtures of lime-pozzolan or hydraulic road binders. After the surface of the layer has been shaped, the stabiliser is spread and then mixed through the layer. Sufficient water is added to meet the compaction requirements and the material is mixed again. The layer must be compacted as soon as possible, trimmed, re-rolled and then cured. It may be necessary to construct the layer of treated soil 0.5 m wider and provide water proofing where necessary (SETRA, 2007). The effect of each operation on the design and performance of the pavement is discussed below. Spreading the stabiliser. The stabiliser can be spread manually by 'spotting' bags (usually 50 kg each) at predetermined intervals, breaking the bags and then raking the stabiliser across the surface as uniformly as possible. Lime has a much lower bulk density than cement and it is possible to achieve a more uniform distribution with lime when stabilisers are spread manually. Alternatively, mechanical spreaders can be used to distribute the required amount of stabiliser onto the surface. Mixing. Robust mixing equipment, of suitable power for the pavement layer being processed, should be capable of pulverising the soil and blending it with the stabiliser and water. The most efficient of these machines carry out the operation in one pass, enabling the layer to be compacted quickly and minimising the loss of density and strength caused by any delay in compaction. Multi-pass machines are satisfactory, provided the length of pavement being processed is not excessive and each section of pavement can be processed within an acceptable time. Graders have been used to mix stabilised materials, but they are inefficient when pulverising cohesive materials and a considerable number of passes are needed before the quality of mixing is acceptable. They are therefore very slow and should only be considered for processing limestabilised layers, because of the greater workability of limestabilised materials and the subsequent diffusion of lime through the soil aggregations (Stocker, 1972). Plant pre-mixing enables better control than in-place spreading and mixing, provided the plant is close enough to the site to overcome possible problems caused by delays in delivery. This can often be justified by the lower safety margins on stabiliser content and target layer thicknesses that are possible. Compaction. A stabilised layer must be compacted as soon as possible after mixing has been completed, so that the full strength potential can be realised and the density can be achieved without over stressing the material. If the layer is overstressed, shear planes will be formed near the top of the layer and premature failure along this plane is likely, particularly when the layer is only covered by a surface dressing. Multilayer construction. When two or more lifts are required to construct a thick layer of stabilised material, care must be taken to prevent carbonation at the surface of the bottom lift. It is also important that the stabiliser is mixed to the full depth of each layer. A weak band of any type can cause over stressing and premature failure of the top lift, followed by deterioration of the lower section. In general, the thickness of a lift should not be greater than 200 mm or less than 100 mm. Care should be taken to reduce the density gradient in the layer, because permeable material in the lower part of the layer makes it more susceptible to carbonation from below. If necessary, a layer should be compacted in two parts to make the bottom less permeable. The compaction operation should be completed within two hours and the length of road that is processed at any time should be adjusted to allow this to be achieved. Curing. Proper curing is very important, for the following reasons: • It ensures that sufficient moisture is retained in the layer for the stabiliser to continue to hydrate; • It reduces shrinkage; • It reduces the risk of carbonation from the top of the layer. In a hot and dry climate, the need for good curing is very important but the prevention of moisture loss is difficult. If the surface is sprayed constantly and kept damp day and night, the moisture content in the main portion of the layer will remain stable but the operation is likely to leach stabiliser from the top portion of the layer. If the spraying operation is intermittent and the surface dries from time to time (a common occurrence when this method is used), curing will be completely ineffective. Spraying can be a much more efficient curing system if a layer of sand 30 to 40 mm thick is first spread on top of the stabilised layer. If this is done the number of spraying cycles per day can be reduced and there is a considerable saving in the amount of water used. After seven days, the sand should be brushed off and the surface primed with a lowviscosity cutback bitumen. An alternative method of curing is to first apply a very light spray of water, followed by either a viscous cutback bitumen, such as MC 3000, or a slow-setting emulsion. Neither of these will completely penetrate the surface of the stabilised layer and both will leave a continuous bitumen film to act as a curing membrane. It is essential that all traffic is kept off the membrane for seven days. After this time, any excess bitumen can be absorbed by sanding the surface. A prime coat, such as MC-30, cannot serve as a curing membrane. Research has shown that prime coats penetrate too far into the layer and insufficient bitumen is retained on the surface to provide the necessary continuous film (Bofinger et al., 1978). Hydraulically Bound Materials 46 5 4 3 2 1 5.10.2 Control of Shrinkage and Reflection Cracks Shrinkage, particularly in cement-stabilised materials, has been shown (PCA, 2003; Bofinger et al., 1978) to be influenced by the following: • Rapid loss of moisture, particularly during the initial curing period. Proper curing is essential not only for maintaining the hydration action, but also to reduce volume changes within the layer. The longer the initial period of moist cure, the smaller the shrinkage when the layer subsequently dries. • Pre-treatment moisture content of the material to be stabilised. Moisture content above the OMC subjects the material to more drying and thus provides greater potential for shrinkage. • Use of soils with a high percentage of clay. Clays such as montmorillonite have a large surface area relative to their weight and thus have a high OMC. • Cement content. Excessive amounts of cement consume more water during the hydration process, which in turn increases drying shrinkage and increases the rigidity and tensile strength of cement-stabilised materials. When the layer eventually dries, the increased strength associated with a high stabiliser content will cause the shrinkage cracks to form at an increased spacing and have a substantial width. The width and spacing of cracks are dependent on the shrinkage stress generated in the cement matrix and the restraint provided by the surrounding. With a lower cement content, the shrinkage cracks occur at a reduced spacing and the material will crack more readily under traffic because of its reduced strength. Shrinkage cracks tend to follow the same pattern as the cracks in the base and are referred to as 'reflection cracks'. The probability of these finer cracks reflecting through the surfacing is reduced at lower cement content, but the stabilised layer itself will be both weaker and less durable. • Density of the compacted material. Poorly compacted materials have high void ratios, with more unrestricted space to undergo movement, which results in greater shrinkage and wider cracks. To maximise both the strength and durability of the pavement layer, the material is generally compacted to the maximum density possible. For some stabilised materials, however, it is sometimes difficult to achieve normal compaction standards. Furthermore, any increase in compactive effort to achieve these standards may have the adverse effect of causing shear planes in the surface of the layer or increasing the subsequent shrinkage of the material as its density is increased. If it proves difficult to achieve the target density, a higher stabiliser content should be considered so that an adequately strong and durable layer can be produced at a lower density. • Method of compaction. Laboratory tests have shown that samples compacted by impact loading shrink considerably more than those compacted by static loading or by kneading compaction. Where reflection cracking is likely to be a problem, it is recommended that the layer should be compacted with pneumatic tyred rollers rather than vibrating types. There is no simple method of preventing shrinkage cracks occurring in stabilised layers but design and construction techniques can be adopted that go some way to alleviating the problem. These may include the following: • Good quality control and ensuring proper construction techniques, such as the use of appropriate cement and moisture contents, thorough mixing and adequate compaction and curing. It is also recommended that the stabilisation process is completed within two hours of mixing, to ensure that final compaction is achieved before cement hydration is completed (PCA, 2003). • Cement-treated materials may be compacted at, or slightly below (2%), of the optimum moisture content. • Soils with a high clay percentage may be blended with granular materials where the cost allows for it. Otherwise, effective quality control, especially of the optimum moisture content, needs to be implemented during construction. • Shrinkage problems in plastic gravels can be substantially reduced if air-dry gravel is used and the whole construction process is completed within two hours, with water being added as late as possible during the mixing operation. It is generally not possible to use gravel in a completely air-dry condition, but the lower the initial moisture content and the quicker it is mixed and compacted, the smaller will be the subsequent shrinkage strains. • Admixtures such as shrinkage-compensated cement, gypsum, water reducers, fly ash and ground granulated blast-furnace slag may be used. Admixtures often reduce water demand, aid in the mixing process, extend mixing time and, for many granular soils, provide a filler material that can effectively reduce the need for excess cement. • Curing the surface of the cement-treated layer must continue until a permanent moisture barrier is in place. The moisture barrier can be a curing compound, a bituminous emulsion prime coat or even a chip seal. Hydraulically Bound Materials 47 5 4 3 2 1 5.10.2 Control of Shrinkage and Reflection Cracks Some shrinkage cracks are inevitable in the stabilised layer, and cracks in the base layer can result in stress concentrations and cracking in the bituminous surfacing. These tend to follow the same pattern as the cracks in the base and are referred to as 'reflection' cracks. Reflection cracks can be confirmed through coring or through visual evidence of cracks in the same location in the base and bituminous surfacing. During construction, the occurrence of reflection cracks can be reduced by the following means: • Providing a stress relief layer in the pavement structure. This could be accomplished using: • a bituminous surface treatment (chip seal) between the stabilised base and the surface, • a geotextile fabric between the stabilised base and the surface, or between the asphalt binder and surface courses, or; • a 50 to 100 mm layer of unbound granular material between the stabilised base layer and the asphalt surface. • The most effective method is to cover the cemented layer with a substantial thickness of granular material. This is the design philosophy illustrated in Charts numbered A2, C2, and D in Chapter 9. When cemented material is used as a roadbase (Chart A3), a flexible surfacing such as a double surface dressing is recommended. • Delaying paving for as long as practicable (14 - 28 days) following the placing of the prime coat, to allow more time for any shrinkage cracks to develop. This can result in fewer and/or thinner cracks in the bituminous surfacing, as the asphalt will tend to bridge the cracks already formed. • Inducing cracking in the pavement by applying loading to the soil-cement (using several passes of a vibrating roller) one to two days after final compaction. This introduces a network of closely spaced hairline cracks into the cement-treated material, which relieves shrinkage stresses early in its life and provides a crack pattern that will minimise the development of wide shrinkage cracks. This could increase the possibility of carbon dioxide affecting the base through carbonation, with a consequent reduction in strength. • If reflection cracks still appear after construction, those of less than 3 mm are likely not to have an impact on low to medium volume roads. Reflection cracks on high volume roads, and cracks wider than 6 mm, affect pavement performance and require treatment. Regular sealing of these cracks tends to reduce their adverse effects but their regular sealing will increase road maintenance cost; it will also look unattractive and affect the ride quality of the surface. Experience in several countries has shown that a further surface dressing applied after two to three years can partially or completely seal any subsequent cracking, particularly where lime is the stabilising agent. 5.10.3 Carbonation If cement or lime-stabilised materials are exposed to air, hydration products may react with carbon dioxide to reduce the strength of the material by an average of 40% of the unconfined compressive strength (Paige-Green et al., 1990). It should, however, be noted that if the material had strength well above the design requirement, this reduction in strength will still leave the material above the specification requirement. This reaction is associated with a decrease in the pH of the material from more than 12 to about 8.5. The presence and depth of carbonation can be detected by testing the pH of the stabilised layer with phenolphthalein indicator and checking for the presence of carbonates with hydrochloric acid (Netterberg, 1984). A reasonable indication of whether the material being stabilised will be subject to serious carbonation can be obtained from the wet/dry test for durability (Paige-Green et al., 1990). Good curing practices, as outlined in Section 5.10.1, are the best means of preventing carbonation in roadbases. The risk of carbonation can be reduced by taking the following precautions: • Avoid wet/dry cycles during the curing phase; • Seal as soon as possible, to exclude carbon dioxide; • Compact as early as possible, to increase density and reduce permeability; • Reduce the possibility of reflection cracks. There may be some conflict between the last two points and care should be taken not to over compact the layer. Checks should be carried out during construction and, if the depth of carbonated material is more than 2 - 3 mm, the carbonated layer should be removed by heavy brushing or grading before the surfacing is applied. Hydraulically Bound Materials 48 5 4 3 2 1 5.11 Quality Control A high level of quality control is necessary in stabilised materials, particularly cement and lime, as with all other materials used in the road pavement, but several factors need special consideration during storage and construction, and before opening to traffic. Details of the measures to be taken into consideration are provided below. Storage and handling of stabilisers. Unless cement and lime are properly stored and used in a fresh condition, the quality of the pavement layer will be substantially reduced. Cement must be stored in a solid, watertight shed and the bags stacked as tightly as possible. Doors and windows should only be opened if absolutely necessary. The cement that is delivered from the manufacturer first should be used first. Even if cement is properly stored, the following losses in strength will occur: • After 3 months, a 20% reduction; • After 6 months, a 30% reduction; • After 1 year, a 40% reduction; • After 2 years, a 50% reduction. Lime should be packed in sealed bags, tightly stacked and stored under cover, or at least under a watertight tarpaulin. If it becomes contaminated or damp, it can only be used as a filler. Lime that is older than six months should be discarded. Mixing. Mixing should begin within 30 minutes of cement placement and continue until a uniform mixture is produced. After the layer has been properly processed, at least 20 samples should be taken for determination of the stabiliser content. Mixing efficiency is acceptable if the coefficient of variation is less than 30%. Great care is necessary, in multilayer construction, to ensure that good mixing extends to the full depth of all the layers. Optimum moisture content. To calibrate water content, the amount discharged in one minute is weighed and compared with the water meter that measures rate of flow on the mixer. The moisture content in the soil material is determined and the quantity of water needed for the mixture determined. About 2% additional moisture must be added to account for the dry stabiliser added to the soil and for evaporation that occurs during processing (PCA, 2001). Overly wet soils may require aeration prior to stabilisation or treatment with a moisture absorbent additive. At the start of compaction, a final moisture content is established. This could be determined using a nuclear density gauge or other tests that give instantaneous results. Fog applications using a pressure distributor may be applied to cater for any moisture loss due to evaporation. Compaction. Compaction should start immediately after the soil, stabiliser and water have been mixed. Tests to ensure that the required density is attained, at the correct moisture content, can then be undertaken as a quality control measure. Stabilised subgrade soil shall be uniformly compacted to a minimum of 95% of maximum dry density, based on a moving average of five consecutive tests and with no individual test showing a density below 93%. To achieve the required densities, it is important that the right equipment for the stabilised material is used. As a guide, padfoot rollers (previously known as sheepsfoot rollers) are generally used for initial compaction, except for more granular soils that are suitable for vibratory steel wheel rollers, grid rollers and segmented rollers. For nonplastic granular materials, vibratory plate rollers may be used and pneumatic tyred rollers used to compact coarse sand, sand and gravel soil cement mixtures with very little plasticity. Curing. After final compaction, the finished surface must be smooth, dense and free of ruts, ridges or cracks. All finishing operations shall be completed within four hours from the start of mixing. Moisture-retaining covers such as geotextiles, plastic sheets, fog-type water spray or a bituminous material should be placed over the finished surface during curing, to permit the cement to hydrate. Prior to the application of bituminous materials, the soil-cement should be moist and free of dry, loose material. Opening to traffic. Cement-bound materials (CBM) usually require a seven-day curing period, or attainment of the specified seven-day strength, before opening to traffic. Early opening to traffic has a similar effect to that of pre-cracking the layer by rolling within a day or two of its construction, but rolling is preferred because it ensures even coverage of the full width of the carriageway. Layers that are precracked or used by traffic early must be allowed to develop sufficient strength to prevent abrasion of the edges of each crack before the layer is opened to general traffic. The slab strength of these layers can effectively be destroyed but early traffic use is acceptable for layers of cemented roadbase type CB2, although it may increase the risk of premature carbonation. Completed portions of cement-stabilised subgrades can be opened immediately to construction equipment, provided any curing operations are not impacted (Gross & Adaska, 2020). Similarly, HBMs based on lime/slag and lime/PFA binder combinations can be immediately opened to heavier traffic without long-term detriment to performance. Immediate opening to traffic of CBM requires that the mechanical stability of the fresh mix is ascertained in the laboratory to determine the IBI of the mix. When carrying out IBI testing, the bottom face values should be determined for both vibrating hammer OMC and 1.2 X OMC. The IBI value is material-specific and is dependent on material grading and aggregate shape. It is recommended that the IBI for coarse-grained mixtures is greater than 40 and greater than 30 for sandy mixtures. The IBI test should Hydraulically Bound Materials 49 5 4 3 2 1 Table 5-8: Guidance for immediate use by traffic of cement-bound materials Main works Nominal size of mixture Grading Crushed or planings component of mixture Flaky, broken, irregular or gritty component of mixture 10% fines value of aggregate IBIbottom at 1.2 OMC determined by vibrating hammer(5) Use by traffic (PTR as specified in column 1) Together with vibrating roller compaction, the main works shall include finishing compaction using a pneumatic tyred roller (PTR), as specified below(4) 31.5, 20 and 14 mm Well-graded(1) 100% N/A > 50 N/A Immediate without N/A 100% > 50 N/A conditions Reasonably graded(2) 100% N/A 30 – 50 N/A Immediate subject to PTR site assessment N/A 100% > 50 N/A > 30% N/A > 50 N/A 10 mm Well-graded(1) > 30% N/A N/A > 50 When measured surface modulus on site > 50 MPa3 and subject to PTR site assessment 6.3 mm Reasonably graded(2) N/A 100% N/A > 35 Notes: (1) Must conform to gradings in BS EN 14227-1 for cement-bound granular mixtures and BS EN 14227-3 for fly ash-bound granular mixtures (2) Mixture shall be without significant size gaps and shall have a uniformity coefficient Cu > 20 (3) Measured with an applied stress of 200 kPa on a 300 mm diameter plate (4) With a wheel load of not less than 3 tonnes, operating at a minimum tyre pressure of 4 bar (5) Determined in accordance with BS EN 13286–47 Source: Modified after Britpave (2005) be complemented by visual assessment of the same mixture under traffic in the field, using a pneumatic tyred roller (PTR). As a guide, CBM meeting the requirements in Table 5-8 may be considered for immediate use by traffic. Mixtures that do not meet the requirements need curing for seven days before opening to traffic. To ensure the long-term performance of the finished surface, it is important that the layer is compacted at optimum moisture content (OMC). Limited deformation under immediate use by traffic may be normal with some mixtures, but is not detrimental to long-term performance (Atkinson, Chaddock & Dawson, 1999). As a guide, deformation of less than 10 mm may be considered acceptable (Britpave, 2005). Hydraulically Bound Materials 50 5 4 3 2 1 8. Carbonation of the stabilised materials can also cause the material to revert to its granular state. Carbonation is mitigated by construction practices such as avoiding intermittent curing, constructing the next pavement layer within a few days of constructing the stabilised layer or applying a curing membrane. 9. Apart from traditional lime and cement, pozzolanic materials and hydraulic road binders are now in use, due to their low shrinkage and low heat of hydration properties. Examples of pozzolans include pulverised fuel ash (PFA) and ground granulated blast furnace slag (GGBS). 10. Hydraulic road binders (HRBs) are also now increasing in use. These are cementitious powders made from more than 10% (by mass) Portland Cement clinker and other constituents, such as natural pozzolana, natural calcined pozzolana, limestone, siliceous fly ash, calcareous fly ash and burnt shale, among others. HRBs are suitable for the stabilisation of roadbases, sub-bases and earthworks. HRBs have the advantage of reduced setting time, thereby providing longer working times and reduced shrinkage cracking through drying (approximately 40 – 80% less than cement), which reduces further with less cement content in the HRB. Specifications for HRB-stabilised materials are included in Table 5-5 and Table 5-6. 11. Additional specification guidance for treated soils is given in Section 5.9. This includes specifications for immediate trafficking (Table 5-7), mechanical performance and resistance to water erosion. Since performance of hydraulically-bound mixtures is strongly governed by construction practices, Section 5.10 describes the key actions that must be undertaken during construction in order to enhance durability. 5.12 Key Points 1. Hydraulically-bound materials (HBM) comprise an aggregate or soil, water and a hydraulic binder such as cement, lime, fly ash, granulated slag or combinations thereof that stabilises the material. The process of improving the properties of materials using these binders is referred to as stabilisation. 2. Selection of the appropriate hydraulically-bound material for use in road pavements is governed by the plasticity and particle size distribution of the material to be treated. Table 5-1 provides guidance on the selection of binders. 3. Hydraulic binders, if used in small quantities, can modify plasticity and, to some extent, strength, but the modified material would still exhibit granular behaviour (low unconfined compressive strength (UCS)). In this case, the material should be specified as an unbound material. Whatever the case, the quantities used should be above the Initial Consumption of Lime (ICL) or Initial Consumption of Cement (ICC). 4. In higher quantities, a significant increase in unconfined compressive strength (UCS) is observed and therefore the modified material should be specified as HBM. 5. Stabilisation can be used in the treatment of expansive clays, collapsible soils and erodible soils. 6. Stabilisation can be used to modify the properties of granular materials for use in capping, sub-base or road bases. Table 5-2 provides the compressive strengths of HBMs used in the design catalogues in this Road Note and the desirable properties of materials suitable for stabilisation for use in these pavement layers. This results in materials with reduced moisture sensitivity and increased resistance to shearing and rutting. 7. Stabilised materials are susceptible to shrinkage cracking and to traffic- and thermally induced cracks. This can sometimes result in the material becoming nearly granular. To account for this, the strength used in design is the average of its highest strength and the strength of the material prior to stabilisation. 51 Bitumen Bound Materials 6 5 4 3 2 1 6 Bitumen Bound Materials 6.1 Introduction and Scope This chapter describes types of bituminous materials, commonly referred to as 'premixes', that are manufactured in asphalt mixing plants and traditionally laid hot. In situ mixing using either labour-intensive techniques or mechanised plant can also be used for making roadbases for lower standard roads but these methods are not generally recommended and are not discussed in detail here. (Further detail can be found in The Southern African Bitumen Association (SABITA) Manuals, more specifically 'Guidelines for the manufacture and construction of hot mix asphalt' (SABITA Manual 5, using https://www.sabita.co.za/non-membersmanuals-and-dvds/). 6.2 Aggregate Types 6.2.1 Natural Aggregate Coarse aggregates used for making premix should be produced by crushing sound, unweathered rock or natural gravel. To obtain good mechanical interlock and good compaction, the particles should be angular and not flaky. Rough-textured material is preferable. The fine aggregate can be crushed rock or natural sand and should also be clean and free from organic impurities. The filler (material passing the 0.075 mm sieve) can be crushed rock fines, Portland Cement or hydrated lime. Portland Cement or hydrated lime is often added to natural filler (1 – 2%, by mass, of total mix), to assist the adhesion of the bitumen to the aggregate. Fresh hydrated lime can help reduce the rate of hardening of bitumen in surface dressings and may have a similar effect in premixes. Suitable specifications for coarse and fine mineral components are given in Table 6-1 and Table 6-2. Table 6-1: Coarse aggregate properties for bituminous mixes Property Test Standard Specification Cleanliness Sedimentation or Decantation EN 933-1 (2021) J C Bullas & G West (1991) < 5% passing 0.075 mm sieve Particle shape Flakiness Index EN 933-3 (2017) < 45% Strength Aggregate Crushing Value (ACV) BS 812, Part 110 (1990) < 25. For weaker aggregates the Ten Per Cent Fines Value Test (TFV) is used. Aggregate Impact Value (AIV) BS 812, Part 112 (1990) < 25% Los Angeles Abrasion Value (LAA) ASTM C131, ASTM C535 < 30 (wearing course) < 35 (other) Abrasion Aggregate Abrasion Value (AAV) EN 1097-8 (2020) < 15 < 12 (very heavy traffic) Polishing (surface course only) Polished Stone Value EN 1097-8 (2020) Not less than 50-75 depending on location Durability Soundness: Sodium Test & Magnesium Test BS 812, Part 121 (1990) < 12% < 18% Water Absorption Water Absorption EN 1097-3 (1998) < 2% Bitumen Affinity Immersion Tray Test <> Effect of water on cohesion of compacted mixes Shell Bitumen Handbook, sixth edition (2015) Index of retained stability > 75% 52 Bitumen Bound Materials 6 5 4 3 2 1 Table 6-2: Fine aggregate properties for bituminous mixes Property Test Specification Cleanliness Sedimentation or Decantation(1,2) Percentage passing 0.075 mm sieve Other layers: < 22% Wearing courses: < 8% for sand fines < 17% for crushed rock fines — Sand Equivalent (material passing 4.75 mm sieve) Traffic Wearing Course Roadbase Light (< T3) > 35% > 45% Medium/Heavy > 40% > 50% Plasticity Index (material passing 0.425 mm sieve) < 4 — — Durability Soundness Test(3) five cycles Magnesium: < 20% Sodium: < 15% Notes: (1) British Standard 812, Part 103 (1985). (2) J C Bullas & G West (1991). (3) British Standard 812, Part 121 (1989). An alternative to natural aggregate (and to binder) is to use innovative and waste-derived materials. Some alternative aggregates, examples being recycled plastic and rubber, may aid the sustainability of the mixtures. Such materials need, however, to be checked for suitability in terms of performance, ageing and health and safety. There are protocols for this purpose (Filtering Protocol for Innovative Paving Materials, including Waste-derived Materials, AECOM, 2021). 6.2.2 Reclaimed Aggregate Reclaimed asphalt (RA, in European terminology), or reclaimed asphalt pavement (RAP, in American terminology), is a material that is being increasingly used as an alternative to natural aggregate, although generally only as a partial replacement. It comes from either the planing of existing asphalt pavements, or previously mixed material. This can be in the form of waste generated during mixing, or over-ordered material from a paving site that is returned to the asphalt plant (known as 'returned loads'). As such, the material contents include binder, as well as aggregate, and the extent to which the binder will have aged and hardened will depend on the history of the asphalt. RAP can be used in all layers of a pavement. There is no inherent difference between mixes incorporating RAP and those with only natural aggregates. In Europe, 10% RAP is widely used without the need for explicit approval, while up to 50% RAP is acceptable for roadbases. The initial test for RAP is to ensure that there is no detritus, which can accumulate if the RAP is stored for a prolonged period. For RAP to be suitable for use in new asphalt, the aggregate within it must have the same properties as those required of natural aggregates, but the assurance of compliance will depend on the source. Generally, the RAP will either be from a single source (particularly if the existing pavement is reused as part of the replacement, when the properties will be those of the aggregate used originally), or a mix from different sources, when the material will need to be thoroughly mixed and then tested. The frequency of RAP testing will depend on the variability of the source. It must be borne in mind that, with the coating and combination of particles, the grading of the aggregate within the RAP will not be identical to the grading of the RAP stockpile. Because wearing courses need higher quality properties than lower layers, the planing and storage of each layer separately can increase the available RAP for wearing courses and ensure highest value reuse. The extent to which the binder content of the RAP affects the design of the new mix will depend on the effectiveness of that binder. If the binder has hardened excessively, it will act as black rock, (i.e. an aggregate coated in aged bituminous binder that does not actively contribute to the overall binder content), rather than as part of the binder. While mildly hardened it will only reduce the penetration of the combined binder. A procedure has been developed to design mixes incorporating RAP to be equivalent to one with all natural aggregate, in TRL Road Note 43, Best Practice Guide for Recycling into Surface Course (https://www.trl.co.uk/publications/road-note-43--- best-practice-guide-for-recycling-into-surface-course). Although nominally for wearing courses, the procedure is also applicable to unbound roadbases and bituminous roadbases. RAP can be used with polymer-modified binders, even if the RAP was originally manufactured with a different polymer. A major reason for incorporating RAP in a new asphalt mix is to reduce the environmental impact of the mix. If the RAP is transported too far, however, environmental benefits can diminish. 53 Bitumen Bound Materials 6 5 4 3 2 1 6.3 Types Of Binders 6.3.1 Straight-run Bitumen Straight-run (unmodified) bitumen is the normal binder used in asphalt and is generally defined by its penetration range. Age hardening of the bitumen in the wearing course is much greater at the exposed surface, where the effect of the environment is much more severe. It is this hardened, brittle skin that usually cracks early in the life of the surfacing (Rolt et al., 1986). In areas where the diurnal temperature range is large, (in most desert areas, for example), thermal stresses can significantly increase the rate at which cracking occurs. The risk of premature cracking can be reduced by applying a surface dressing to the wearing course soon after it has been laid, preferably after a few weeks of use by construction traffic. This provides a bitumen-rich layer with a high strain tolerance at the point of potential weakness, while also providing a good surface texture with improved skid-resistant properties. If such a surface dressing is used, some cost savings can often be made by using a roadbase material in place of the wearing course. For severely loaded sites, such mixes can be designed to have a high resistance to deformation, and under these conditions a surface dressing is essential if early cracking is to be prevented. It has also been shown (Smith et al., 1990) that 40/50, 60/70 and 80/100 penetration grade bitumens in the surface of wearing courses all tend to harden to a similar viscosity within a short time. It is, therefore, recommended that 60/70 pen bitumen is used to provide a suitable compromise between workability, deformation resistance and potential hardening in service. If possible, a bitumen should be selected that has a low temperature sensitivity and good resistance to hardening, as indicated by the standard and extended forms of the Rolling Thin Film Oven Test (EN 12607-1, ASTM, D2872, Dickinson, 1982). 6.3.2 Polymer-modified Binders There are numerous polymers that have been used to modify straight-run bitumen that result in different property enhancements, primarily through physical modification. The usefulness of a modifier will depend not only on the modifier, but also on the property enhancement required. Because different modifiers affect different properties, the relative usefulness of these modifiers is likely to vary – there is no polymer that enhances all mix properties. A summary of typical properties that might require enhancement for different materials is shown in Table 6-3; these properties (with the exception of embrittlement and adhesion) are generally associated with the bituminous mix, rather than the binder itself. The main approach to polymer modification has been the use of synthetic thermoplastic modifiers. These include thermoplastic polymer elastomers (such as styrene-butadiene-styrene block co-polymer, styrene-butadiene-rubber, ethylene-propylene-diene terpolymer and isobutene-isoprene copolymer) and organic thermoplastic polymer modifiers (such as ethylene-vinyl acetate, ethylene methyl acrylate, ethylene butyl acrylate, polyethylene, polypropylene, polyvinyl chloride and polystyrene). The most widely used polymer is styrene-butadiene-styrene (SBS). Biogenic components are also incorporated into binders/asphalt. Although thermoplastic polymers have been utilised the most, thermosetting polymer modifiers such as epoxy resin, polyurethane resin and acrylic resin have also been used, but they often require specialist equipment. Different polymers often need different methods of addition, the principal difference being between pre-mixed binders and polymers that are added separately in the asphalt mixing. This multiplicity of methods makes it difficult to change the modifier between mixes. Although they are not polymers, natural bitumens such as Trinidad Lake Asphalt (TLA) and Gilsonite can be used to enhance the mix properties. Other additives can also be used to chemically modify the mix properties, but these are not discussed in this document. If the binder is defined by the Superpave Performance-Graded (PG) specification rather than by penetration grade, there is less of a need to differentiate between straight-run bitumens and polymermodified binders. Property changes desired in mixed material Mixed Material / Surface Treatment Surface dressing Wearing course Binder course and roadbase Bridge deck surfacing Increased workability — Primary importance — — Reduced permanent deformation — Primary importance Primary importance Primary importance Increased load spreading ability — Primary importance Primary importance Primary importance Reduced embrittlement Primary importance Secondary importance Secondary importance Primary importance Increased elasticity — — Primary importance Secondary importance Extended fatigue life — — Primary importance Primary importance Improved adhesion Primary importance — Secondary importance — Table 6-3: Changes desired when modifying binders 54 Bitumen Bound Materials 6 5 4 3 2 1 6.4 Types Of Asphalt 6.4.1 Bituminous Surfacings The most critical layer of the pavement is the bituminous surfacing, and the highest quality material is necessary for this layer. Where thick bituminous surfacings are required, they are normally constructed with a wearing course (also called a surface course) laid on a basecourse (sometimes called a binder course), which can be made to slightly less stringent specifications. To perform satisfactorily as road surfacings, bitumen aggregate mixes need to possess the following characteristics: • High resistance to deformation; • High resistance to fatigue and the ability to withstand high strains, i.e. they need to be flexible; • Sufficient stiffness to reduce the stresses transmitted to the underlying pavement layers; • High resistance to environmental degradation, i.e. good durability; • Low permeability, to prevent the ingress of water and air; • Good workability, to allow adequate compaction to be obtained during construction. In the tropics, higher temperatures and high axle loads produce an environment that is more severe than elsewhere. This makes the mix requirements more critical and an overall balance of properties more difficult to obtain. High temperatures initially reduce the stiffness of mixes, making them more prone to deformation and causing the bitumen to oxidise and harden more rapidly, thereby reducing durability. Unfortunately, the requirements for improved durability, i.e. increased bitumen content and fewer voids, usually conflict with the requirements for greater stiffness and improved deformation resistance. As a result, the tolerances on mix specifications need to be very narrow and a high level of quality control at all stages of manufacture is essential. The requirements are so critical for wearing course mixes that, on a single road, different mix designs are often necessary for different conditions. For example, mixes suitable for flat, open terrain, where traffic moves more rapidly, will be unsuitable for areas carrying heavy, slow-moving traffic, such as on climbing lanes, or for areas where traffic is highly channelled. A mix suitable for the latter is likely to deform on a climbing lane, while a mix suitable for a climbing lane is likely to have poor durability on a flat terrain. In severe locations, the use of bitumen modifiers is often advantageous (Hoban, 1990; Harun & Jones, 1992). It is essential that the thin bituminous surfacings (50 mm) recommended for structures described in Charts B of the structural catalogue (Chapter 9) are flexible. This is particularly important for surfacings laid on granular roadbases (reviewed further in Section 6.4.8). Mixes that are designed to have good durability, rather than high stability, are flexible and are likely to have 'sand' and bitumen contents at the higher end of the permitted ranges. In areas where the production of sand-sized material is expensive and where there is no choice but to use higher stability mixes, additional stiffening through the ageing and embrittlement of the bitumen must be prevented by applying a surface dressing. 6.4.2 Bituminous Roadbases Satisfactory bituminous roadbases for use in tropical environments can be made using a variety of specifications. They need to possess properties similar to bituminous mix surfacings but, whenever they are used in conjunction with such a surfacing, loading conditions are less severe, hence the mix requirements are less critical. Nevertheless, the temperatures of roadbases in the tropics are higher than in temperate climates and the mixes are, therefore, more prone to deformation in early life, and to ageing and embrittlement later. 6.4.3 Types of Premix The main types of premix are asphaltic concrete (also called asphalt concrete), bitumen Macadam and hot rolled asphalt. Each type can be used in surfacings or roadbases. Their general properties and specifications in the context of tropical environments are described below. A design procedure based on 'refusal density' is recommended to enhance the standard Marshall procedure (Section 6.6.2). 6.4.4 Asphaltic Concrete 6.4.4.1 General Asphaltic concrete (AC) is a dense, continuously graded mix that relies for its strength on both the interlock between aggregate particles and, to a lesser extent, the properties of the bitumen and filler. The mix is designed to have a low incidence of air voids and low permeability, to provide good durability and good fatigue behaviour, but this makes the material particularly sensitive to errors in proportioning. Mix tolerances are therefore very narrow (Jackson & Brien, 1962; Asphalt Institute, 1991, 2014 and 2014). The particle size distributions for wearing course material given in Table 6-4 have produced workable mixes that have generally not been associated with deformation failures, but they are not ideal for conditions of severe loading caused by slow-moving heavy traffic and high temperatures, etc. (see Section 6.5.2). This is because the continuous matrix of fine aggregate, filler and bitumen is more than sufficient to fill the voids in the coarse aggregate, and this reduces particle to particle contact within the coarse aggregate and lowers resistance to deformation. A particle size distribution that conforms to the requirements for asphaltic concrete basecourse or a close-graded bitumen Macadam basecourse (BC1 in Table 6-4, or BC2 in Table 6-8) is recommended for use as the wearing course in severe conditions, but such mixes must be sealed. 55 Bitumen Bound Materials 6 5 4 3 2 1 Mix designation WC1 Wearing Course WC2 Wearing Course BC1 Basecourse BS test sieve (mm) Percentage by mass of total aggregate passing test sieve 28 — — 100 20 100 — 80 – 100 14 80 – 100 100 60 – 80 5 54 – 72 62 – 80 36 – 56 2.36 42 – 58 44 – 60 28 – 44 1.18 34 – 48 36 – 50 20 – 34 0.6 26 – 38 28 – 40 15 – 27 0.3 18 – 28 20 – 30 10 – 20 0.15 12 – 20 12 – 20 5 – 13 0.075 6 – 12 6 – 12 2 – 6 Bitumen content(1) (percentage by mass of total mix) 5.0 – 7.0 5.5 – 7.4 4.8 – 6.1 Bitumen grade(2) (pen) 60/70 or 80/100 60/70 or 80/100 60/70 or 80/100 Thickness(3) (mm) 40-50 30-40 50-65 Table 6-4: Asphaltic concrete surfacings Notes: (1) Determined by the Marshall design method. (2) PG-bitumen has proved to represent better selection than pen-grade, hence it is recommended that countries undertake temperature zoning and PG classification of any common bitumens used. (3) In practice, the upper limit has been exceeded by 20% with no adverse effect. It is common practice to design the mix using the Marshall Test and to select the design binder content by calculating the mean value of the binder contents for: • Maximum stability; • Maximum density; • The mean value for the specified range of void contents; • The mean value for the specified range of flow values. In addition, Tensile Strength Ratio (TSR) testing is considered important to ensure that the aggregate and bitumen has a good bond. Failure to achieve this can lead to adhesion problems or high ravelling/disintegration potential, signalling the need to consider proprietary adhesion agents and/or 1 to 2% cement or lime (particularly when new aggregate sources are used). Total Traffic (106 ESA) < 1.5 1.5 – 10.0 > 10.0 Severe Sites(1) Traffic classes T1, T2, T3 T4, T5, T6 T7, T8 — Minimum stability (kN at 60°C) 3.5 6.0 7.0 9.0 Minimum flow (mm) 2 2 2 2 Compaction level (Number of blows) 2 x 50 2 x 75 2 x 75 2 x 75 Air voids (%) 3 – 5 3 – 5 3 – 5 3 – 5(2) Indirect tensile strength (kPa) AASHTO T 283 Minimum 800 tested at 25°C Indirect wet tensile strength (kPa) ASSHTO T 283 80% of dry strength Table 6-5: Marshall Test criteria Notes: (1) Slow moving heavy traffic, etc. (see Section 6.6.2). (2) The refusal density must not be too much greater than the bulk density. The compliance of properties, at the selected design binder content, with recommended Marshall criteria is then obtained (see Table 6-5). If the designer adheres to these ranges (Table 6-5), it will generally ensure that a 'brittle' mix is not produced, and aid compaction. A maximum air void content of 5% is recommended, to reduce potential age hardening of the bitumen. At severe sites, however, the most important criterion is that a minimum air void content of 3% at refusal density should be achieved. This requirement is equivalent to the condition of the road after use by heavy traffic; it is designed to ensure that serious deformation does not occur. For such a mix, reducing the air voids content at 98% of Marshall density to 5% is unlikely to be possible. It is therefore recommended that a surface dressing is applied to the wearing course to provide the necessary protection against age hardening. It is common for mixes to be designed to have maximum stability. This usually means that the binder content is reduced, resulting in mixes that are more difficult to compact and are less durable. It is important to note that there is a relatively poor correlation between Marshall stability and deformation in service. this means that durability should not be jeopardised in the belief that a more deformation-resistant mix will be produced. 56 Bitumen Bound Materials 6 5 4 3 2 1 A better method of selecting the Marshall design binder content is to examine the range of binder contents over which each property is satisfactory, define the common range over which all properties are acceptable and then choose a design value near the centre of the common range. If this common range is too narrow, the aggregate grading should be adjusted until the range is wider and tolerances less critical. To ensure that the compacted mineral aggregate in continuously graded mixes has a void content large enough to contain sufficient bitumen, a minimum value of the voids in the mineral aggregate (VMA) is specified, as shown in Table 6-6. The Marshall design procedure is based on the assumption that the densities achieved in the Marshall Test samples represent those that will occur in the pavement along the wheel-paths after a few years' use by traffic. If the in situ air void content is too high, this will lead to rapid age hardening of the bitumen. Conversely, on severely loaded sites, the air void content may be reduced by traffic, leading to failure through plastic flow. In the latter situation, the method of designing for a minimum air void content in the mix (VIM) at refusal density should be used (see Section 6.5.2). 6.4.4.2 Enrobé à Module Élevé 2 Enrobé à Module Élevé (High modulus bituminous mix) Type 2 (EME2) is a variant of AC that was developed in France. The mix uses a hard paving grade bitumen (10/20 or 15/25) to produce a very stiff asphalt, which allows the thickness of the roadbase and/or basecourse to be reduced. The use of hard grade bitumen makes the mix type unsuitable for the surface course because ageing at the surface will lead to premature failure. The use of hard binders requires very stringent quality control during construction to minimise the risk of embrittlement due to overheating and to enable the compaction density to be achieved before the mix cools. Furthermore, the stiffness of the pavement means that it must be laid on a firm foundation. EME2 (roadbase) is important for enhancing climate resilience; because of its low air voids content and high stiffness, it minimises water ingress into lower pavement layers. Because of the hard binders used, it is also highly resistant to high temperatures. Suitable gradings and minimum binder contents for EME2 are presented in Table 6-7. Nominal maximum particle size (mm) Minimum voids in mineral aggregate (%) 37.5 12 28 12.5 20 14 14 15 10 16 5 18 Table 6-6: Voids in the mineral aggregate The mechanical property of the mix should be as indicated in Table 6-15. The maximum acceptable air void content of any laboratory mix should not exceed 6%, and that compacted in-situ mix shall not exceed 4% (96% of the maximum theoretical density). Test sieve aperture size (mm) 20 14 10 31.5 100 — — 20 90 – 99 100 — 14 70 – 95 90 – 99 100 10 55 – 90 — 90 – 99 6.3 42 – 75 42 – 65 60 – 80 4 — — 35 – 65 2 18 – 35 19 – 42 27 – 42 0.250 8 – 18 8 – 18 8 – 18 0.063 5.0 – 9.0 5.0 – 9.0 5.0 – 9.0 Minimum target binder content (%) 5.1 5.3 5.5 Compaction gyrations (gyratory compactor) 120 100 80 Table 6-7: EME2 basecourse and roadbase 6.4.5 Dense Bitumen Macadam Close-graded bitumen Macadams (formerly called dense bitumen Macadams, or DBMs) are continuously graded mixes that are similar to asphaltic concretes, but they usually have a less dense aggregate structure. They have been developed in the United Kingdom (British Standard 4987, 1973, since being incorporated into British Standards Institution PD 6691, 2015) from empirical studies over many years. They are made to recipe specifications without reference to a formal design procedure. The following principles should be adopted for all bituminous layers, but they are particularly important for recipe-type specifications: • Trials for mix production, laying and compaction should be carried out to determine suitable mix proportions and procedures; • Durable mixes require a high degree of compaction, and this is best achieved by specifying density in terms of maximum theoretical density of the mix or, preferably, by using a modification of the Percentage Refusal Test with extended compaction time (British Standard 598, Part 104, 2005; Powell & Leech, 1982); • Mixing times and temperatures should be set at the minimum required to achieve a good coating of the aggregates and satisfactory compaction. • The highest bitumen content commensurate with adequate stability should be used. 57 Bitumen Bound Materials 6 5 4 3 2 1 The advantage of this approach is that quality control testing is simplified, which should allow more intensive compliance testing to be performed. Aggregates that behave satisfactorily in asphaltic concrete will also be satisfactory in dense bitumen Macadam. Suitable specifications for both wearing course and basecourse mixes are given in Table 6-8. Sealing the wearing course with a surface dressing soon after laying is recommended, for a long, maintenance-free life. Slurry seals can also be used but they are best used in combination with a surface dressing to form a cape seal. Test sieve aperture size (mm) WC3 WC4 BC2 Wearing Course(5) Base Course BS test sieve (mm) Percentage, by mass, of total aggregate passing test sieve 28 — — 100 20 100 — 95 – 100 14 95 – 100 100 65 – 85 10 70 – 90 95 – 100 52 – 72 6.3 45 – 65 55 – 75 39 – 55 3.35 30 – 45 30 – 45 32 – 46 1.18 15 – 30 15 – 30 — 0.3 — — 7 – 21 0.075(1) 3 – 7 3 – 7 2 – 8 Bitumen grade(2) (pen) 80/100 or 60/70 80/100 or 60/70 80/100 or 60/70 Bitumen content(3) (per cent by mass of total mix) 5.3 ± 0.5 5.5 ± 0.5 5.0 ± 0.6 Thickness(4) (mm) 40 – 55 30 – 40 50 – 80 Table 6-8: Bitumen Macadam surfacings Notes: (1) When gravel other than limestone is used, the anti-stripping properties will be improved by including 2% Portland Cement or hydrated lime in the material passing the 0.075 mm sieve. (2) 60/70 grade bitumen is preferred, see text. (3) For aggregate with a fine microtexture, e.g. limestone, the bitumen content should be reduced by 0.1 to 0.3%. (4) In practice, the upper limit has been exceeded by 20%, with no adverse effect. (5) Limestone and gravel are not recommended for wearing courses where high skid resistance is required. Close-graded bitumen Macadam mixes offer a good basis for the design of deformation resistant materials for severe locations. For such use, they should be designed on the basis of their refusal density. Recipe mixes are not recommended in these circumstances; the Marshall design criteria presented in Table 6-9 should be used. At the time of construction, air void content is virtually certain to be in excess of 5%; therefore, a surface dressing should be laid soon after construction. Design Traffic (106 esa) < 1.5 1.5 – 10.0 > 10.0 Severe Sites and T9, T10 Traffic classes T1, T2, T3 T4, T5, T6 T7, T8 T9, T10 Minimum stability (kN at 60°C) 3.5 6.0 8.0 9.0 Minimum flow (mm) 2 – 4 2 – 4 2 – 4 2 – 4 Compaction level (Number of blows) 2 x 50 2 x 75 To refusal To refusal Table 6-9: Marshall Test criteria for close-graded bitumen Macadams 6.4.6 Hot Rolled Asphalt Hot rolled asphalt (HRA), also known as rolled asphalt, is a specific type of asphalt; the term does not refer to any asphalt that is rolled when hot. It is a gap-graded mix that relies for its properties primarily on the mortar of bitumen, filler (< 0.075 mm) and fine aggregate (0.075 - 2.36 mm). The coarse aggregate (> 2.36 mm) acts as an extender but its influence on stability and density increases as the proportion of coarse aggregate in the mix exceeds approximately 55%. If the coarse aggregate content is less than about 40%, precoated chippings should be rolled into the surface to provide texture for good skid resistance, where necessary. Hot rolled asphalt has been developed in the United Kingdom to recipe specifications, but it can also be designed using the Marshall Test so that the physical characteristics of the fine aggregate can be taken into account (British Standard PD 6991, 2015). Wearing courses made to the particle size distributions specified in the BSI Published Document, and with filler-to-binder ratios in the range 0.8 – 1.0, have performed well in the tropics. The compositions of suitable mixes are summarised in Table 6-10. Mixes made with natural sand are more tolerant of proportioning errors than asphaltic concrete and they are easier to compact. Although the air void content tends to be slightly higher than for asphaltic concrete, they are discontinuous and the mixes are impermeable. HRA (surfacing) is important for enhancing climate resilience; because of low air voids content, it minimises water ingress into lower pavement layers. However, it may not perform well in extreme temperatures. 58 Bitumen Bound Materials 6 5 4 3 2 1 Mix designation WC5 WC6 BC3 BC4 Wearing Course(1,2) Base Course BS test sieve (mm) Percentage, by mass, of total aggregate passing test sieve 28 — — — 100 20 100 100 100 90 – 100 14 90 – 100 90 – 100 90 – 100 65 – 100 10 50 – 85 50 – 85 65 – 100 35 – 75 2.36 50 – 62 50 – 62 35 – 55 35 – 55 0.6 35 – 62 20 – 40 15 – 35 15 – 55 0.212 10 – 40 10 – 25 5 – 30 5 – 30 0.075 6 – 10 6 – 10 2 – 9 2 – 9 Type of fines Natural sand Crushed rock Sand or crushed rock Bitumen grade (pen) 40/50 or 60/70 60/70 40/50 or 60/70 Thickness (mm) 50 50 40 – 65 50 – 80 Bitumen content (per cent by mass of total mix) Minimum target value 6.5 + 0.6 (crushed rock) 6.3 ± 0.5(3) 6.3 ± 0.6 (gravel) Table 6-10: Hot rolled asphalt surfacings Notes: (1) The preferred target for coarse aggregate is 50%. (2) For WC5, a maximum of 12% should be retained between the 0.6 mm and 2.36 mm sieves.(3) With 50% coarse aggregate (see BSI PD 6691). 6.4.7 DBM and HRA Roadbases Particle size distributions and general specifications for continuously graded mixes are presented in Table 6-11. No formal design method is generally available for determining the optimum composition for these materials because the maximum particle size and proportions of aggregate greater than 25 mm preclude the use of the Marshall Test. Suitable specifications for gap-graded rolled asphalt roadbases are presented in Table 6-12. All these specifications are recipes that have been developed from experience. They rely on performance data for their optimum adaptation to local conditions. Table 6-11: Bitumen Macadam roadbase Mix designation RB1 BS test sieve (mm) Percentage, by mass, of total aggregate passing test sieve 50 100 37.5 95 – 100 28 70 – 94 14 56 – 76 6.3 44 – 60 3.35 32 – 46 0.3 7 – 21 0.075 2 – 8(1) Bitumen content (percentage, by mass, of total mix) 4.0(2) ± 0.5 Thickness (mm) 65 – 125 Voids (percentage) 4 – 8 Bitumen grade (pen) 60/70 or 80/100 Notes: (1) Where gravel other than limestone is used, anti-stripping properties will be improved by including 2% Portland Cement or hydrated lime in the material passing the 0.075 mm sieve. (2) Up to 1% additional bitumen may be required for gravel aggregate. Table 6-12: Rolled asphalt roadbase Mix designation RB2 RB3 BS test sieve (mm) Percentage, by mass, of total aggregate passing test sieve 50 — 100 37.5 100 90 – 100 28 90 – 100 70 – 100 20 50 – 80 45 – 75 14 30 – 60 30 – 65 2.36 30 – 44 30 – 44 0.6 10 – 44 10 – 44 0.212 3 – 25 3 – 25 0.075 3 – 7 3 – 7 Bitumen content (percentage, by mass, of total mix) 5.7 ± 0.6 Layer Thickness (mm) 60 – 120 75 – 150 Filler: binder ratio 0.6 – 1.2 Bitumen grade (pen) 40/50 or 60/70 59 Bitumen Bound Materials 6 5 4 3 2 1 6.4.8 Thin Asphalt Wearing Courses Although traditional wearing courses were 40 mm to 50 mm thick, mixes have been developed that allow for thinner layers. Two types of asphalt from France are included in European Standards: EN 13108-2 (2016) for Asphalt Concrete for Very Thin Layers (BBTM) and EN 13108-9 (2016) for Asphalt for Ultra-Thin Layers (AUTL). These asphalt types generally incorporate polymer-modified binders to reduce binder drainage and provide durable mixes. Thin asphalt courses can be very difficult to construct consistently well and may be prone to becoming segregated, poorly compacted and porous with interconnected voids (allowing water to damage granular roadbase materials). Furthermore, the reduced thickness considerably limits the ability to level the surface. This means that a higher standard is required of the layer below. The grading of asphalt mixes for thin surfacings should not be too coarse, with the maximum particle size never exceeding one-third of the layer thickness (SABITA Manual 35 / TRH 8, Design and Use of Asphalt in Road Pavements, 2019). While a relatively coarse thin asphalt mix should be more rut resistant, the associated problems far outweigh this possible advantage, particularly where a thin asphalt wearing course is constructed on a granular base course. It should be noted that bituminous surface treatments (double surface dressing/chip seals, Cape seal, Otta seal) perform well with traffic levels beyond 15 MESA, provided they are well-constructed. 6.4.9 Stone Mastic Asphalt Stone mastic asphalt (SMA), sometimes called Split Mastic Asphalt, is an asphalt mix that is standardised in EN 13108- 5 (2016). It is based on combination of aggregate interlock, to maximise deformation resistance, with the remaining voids partially filled with mortar. It was developed in Germany, as a composite between asphaltic concrete and mastic asphalt, to overcome abrasion by studded tyres; this problem was subsequently solved by banning such tyres. The issue of studded tyres is not relevant in tropical and sub-tropical countries, since winter conditions are not experienced. The mix has, however, proved useful for its abrasion resistance in other situations. Suitable particle size distributions for stone mastic asphalt are presented in Table 6-13. The mortar requires a higher binder content than the aggregate skeleton can take without draining, and fibres are included to increase the available surface area and, hence, avoid binder drainage. Polymer-modified binders can be used instead, or as well, for this purpose, and to enhance other mix properties. Penetration grade bitumens 40/50 and 60/70 are recommended for mix design. For projects considered critical, polymer-modified binders should be used to enhance performance of the mix. Table 6-13: Stone mastic asphalt Sieve size Maximum aggregate size (mm) 6 10 14 20 Passing sieve (%, by mass) 31.5 — — — 100 20 — — 100 94 – 100 14 — 100 93 – 100 — 10 100 93 – 100 35 – 60 25 – 39 6.3 93 – 100 28 – 52 22 – 36 22 – 32 4 26 – 51 — — — 2 24 – 39 20 – 32 16 – 30 15 – 26 0.063 8.0–14.0 8.0–13.0 6.0–12.0 8.0–11.0 Binder content (%) 6.6 6.2 5.8 5.4 Notes: Mixes designed with polymer-modified bitumens may result in a reduced binder content. The air void content of stone mastic asphalt should be relatively low (for wearing course 1.5%-5%, and for binder course 4%-6%), although it can be increased to provide higher texture depth; higher air void content does, however, incur a cost in terms of durability (TRL 674, Nicholls et al., 2010). Stone mastic asphalt can be used for all pavement layers, although it is generally used for the wearing course and basecourse. Other specification requirements are as follows: • Compaction energy for preparation of test specimens – as per Marshall criteria in Table 6-5; • Voids filled with bitumen 71%-92% of the mix; • VMA is controlled indirectly by the particle size distribution selection; • Ratio of indirect tensile strength of wet conditioned specimens to dry conditioned specimens should be greater than 80%; • Minimum bitumen content of 5% by mass; • Mechanical property requirement should be as indicated in Table 6-15; • Field compaction density, a minimum of 95% of the maximum theoretical density. 60 Bitumen Bound Materials 6 5 4 3 2 1 6.4.10 Sand-bitumen Mixes In areas lacking coarse aggregates, bitumen-stabilised sands are an alternative material for use as roadbases. Best results are achieved with well graded angular sands, in which the proportion of material passing the 0.075 mm sieve does not exceed 10%, and where the material is non-plastic. The bitumen can range from a viscous cutback that will require heating, to a more fluid cutback or emulsion that can be used at ambient temperatures. The most viscous cutbacks that can be properly mixed at ambient temperatures are RC or MC 800 or equivalents. In general, the more viscous the bitumen, the higher the stability of the mix will be. The use of penetration grade bitumens will produce the highest stabilities, but this will necessitate heating the sand as well as the bitumen. An example has been given by Harris et al. (1983). The amount of bitumen required will generally be between 3 and 6%, by mass, of the dry sand, a higher proportion being required with a finer-grained material. Cement of up to 1.5% can be added to enhance the strength, and to shorten the breaking time if emulsions are used. The Marshall Test can be used for determining the amount of bitumen required (Asphalt Institute, MS-2, 2014) Design criteria are presented in Table 6-14 for sand-bitumen mixes used as roadbase materials for tropical roads carrying medium to light traffic. Experience shows that these bases perform well, even up to 20 MESA. Figure 6-1: Categories of reduced temperature asphalt Source: Nicholls et al. (2018) 6.4.11 Warm, Half-warm and Cold Mixes The full definition of an asphalt mix now needs to include whether it is 'hot mix asphalt', 'warm mix asphalt', 'halfwarm mix asphalt' or 'cold mix asphalt'. The distinctions are that HMA is generally mixed at a temperature above 140°C, warm mix asphalt is generally mixed at between 140°C and 100°C, half-warm mix asphalt is generally mixed at between 100°C and 70°C and cold mix asphalt is mixed at roughly ambient temperature, as shown in Figure 6-1. Lower temperatures cannot be used for hot mixed asphalts without initiating premature failure of the mix. Most mix types can be converted to lower temperature by several techniques, including the use of organic additives, chemical additives, emulsion-based processes, waterbearing additives and water-based processes. The different methods use different technologies and involve different costs; they vary from one-off equipment change to the need for on-going additives. Table 6-14: Criteria for sand-bitumen roadbase materials Test Traffic Classes T1 T2-T6 Marshall stability at 60°C (min) 1 kN 1.5 kN Marshall flow value at 60°C (max) 2.5 mm 2 mm Often, lower temperature mixes are only considered successful if they replicate the long-term performance of hot mixes, but until long-term performance data are gathered, other benefits (e.g. low energy demand) must be considered. The use of lower temperature mixes have the potential for reducing the carbon footprint and energy requirement, provided the modification technique itself does not counteract the savings from lower temperature mixing. Lower temperatures have additional advantages over traditional hot mixes, particularly in terms of health and safety during laying. Warm mix asphalt can also increase productivity on site, as time for cooling before adding additional layers, or opening to traffic, is reduced, thereby increasing the quantity of material that can be laid in a shift. Specifications for lower temperature asphalt are available, e.g. TRL Published Project Report PPR666 (Nicholls et al., 2013, https://www.trl.co.uk/publications/ppr666). 6.5 Designs for Rut Resistance 6.5.1 Bailey Aggregate Selection The Bailey Method, defined in Transportation Research E-Circular, No. E-C044, Bailey Method for Gradation Selection in HMA Mixture Design (Vavrik et al., 2002), was developed to prevent rutting while also maintaining the durability of mixtures, to better understand the mechanics of aggregate packing and its contribution to the compressive strength and stability of asphalt pavements. The overriding principle of the Bailey Method is that maximum compressive strength of an asphalt mix is best achieved when there is stone-to-stone contact between as many aggregate particles as possible. The Bailey Method provides a good alternative for the design of rut resistant mixes capable of passing wheel tracking tests and refusal density. The approach also serves as a useful aid when adjusting at the plant to improve air voids, VMA and the overall workability of the mix. Further details can be found in Appendix B and at the Asphalt Institute (https://www.asphaltinstitute.org/engineering/ design/bailey-method/). 61 Bitumen Bound Materials 6 5 4 3 2 1 6.5.2 Refusal Density Design Under severe loading conditions, asphalt mixes must be expected to experience significant secondary compaction in wheel-paths. Severe conditions cannot be precisely defined, but they will consist of a combination of two or more of the following: • High maximum temperatures; • Very heavy axle loads; • Very channelled traffic; • Stopping, or slow-moving, heavy vehicles. Failure by plastic deformation in continuously graded mixes occurs very rapidly once the VIM falls below 3%. Therefore, the aim of refusal density design is to ensure that, at refusal, there is still at least 3% VIM in the mix. For sites that do not fall into the 'severe' category, the method can be used to ensure that the maximum binder content for good durability is obtained. This binder content may be higher than the Marshall optimum but the requirements for resistance to deformation will be maintained. Where lower axle loads and higher vehicle speeds are involved, the minimum VIM at refusal can be reduced to 2%. The determination of the refusal density by increasing the number of Marshall blows is now strongly discouraged. The correct method should be by the use of a calibrated vibrating hammer and moulds as described in at refusal BS 594-104:2005 - with emphasis on Appendix B. 6.5.3 Wheel-track Testing Marshall stability values have been found to not correlate well with the permanent deformation of in situ pavements. Therefore, various wheel-tracking apparatus has been developed to improve this correlation. The various pieces of apparatus that have been standardised do not, however, correlate with one another (see TRL Published Project Report 536, Nicholls et al., 2010), so cannot all correlate well with in situ permanent deformation. The differences between the methods include the diameter, width and material of the loading wheel, the frequency and number of load cycles, the test temperature and whether conditioning takes place in air or water. The usual approach is to check whether the deformation and/or deformation slope achieved under a specific combination of factors is less than the permitted maximum. The test temperature is, however, often selected to provide a reasonable breadth of results, rather than to represent local ambient temperature. In addition, the susceptibility of aggregate interlocked mixes to temperature will be less than that of mastic-based mixes. Of the devices available, the Hamburg Wheel Tracking Test (HWTT) indicates susceptibility to premature failing of asphalt mixtures due to weak aggregate structure, inadequate binder stiffness, moisture damage or inadequate adhesion between aggregate and binder. HWTT results are known (SABITA, 2022) to be influenced by aggregate quality, binder stiffness, duration of short-term ageing, binder source, anti-stripping treatments and compaction temperature. This test, as applied and specified in South Africa Ref SABITA Manual 35, is therefore recommended for consideration in tropical and sub-tropical countries. Wheel-tracking limits when testing to EN 12697-22 (2020), selected for the UK in BSI Published Document PD6691 (2015), are presented in Table 6-15. These limits will need to be reviewed for tropical and sub-tropical countries, given that the UK has a temperate climate. Table 6-15: Limiting wheel tracking requirements for site classification Mix type Equipment Conditioning Number of passes Site classification Test temperature (°C) Maximum deformation (mm) Maximum proportional deformation (%) Maximum deformation slope (mm/1,000 cycles) Asphalt concrete Small Air 10,000 1 45 – 9.0 1.0 2 60 – – 1.0 3 – – – – EME2 Large Air 100,000 All 60 – 7.5 – Hot rolled asphalt Small Air 1,000 1 45 5.0 – 5.0 2 60 7.0 – 15.0 3 – – – – Stone mastic asphalt Small Air 10,000 1 45 – – 1.0 2 60 – – 1.0 3 – – – – Notes: Classification 1 – Moderately to heavily stressed sites requiring high rut resistance. Classification 2 – Very heavily stressed sites requiring very high rut resistance is intended for normal highway traffic. For very slow moving/stationary traffic in bus lanes, bus stops, major stop lines, docks and airport taxiways and stands, an enhanced deformation resistance might be necessary. Classification 3 – Other sites. Where data validation/confirmation is to be performed on plant trial material, care should be taken to note the age condition the mixture tested, to allow informed analysis/comparison of results to be undertaken. 62 Bitumen Bound Materials 6 5 4 3 2 1 6.5.4 Commentary on the Superpave Mix Design The Strategic Highway Research Program (SHRP) was set up, in the USA, to develop a method for designing asphalt mixtures in terms of performance properties, in contrast to the more compositional design approaches of the Hveem and Marshall methods. The resulting method is called Superpave (Cominsky et al., 1994; Asphalt Institute, 2001) and the asphalt concrete designed by the method can be termed Superpave asphalt. The properties of the mixture that are tested in the design method include permanent deformation, fatigue cracking and low temperature cracking. Superpave asphalt can be used almost universally, although it is generally used in more critical contexts, because of the additional aspects of the design and its associated cost. The specification of the Superpave binder is more demanding than more traditional paving grade binders and often requires polymer-modified binders. Should the designer wish to follow this approach, further guidance on analysis can be found by accessing the Asphalt Institute (https://www.asphaltinstitute.org/engineering/ design/superpave/). The associated performance graded binder, also developed by SHRP, is based on providing resistance to rutting, fatigue cracking and low-temperature cracking at specific pavement temperatures. The tests used include the use of a dynamic shear rheometer, a rotational viscometer, a bending beam rheometer, a direct tension tester, a rolling thin film oven and a pressure ageing vessel. The binder temperature ranges in the grading are based on the high and low temperatures at which a binder reaches critical values of distress-predicting properties. 6.6 Designs for Durability (Crack Mitigation) Separate definitions have been proposed for asphalt durability and pavement durability. Asphalt durability is defined in TRL Road Note 42 (Nicholls et al., 2008, https://www.trl.co.uk/publications/road-note-42- --best-practice-guide-for-durability-of-asphalt-pavements) as "the maintenance of the structural integrity of compacted material over its expected service life when exposed to the effects of the environment (water, oxygen, sunlight) and traffic loading". Asphalt durability is dependent on: • the component materials used; • the weather conditions during laying; • the mixture, (both the generic type of mix and the job mix design); • the workmanship during mixing, transport, laying and compaction; • the site conditions, including geometry, local weather conditions immediately after construction, drainage and (possibly) traffic. Pavement durability is defined in TRL Road Note 42 as "the retention of a satisfactory level of performance over the structure's expected service life without major maintenance for all properties that are required for the particular road situation in addition to asphalt durability". Pavement durability is dependent on: • the asphalt's durability; • the traffic and other site conditions; • the performance requirements set; • the asphalt performance characteristics. The durability of the pavement, and hence of the asphalt, are critical aspects for the overall performance of the pavement. The importance of durability has increased with the need to improve sustainability. Constructing pavements that do not need to be maintained, or that have an increased time between maintenance operations, is often the most sustainable option, provided that it does not require significant increases in the use of virgin materials, the consumption of additional energy and/or the carbon footprint. The aspects of asphalt mixes that enhance their durability include: • Air void content, (mixes with a high void content are less durable); • The thickness of the binder film; thin films allow faster and more complete oxidation, thus increasing the potential for cracking; • The use of hydrophobic aggregates to minimise the potential for binder stripping; • Effective compaction, undertaken at the appropriate temperature for the mix type. There is no measurable property of durability, other than the length of life of pavements with the mix. Furthermore, there is no recognised point at which a pavement is regarded as being unserviceable. This can often depend on the finances available to replace it, rather than on any technical rationale. 6.7 Manufacture and Construction General guidance on the design, manufacture and testing of asphalts, including bitumen Macadams and hot rolled asphalts, can be found in British Standard BS 594987 (2015). Similar guidance for asphalt concrete is given in the publications of the Asphalt Institute, MS-2 (2014) and MS22 (2020), the NAPA/US Army Corps of Engineers Handbook 2000 (2001) and the SABITA Manufacture and Construction Guidelines Manual 5 (2020) and Manual 35 (2019). It is normal practice to carry out preliminary design testing to determine the suitability of available aggregates, and their most economical combination, to produce a job-mix formula. The job-mix particle size distribution should be reasonably parallel to the specified grading envelope and is the target grading for the mix to be produced by the asphalt plant. Loss of fines may occur during the drying and heating phase and, therefore, tests on aggregates that have passed through the asphalt plant in the normal way should be used to establish a job-mix formula that meets the specified Marshall Test criteria. 63 Bitumen Bound Materials 6 5 4 3 2 1 The importance of detailed compaction trials at the beginning of asphalt construction work cannot be overemphasised. During these trials, compaction procedures and compliance of the production-run asphalt with the job-mix formula should be established. Adjustments to the job-mix formula and, if necessary, redesign of the mix are carried out at this stage to ensure that the final job-mix satisfies the mix design requirements and can be consistently produced by the plant. Tolerances are specified for bitumen content and for the aggregate grading, to allow for normal variation in plant production and sampling. Typical tolerances for single tests are given in Table 6-16. Good quality control is essential to obtain durable asphalt and the mean values for a series of tests should be very close to the job-mix formula which, in turn, should have a grading entirely within the specified envelope. Table 6-16: Job-mix tolerances for a single test Combined aggregate passing test sieve (mm) Bitumen content BS test sieve (mm) Percentage Mix type Percentage 12.5+ + 5 10.0 + 5 Wearing + 0.3 2.36 + 5 courses 0.60 + 4 0.30 + 3 Basecourses + 0.4 0.15 + 2 0.075 + 2 Roadbases + 0.4 Hot rolled asphalts are relatively easy to compact but bitumen Macadams and asphaltic concretes are relatively harsh, so that more compactive effort is required. Heavy pneumatic tyred rollers are usually employed, the kneading action of the tyres being important in orientating the particles. Vibratory compaction has been used successfully but care is needed in selecting the appropriate frequency and amplitude of vibration, and control of mix temperature is more critical with pneumatic tyred rollers. Steel-wheeled dead-weight rollers are relatively inefficient and give rise to a smooth surface with poor texture, but their use is required to obtain satisfactory joints. Rolling usually begins near the shoulder and progresses toward the centre. It is important that directional changes of the roller are made only on cool compacted mix and that each pass of the roller should be of slightly different length, to avoid the formation of ridges. The number of joints to cold, completed edges should be minimised, by using two pavers in echelon or a full-width paver to avoid cold joints between adjacent layers. If this is not possible, repositioning the paver from lane to lane at frequent intervals is an alternative. Should a layer be allowed to cool before the adjacent layer is placed, then the Asphalt Institute method of joint formation is recommended. The edge of the first layer must be 'rolled over' and thoroughly compacted. Before laying the second lane, the cold joint should be broomed, if necessary, and tack coated. The paver screed should be set to overlap the first mat by a sufficient amount to allow the edge of the rolled over layer to be brought up to the correct level. Coarse aggregates in the material overlapping the cold joint should be carefully removed. The remaining fine material will allow a satisfactory joint to be constructed. 6.8 Climate-Resilient Surfacings 6.8.1 Climatic Hazard Impacts on Road Surface With climate change, extreme weather conditions have become both increasingly common and more severe, often having an impact on road pavements. Such weather conditions include: • Higher temperatures for more extended periods, increasing the potential for deformation and binder ageing from the associated additional ultra-violet light; • Lower temperatures, although this phenomenon should not be significant in tropical and sub-tropical regions; • Greater rainfall, in terms of amount, frequency and intensity, which increases the potential for flooding, with the asphalt binder film remaining in contact with water for longer and more often, leading to stripping and general disintegration; • Longer periods of drought, during which the asphalt surfacing can age; • Strong winds and storms, although these should not affect the pavement structure directly; • Earthquakes and volcanoes, which can disrupt, or even destroy, asphalt pavements. Table 6-17: Manufacturing and rolling temperatures Grade of bitumen (pen) Bitumen Aggregate Mix Mixing Mixing Rolling (minimum) 80 - 100 130 – 160 130 – 155 80 60 - 70 150 – 175 150 – 170 90 40 - 50 160 – 175 160 – 170 100 Notes: The ageing of the binder due to overheating need to be avoided. Mixing must be accomplished at the lowest temperatures, and in the shortest time, that will produce a mix with complete coating of the aggregate and at a suitable temperature to ensure proper compaction. The ranges of acceptable mixing and rolling temperatures for hot mix asphalts are shown in Table 6-17. Warm and cold mix asphalts will require different temperatures, depending on the methodology involved. Very little additional compaction is achieved at the minimum rolling temperatures shown in Table 6-17 and only pneumatic tyred rollers should be used at these temperatures. 64 Bitumen Bound Materials 6 5 4 3 2 1 The extent to which such future events should be catered for will depend on the strategic importance of the road and the probability of them occurring. The possibility of extreme weather cannot be totally discounted in any location; the extreme heat wave in Canada, in June/July 2021, illustrates this. The nature, and extent, of climate change impacts will depend on future emissions scenarios, which are the subject of much modelling. The resilience of pavements depends a great deal on durability. A guide to good durability is given in TRL Road Note 42 (Nicholls et al., 2008, https://www.trl.co.uk/ publications/road-note-42---best-practice-guide-for-durability-ofasphalt-pavements) and (Greenham et al., 2022). There is no technology that can counter all the potential adverse scenarios that can occur, but mitigating options include: • The use of stiffer binders for extreme temperatures, but this approach is of limited value, given that the binder still needs to work in the more common temperatures currently experienced. Selection of a binder with an increased upper temperature limit (as determined by the Superpave performance grade system) may be a helpful first step, but that may result in a greater need for polymer modification. • Using temperature resistance surface options such as concrete or epoxy-modified binders. • The use of adhesion agents to reduce the possibility of binder stripping. • The use of anti-ageing binders and modifiers to reduce the extent of binder ageing. • The use of dense, impermeable mixtures to limit any water penetration into the asphalt. • Having a drainage system in and around the pavement that has excess capacity, with this capacity ensured through regular maintenance. There is no technology that can ensure resilience to earthquakes and volcanoes. The only mitigating measure is to build roads away from locations where such events can occur, but this is not a feasible transport policy in areas that are prone to such events. Climate-resilient roads consider all design elements, including geometry, drainage, pavement structure and surfacing. This section focuses on methods of providing climate-resilient surfacing to waterproof the pavement layers beneath. Maintaining the integrity of the surface through traditional maintenance approaches, such as resurfacing and localised repairs, are already effective climate adaptation strategies. In locations that experience extreme climatic conditions, however, the alternative solutions presented in this section might be required. Table 6-18 (adapted from the Nordic Development Fund (2018), Turnbull (2016) and Henning et al. (2017)) lists climatic hazards and their impact on the road surface, with only first-order impacts listed. It is, however, acknowledged that secondary impacts are possible, such as changes in land use resulting from changing climatic conditions that might ultimately have an impact on road use and subsequent performance. Table 6-18: Climate hazard impacts on road surfaces Climate Hazard Impacts the Road Surface Extreme wind Mechanical damage to the road surface from wind-borne debris (e.g. trucks overturning) Flooding or increased rainfall Delamination of the surface Increased moisture in pavement layers, resulting in reduced stiffness and subsequent surface failures Scouring of embankments and road shoulders Increased risk of aquaplaning/ hydroplaning Sea level rise (tidal movement) Blistering of surface as a result of pressure build-up below the surface, due to changing water table levels Increased frequency of wet-to-dry-to-wet cycles and hot-tocold-to-hot cycles Temperature cracks Shrinkage cracks Fretting Extreme high temperatures Reduced viscosity of the bitumen binder, leading to flushing Increased hardening of the bitumen (oxidation) Increased droughts Increased cracking 6.8.2 Choosing a Technology for Mitigating Expected Impacts Table 6-19 shows available technologies that could protect the required characteristics of the surface layer. Note that, although there are some technologies specifically developed to combat some climatic impacts, traditional technologies could also address these climate challenges. For example, if a chip seal surface does not waterproof a surface sufficiently, then other technologies such as cape seals or asphalt may achieve the desired outcome. 65 Bitumen Bound Materials 6 5 4 3 2 1 Table 6-19 suggests that there are three fundamental adaptation characteristics of road surfaces: • Less permeable surface options; • Surfaces that are more crack resistant; • Heat-resistant surfaces. Section 6.7 provides details of crack-resistant design options, while Section 6.8.3, below, describes the use of epoxy-modified binders as heat-resistant surfacing solutions. 6.8.3 Heat-resistant Surfaces: Epoxy-modified Asphalt and Chip Seals Originally developed as a surfacing solution on airfields and bridge decks, the application of epoxy-modified binders (EMB) in asphalt (EMA), open-graded porous asphalt (EMOGPA) and chip seals (EMCS) can be extended to climate-resilient surface options for roads and highways. Epoxy-modified binders have two parts: • Part A - epoxy resin (e.g. epichlorohydrin and bisphenol); • Part B – fatty acid curing agent mixed with bitumen. A standard in-line blending asphalt mixing system could be used for the premixing of EMA and EMOGPA. Herrington et. al. (2010) reported using a turbulent-mass continuous-mix Table 6-19: Climate resilience technology options for road surfaces Impacts on the Road Surface Characteristics Required of the Surface Potential Technologies Mechanical damage to the road surface from wind-borne debris (e.g. trucks overturning) • More robust surface (it is not often that specific allowance is made for high winds) • Modified mixtures such as epoxymodified surfaces, fibre-reinforced binder Delamination of the surface • Surfaces less prone to delamination • Use of prime coats or tack coats • Single-layer asphalt Water ingress through the surface • Using less permeable surfaces (e.g. a dense graded asphalt that is less permeable than, say, a single layer chip seal surface) • Close/dense-graded asphalt mixture options or cape seal • Crack-resistant surfaces Increased risk of aquaplaning/ hydroplaning • Free-draining surface • Porous surfaces (concrete/asphalt) • Increased camber Blistering of surface as a result of pressure build-up below the surface, thermal ratchetting • Improved surface bonding • Free-draining surface • Added surface weight • Installed surface drains • Use of prime coats or tack coats • Asphalt surfaces • Porous surfaces • Vertical or horizontal pressure relief valves. • (Leung et al., 2007) Temperature cracks • Crack-resistant surfaces • Fibre-reinforced asphalts • Stress-relieving layers Decreasing viscosity of the bitumen binder leads to flushing Increased hardening of the bitumen (oxidation) • Temperature-resistant surfaces • Modified binders used in epoxy asphalt and chip seals • Use of warm mix asphalt to reduce oxidation during mixing and to improve long-term durability drum plant for a trial construction in New Zealand. Part B (120°C) was mixed first, with Part A (85°C) being injected into the drum 4 m from the point of discharge. Positive displacement gear pumps fitted with electronic mass flow meters were used to inject the epoxy. The construction of EMCS requires modifications to the standard bitumen spray truck. A second spray bar is fitted to separately spray Parts A and B of the epoxy-modified bitumen simultaneously (See Figure 6-2). Most applications of EMA, EMOGPA and EMCS on roads and highways are still relatively recent, so the full life expectancy is unknown. Surface lives of over 40 years have been reported on bridge decks, such as the San Mateo bridge deck in San Francisco (OECD, 2005). The following benefits of epoxy-modified binders have been reported in OECD (2005) and Dinnen et al. (2020): • Resistance to extreme temperatures; • Resistance to oxidation; • A stiffness increase of three times that of other binder products; • A significantly increased fatigue life; • A lack of susceptibility to moisture permeation. 66 Bitumen Bound Materials 6 5 4 3 2 1 Figure 6-2: Modified spray bars for the construction of epoxy-modified chip seals Spray bar for part B Nozzle Nozzle Spray bar for part A Road surface Curing agent mixed with bitumen (part B) Epoxy resin (part A) 100m off the ground There is sufficient evidence available to suggest that epoxymodified binders are an ideal climate-resilient solution in areas susceptible to high temperatures and some moistureprone areas. Figure 6-3 and Figure 6-4 show the results of laboratory tests that indicate enhanced performance regarding the fatigue and bonding properties of epoxymodified surfaces. Figure 6-3 shows EMA's resistance to fatigue cycles to be substantially higher than those of the polymer-modified control. Similarly, the Cantabro Figure 6-4 loss of EMB in porous asphalt mixes was significantly less when compared with that of neat asphalt binder. Figure 6-3: Fatigue properties of dense-graded mixes with epoxy asphalt Source: Dinnen et al. (2020) Figure 6-4: Cantabro loss results of aged and un-aged open-graded asphalt mixes Source: Modified from Alabaster et al. (2014) 6.8.4 Design and Specifications for Epoxymodified Asphalt and Chip Seals Application and economic analysis The primary reason for using EMB is to provide surfaces that are heat-resistant and that have lower oxidation rates. Section 6.8.3 reports significantly increased fatigue performance and durability, but EMB would be most cost-effective for applications where extreme heat and oxidation rule out other bitumen additives. A report on trials carried out in New Zealand (Alabaster et al., 2014) recommended that it was possible to obtain a five-fold increase in the durability of low-noise surfaces, with an additional 30% in initial costs, by blending EMB with local bitumen. This had the potential to reduce the life-cycle cost of using low-noise surfaces to one sixth of their current level and this is currently the requirement on new high volume New Zealand roads (Gribble, 2018). Design philosophy The design used for EMB follows a similar approach to that of traditional bitumen-bound layer designs. The main design consideration is the dosage of epoxy mixed into the bitumen binder. In addition, given the enhanced performance of the EMB, a good quality aggregate should be chosen to realise the full life expectancy of the bound layer. The selection of high-quality aggregates is particularly important for the EMCS and EMOGPA mixes. Epoxy binder considerations A 100% EMB (approximately 50% Epoxy Dosage Rate) may be required for bridge decks and in high-fatigue and high-stress areas. A diluted epoxy binder is, however, typically used on sound pavement roadbases where the main concerns are heat and oxidation resistance. Diluted EMB rates of 25% or 40% (12.5% or 20% Epoxy Dosage Rate) normally satisfy the intended performance requirements. 67 Bitumen Bound Materials 6 5 4 3 2 1 Note 1: Epoxy Binder Dosage – Most literature sources refer to epoxy-modified dosage as the portion of the bitumen binder mixed with epoxy resin (from the supplier) to the volume of neat bitumen (e.g. 20, 40 or 100%). Fan et al. (2021) proposed the following Equation 6-1: Epoxy Dosage Rate = Epoxy Resin + Curing Agent Epoxy Resin + Curing Agent + Bitumen Binder Equation 6-1 EMCS on roads with flushed or bleeding surfaces, a higher EMB of a minimum 100% (50% Epoxy Dosage Rate) is recommended. Epoxy-modified open graded porous asphalt Due to the high void content of open-graded porous surfaces, oxidation and ravelling reduce their life expectancy when produced with traditional binders. EMOGPA is used on high-speed motorways and highways where aquaplaning and tyre-generated noise or water spray are of concern. EMOGPA has been successfully applied in these situations, with over 1,000,000 m2 laid in New Zealand alone, with successful trials and projects having taken place in the Netherlands. Table 6-20 provides specifications for EMOGPA particle distribution, while Table 6-21 provides the performance criteria. The epoxy supplier should specify the EMB mixing temperature. Typical mixing temperatures in laboratory conditions for Part A and Part B typically range from 80 to 90°C and 120 to 130°C, respectively (Wu et al., 2019). Epoxy-modified asphalt concrete Dense mix asphalt is designed according to Section 6.4.5. Apostolidis et al. (2020) reported asphalt mix properties of 5% air voids and 6.7% mass binder content when using a 70/100 penetration grade bitumen. The minimum EMB content is determined using the indirect tensile test and four-point bending stiffness and fatigue tests. Epoxy-modified chip seal (EMCS) EMCS follows the same design procedures as for conventional seals (e.g. in TRL ORN 3, 2000). The dilution rate of the EMB depends on anticipated road conditions. For example, for surfaces on sound roadbases and with few defects, a dilution of 20% EMB (10% Epoxy Dosage Rate) is recommended, for increased durability. When applying Table 6-20: Particle size distribution for EMOGPA Sieve Size (mm) EMOGPA 7 EMOGPA 10 EMOGPA 10 High Strength EMOGPA 14 26.5 – – – – 19.0 – – – 100 13.2 – 100 100 85-100 9.5 100 85-100 85-100 35-50 6.7 85-100 – – – 4.75 10-40 20-40 30-40 12-22 2.36 5-15 5-15 19-25 5-15 0.075 2-5 2-5 2-5 2-5 Effective Binder Content (%, by mass, min) 4.5 4.5 4.5 4.0 Concentration of Epoxy Bitumen in the Binder (%, by mass) 25 25 25 25 Minimum Thickness of Asphalt (mm) 20 25 25 30 Source: NZTA, 2021 Table 6-21: Design performance criteria for EMOGPA Criteria Requirements EMOGPA 7 EMOGPA 10 Air Voids (%) 20 – 25 12 – 16 Retained Tensile Strength (%) 75 min 75 min Binder Drainage (%) 0.3 max 0.3 max Cantabro Loss (%) 15 max 20 max Note: The Cantabro Loss test is undertaken using Austroads AGPT/T236 Asphalt Particle Loss (%). The criteria indicated here are for mixed design purposes, not construction quality control. Source: NZTA, 2021 68 Bitumen Bound Materials 6 5 4 3 2 1 6.9 Key Points 1. This chapter provides guidance on the selection, specification and use of bitumen-bound mixes. Bituminous-bound materials mixtures, commonly referred to as 'premixes', are manufactured in asphalt mixing plants, and typically compromise aggregate, binder and filler. 2. Specifications for the aggregates are similar to those for granular roadbases (Chapter 4). Suitable specifications for coarse and fine mineral components are given in Table 6-1 and Table 6-2. 3. Reclaimed asphalt is a material that is being increasingly used as an alternative to natural aggregate (and in all layers of a pavement). A procedure has been developed to design mixes incorporating RAP to be equivalent to one with all-natural aggregate, in TRL Road Note 43, 'Best Practice Guide for Recycling into Surface Course'. Although nominally for wearing courses, the procedure is also applicable to unbound roadbases and bituminous roadbases. (https://www.trl.co.uk/ publications/road-note-43---best-practice-guide-forrecycling-into-surface-course). 4. Straight-run bitumen is typically used as a binder for bituminous-bound materials, although polymermodified binders are increasingly popular, along with other modifiers, with the aim of minimising the environmental impact of the roads. The usefulness of a modifier will depend not only on the modifier, but also on the property enhancement required, as specified in Table 6-3. 5. The most critical layer of the pavement is the bituminous surfacing, and the highest quality material is necessary for this layer. To perform satisfactorily as road surfacings, bitumen aggregate mixes need to possess the following characteristics: high resistance to deformation; high resistance to fatigue and the ability to withstand high strains; sufficient stiffness to reduce the stresses transmitted to the underlying pavement layers; high resistance to environmental degradation; low permeability, to prevent the ingress of water and air; good workability, to allow adequate compaction to be achieved during construction. 6. The main types of premix are asphaltic (or asphalt) concrete, bitumen Macadam and hot rolled asphalt. Each type can be used in surfacings or roadbases but for a material to achieve long-term performance it is vital to understand the local conditions (climate and traffic) prior to design. 7. Asphaltic concrete (AC) is a dense, continuously graded mix designed to have a low incidence of air voids and low permeability, to provide good durability and good fatigue behaviour. It is common practice to design the mix using the Marshall Test. Particle size distributions and recommended Marshall criteria can be found in Table 6-4 and Table 6-5, respectively. 8. Variations of asphaltic concrete include: a. Enrobé à Module Élevé (High modulus bituminous mix) Type 2 (EME2). The mix uses a hard paving grade bitumen (10/20 or 15/25) to produce a very stiff asphalt, which allows the thickness of the roadbase and/or basecourse to be reduced. Gradings and binder contents can be found in Table 6-7. b. Dense bitumen Macadam, although similar, usually has a less dense aggregate structure. Made to recipe specifications without a formal design procedure, these mixes are based on empirical studies over many years. Suitable specifications for both wearing course, basecourse and roadbase mixes are given in Table 6-8, Table 6-9 and Table 6-11, respectively. c. Hot rolled asphalt (HRA), also known as rolled asphalt, is a specific type of asphalt that is gapgraded and relies for its properties primarily on the mortar of bitumen, filler and fine aggregate. Originally developed to recipe specifications, it can also be designed using the Marshall Test. The compositions of suitable mixes are summarised in Table 6-10; rolled asphalt roadbase is described in Table 6-12. 9. Thinner layer materials have been developed in recent years. They can be very difficult to construct consistently well and may be prone to becoming segregated, poorly compacted and porous with interconnected voids. Furthermore, the reduced thickness considerably limits the ability to level the surface, meaning that a higher standard is required of the layer below. The merits of a thin asphalt wearing course are discussed in Section 6.4.8. 10. Stone mastic asphalt (sometimes called Split Mastic Asphalt) can be used for wearing course and binder course layers and may have significant advantages on high traffic volumes roads. The air void content of stone mastic asphalt should be relatively low, although it can be increased to provide higher texture depth; this can incur a cost in terms of durability. Suitable designs for stone mastic asphalt are presented in Table 6-13. 11. For light- and medium-trafficked roads and in areas lacking coarse aggregates, sand-bitumen mixes are an alternative to traditional bituminous bound materials. Design criteria are presented in Table 6-14. 12. The full definition of a bituminous-bound material (asphalt) mix now needs to include whether it is 'hot mix asphalt', 'warm mix asphalt', 'half-warm mix asphalt' or 'cold mix asphalt'. The use of lowertemperature mixes does have the potential for reducing the carbon footprint and energy requirement. Categories of reduced-temperature asphalt can be found in Figure 6-1. 69 Bitumen Bound Materials 6 5 4 3 2 1 13. Under severe loading conditions, asphalt mixes must be expected to experience significant secondary compaction in wheel-paths. It is therefore important to design all mixtures to resist such conditions: this should include: a. Refusal density design - see Section 6.5.2. b. Wheel-track testing – see Section 6.5.3. c. Consideration of alternative approaches, such as analysis using the Bailey Method, and Superpave – see Sections 6.5.1 and 6.5.4. 14. The durability of the pavement, and hence of the asphalt, is a critical aspect for the overall performance of the pavement. The aspects of asphalt mixes that enhance their durability include air void content, the thickness of the binder film and the use of hydrophobic aggregates to minimise the potential for binder stripping and effective compaction, undertaken at the appropriate temperature for the mix type. 15. Premature failure is recognised when the failure modes become significant within a few years of construction. The underlying causes of such failures are major defects, in particular inadequate foundations, poor compaction, inadequate drainage, poor design and unsuitable component materials. Key approaches to minimising the possibility of premature failures can be found in Section 6.7. 16. The importance of testing and temperature control during production is critical to high quality materials. Tolerances are specified for bitumen content and for the aggregate grading, to allow for normal variation in plant production. Tolerances for a single test are given in Table 6-16, and the ranges of acceptable mixing and rolling temperatures for hot mix asphalts are shown in Table 6-17. Chapter 7 covers the adaptation strategy for creating more resilient road pavements through geometric design, drainage and materials considerations. The chapter includes specific considerations for climate resilient surfaces. A number of climatic impacts are presented, along with suggested adaptation strategies for reducing the adverse impacts of climate and weather events. Of greatest concern for bituminous surfaces are increased precipitation and moisture regimes and more adverse temperatures. The main climate resilient surface adaptation strategies include: • The use of stiffer binders for extreme temperatures; • Using temperature resistance surface options such as concrete or Epoxy-modified binders; • The use of adhesion agents to reduce the possibility of binder stripping; • The use of anti-ageing binders and modifiers to reduce the extent of binder ageing; • The use of dense, impermeable mixtures to limit any water penetration into the asphalt. In most cases, additional climate resilience can be achieved using traditional surfacing solutions. For higher temperatures, however, alternative binder options should be considered. This design guide describes a design and construction approach for Epoxy-modified binders in asphalt and chip seal surfaces. Designers should consider life-cycle costs to ensure that the increased life expectancy of these binders warrants the additional cost. 70 Pavement Drainage & Climate Resilience 6 5 7 4 3 2 1 7 Pavement Drainage And Climate Resilience 7.1 Introduction 7.1.1 General Two issues that have become important, in recent years, and which affect many aspects of modern life, are the Development of sustainable methods of conducting human affairs and adapting to climate change. Climate change refers to long-term shifts in temperatures and weather patterns, while adaptation refers to adjustments in ecological, social or economic systems in response to actual, or expected, climatic stimuli and their effects or impacts (United Nations Climate Action, 2021). There are different types of adaptation solutions, depending on the unique context of a community, business, organisation, country or region. There is no 'one-size-fits-all' solution. Adaptation can include building flood defences, setting up early warning systems for cyclones, switching to drought-resistant crops and redesigning communication systems, business operations and government policies (United Nations Framework Convention on Climate Change, 1992). The ability to prepare for, recover from and adapt to climate impacts is usually called 'climate resilience' (Centre for Climate and Energy Solutions, 2018), which implies that the solutions are resistant to the adverse effects of climate change. Developing sustainable solutions concerns developing methods and solutions that do not cause significant and irreversible damage to the world environment as a whole or to the local environment in particular. Quite clearly, the science and profession of civil engineering has a very important role to play in both of these issues and developing sustainable transport must make a major contribution. Climate change is expected to lead to more frequent extreme precipitation events and floods. The frequency of road closures and other incidents, such as parts of roads being washed away, will probably increase. A robust and resilient drainage design prevents the destruction of a road or reduces the scale and level of damage. It is also important to make roads and associated infrastructure climate-resilient, to ensure that social services, economic activities and emergency services remain uninterrupted, even during extreme weather events, or soon after. Hence, a resilient drainage system with an adequate capacity to cater for increased flows is very critical for the integrity and performance of the road infrastructure. Particular attention must be paid to enhancing existing standard designs pertaining to drainage systems, including ditches, pipes, culverts and bridges, to reflect changes in future expected runoff or water flow. The traditional approach to drainage has been to remove water from the road pavement and its surrounding areas with little regard to any damage this may cause to the receiving water body or the environment etc. Unfortunately, this often results in heightened peak runoff volumes and an increase in erosion and pollution problems in natural rivers and streams. Good road drainage design must consider not just the removal of runoff water, but also the maintenance of sensitive environments, public health, natural water resources and the cost-effectiveness of future maintenance activities. Drainage solutions that provide an alternative to the direct channelling of surface water via lined channels, through networks of pipes and sewers to nearby watercourses, and approaches to managing surface water that take account of water quantity (flooding), water quality (pollution), biodiversity (wildlife and plants) and amenity, are collectively referred to as Sustainable Drainage Systems (SuDS). The purpose and scope of this chapter is to give guidance on pertinent design principles that can enhance climate resilience. These principles should provide a robust pavement that will be able to perform its function sustainably. Since the publication of the ORN 31 fourth edition, many LMICs have established certain standards and requirements for pavement drainage design. Therefore, this chapter is not intended to serve as a hydrology and drainage manual. It does not cover detailed hydrology and drainage designs (as these can be found in specific manuals that are available in each country). The information contained herein is provided as an additional reference source for basic design and construction considerations. Details of climate vulnerability assessments and climate resilience policy measures are also not covered in this chapter. For climate resilience policy, readers can refer to the recently published policy guide document ('Climate Resilience Transport, A policy guide'), which is available from the HVT website. For vulnerability assessment, readers are referred to a guide for road managers (USAID, 2015). 7.1.2 Adopting a Holistic and Integrated Approach to Dealing with Climate Change The drainage measures described above all aim at: • Preventing water from initially entering the pavement; • Facilitating its outflow as quickly as is practicable, given the cost implications; • Ensuring that water in the road for an extended period does not cause failures. 71 Pavement Drainage & Climate Resilience 6 5 7 4 3 2 1 It should be appreciated, however, that the adoption of any single measure on its own is unlikely to be as effective as the adoption of a judicious mixture of a number of complementary measures applied simultaneously. There are numerous ways in which the road system can be damaged by climate-driven effects. The design principles described in this chapter provide information on drainage and methods of minimising and preventing damage to the road transport system, but climate change is affecting many more aspects of highway engineering than simply the design of drainage. For example, more extreme temperature could reduce the performance and service life of roads and infrastructure, and coastal roads will be severely affected by a rise in sea level, which may result in the complete loss of the asset. Thus, coping with climate change will require a coordinated effort by government as a whole and a comprehensive and integrated approach. 7.2 Adjusting Hydrological Design Standards 7.2.1 General This section considers adjustments to cater for gradual climate change, as opposed to extreme events, which are covered in Section 7.4. Road design in most parts of the world has traditionally been based on the use of historical data for many design inputs, such as environmental conditions (climate), drainage requirements, material performance, etc. (USAID, 2015). Many design methodologies are based on empirical criteria, relating to observation of what has worked in the past and making predictions through relatively simple extrapolation, assuming that the same conditions will apply in the future. The risk to road infrastructure is that, with changing conditions, design assumptions become less valid. This may lead to a reduced service life, poor in-service performance and ultimately additional, or more frequent, maintenance (Yand et al., 2016). Pavement drainage designers should take account of changes (such as climatic changes) that are occurring now and might occur during the design period. Climate change can cause increases in rainfall intensity and the likelihood of extreme rainfall events. Climate change will affect a road pavement in many ways. The accepted characteristics, amongst others, are higher temperatures, higher rainfall, more intense storms and more frequent storms. If climate change is not taken into consideration, the existing highway drainage system might not be designed with sufficient capacity to cope with possible increases in precipitation. Therefore, the risk of the pavement flooding may increase, which not only causes hazards to the general public, but also will have an adverse impact on the economy. Rainfall intensity - Duration – Frequency (IDF) relationships are used to design highway drainage systems but these relationships were established using historical data to predict the future with a no-change assumption. Therefore, it is necessary to incorporate the impacts of climate change into hydrological design and to adjust drainage design standards. This includes design standards for road drainage and for infrastructure, as well as the revision of flood frequency standards (including IDF curves) to reflect climate projections, rather than taking only historic trend data into account, (e.g. the 100 year flood in the past may now be a 25 year flood). This means that current storm event return periods need to be reviewed and the predicted changes in rainfall intensity considered, particularly for new watercourse structures (Galbraith, 2005). Along with new design standards, there is also a need to develop ways to share best practice for adapting design strategies that state and local governments can easily access. For example, Transport Scotland, in the UK, recommends that return periods for design storms for watercourse structures should be increased from the present practice of 1 in 100 years to 1 in 200 years (CIRIA, 2015). Transport Scotland also recommends that an individual risk-based approach should be used for particularly sensitive, or critical, sections of the road network. It has been recommended that a risk-based approach could be based on the projected 90th percentile rainfall, which could result in an increase of 40% on current design flows; this is in line with UKCP18 (2019). Taking a risk-based approach is key to dealing with the impacts of climate change on roads in an appropriate and cost-effective manner. A risk-based approach involves developing a better understanding of the relevant hazards, their associated risk and how they change over time, to enable road authorities to make informed decisions and prioritise resources. The elements that make up risk, and associated terms such as vulnerability, resilience, susceptibility and criticality, are often defined differently by different people, but the main points for consideration are the same. For the purposes of this RN31, risk has been divided into (1) exposure, (2) hazard and (3) vulnerability. The increased spatial variability, and increased intensity, of rainfall are the parameters that have the greatest impact on road drainage, and they must be taken into consideration in the preparation of climate-resilient designs. The impacts of short duration storms of high intensity rainfall are also significant. They will result in increased rapid runoff, often carrying debris (such as vegetation). The dimensions of drainage structures (cross-sectional areas and volumes) should be determined not only to accommodate the runoff flow rate, but also to accommodate sediment and debris flow from land degradation. In the absence of a specific drainage policy for individual countries, a 50% increase in in cross-sectional area for drainage structures should be considered. The 50% increase in cross-sectional area is to cater for increased debris and silting as a result of silting due to increased run-off. It is different from the uplift in Section 7.2.3 that is to cater for the increased flow through structures. 72 Pavement Drainage & Climate Resilience 6 5 7 4 3 2 1 7.2.2 Global Climate Models and Projection Tools There are more than 28 Global Circulation Models (GCMs), developed by different organisations for different regions; (for a list of Global Climate Models and a detailed discussion, reference can be made to the United Nations Intergovernmental Panel on Climate Change (IPCC) and the UK Met Office websites). There is no one single model solution for all regions. As the name 'global' implies, the grid size of most of the GCMs is roughly 250 by 250 km, which is too coarse to be applied on a river basin scale. In addition to the above, the outputs (mean sea level, pressure and temperature) from GCMs are not directly applicable for drainage design, given that it is aspects of precipitation that are required as a design input. Therefore, downscaling of the GCM, which is an estimate of climate conditions at a higher spatial resolution than is produced by GCMs, and the creation of a linear equation for the relationship between observed precipitation and the GCM output, are required. One of the most advanced sets of global model projections has been produced by the UK (UKCP18, 2019). The project provides updated observations and climate change projections up to 2100, for the UK and globally. The project builds on UKCP09, to provide the most up-to-date assessment of how the climate in the UK, and globally, may change during the 21st century (UKCP18, 2019). The UKCP18 set of global model projections provides 28 plausible, but diverse, projections from which to choose, based on locally observed climate data. The set comprises projections using the GC3.05 model and other Coupled Model Intercomparison Project (CMIP5) phase 5 models of the World Climate Research Programme. Many of the global simulations from the UK Met Office Hadley Centre (GC3.05) model have been downscaled to a 12 km scale ('regional') and will be further reduced to a 2.2 km scale ('local') in the future (UKCP18, 2019). The best option is to use a Regional Clime Model (RCM), if one is available for a particular region. If an RCM is not available, the second option will be to use a Global Climate Model (GCM), downscaled and calibrated with locally observed climate data. 7.2.3 Allowance for Climate Change The precautionary sensitivity allowances used in the UK for the impacts of climate change when assessing flood risk are shown in Table 7-1. According to Table 7-1, a multiplication factor is needed to allow for the impact of climate change on precipitation when undertaking flooding risk assessment. This factor increases with the targeted year of the assessment. Table 7-1: Recommended UK national precautionary sensitivity ranges for peak rainfall intensity, peak river flow, offshore wind and wave height Parameter Year 1990 to 2025 2025 to 2055 2055 to 2085 2085 to 2115 Peak rainfall intensity + 5% + 10% + 20% + 30% Peak river flows + 5% + 10% + 20% + 30% Sea surface water rise 10 cm 15 cm 25 cm 35 cm Source: UK Environment Agency, 2013 In the absence of local climate change model projections in LMICs, it is generally recommended that all drainage scheme designs incorporate an assessment of, and mitigation against, the potential impacts of climate change. Drainage designs should be developed on the basis that all new road drainage has a minimum design lifetime of 20 years, unless otherwise instructed by the local road authority. All drainage scheme designs should include the latest climate change allowances, in accordance with relevant national policy. In the absence of a national design policy, for the design of carriageway drainage, calculation of a 20% uplift in peak rainfall intensity, together with one of 40%, should be undertaken and documented within the design report that describes the technical basis of the drainage design. The difference between the 20% and 40% increases in rainfall intensity, based on future predicted global emission scenarios, will enable understanding of the range of impacts between different climate change risk scenarios. The appropriate rainfall intensity value for design should then be selected based on the acceptable risk for each project. The 20% increase in peak rainfall intensity should be the minimum increase accommodated by the carriageway drainage design. Adoption of an increase in peak rainfall intensity in excess of 20% for carriageway drainage design shall be subject to approval by the respective roads agencies. Justification for the value of peak rainfall intensity chosen for carriageway drainage design shall be given within the design report describing the technical basis of the drainage design. 73 Pavement Drainage & Climate Resilience 6 5 7 4 3 2 1 Figure 7-1: Typical cross section of a road, showing drainage types Source: ReCAP, 2019 7.3 Climate-Resilient Road Drainage Systems Road drainage design has four parts, as illustrated in Figure 7-1, namely: • External surface drainage; • Internal and subsurface drainage; • Slope drainage; • Drainage of retaining structures. In addition, cross-drainage is required for rivers and other watercourses that the road must cross. 7.3.1 External and Surface Drainage 7.3.1.1 Surface drainage The principles of good drainage design are briefly outlined below: • Surface runoff over the pavement and shoulders should be drained away as quickly as possible, preventing water from entering pavement layers from the top, and the subgrade from the bottom and the sides. • Precipitation over the open land adjoining the road should be led away from the pavement structure through natural drainage channels or artificial drains. Suitable crossdrainage channels should be provided, to lead the water across the road embankment, which may be cutting across natural drainage courses. • Consideration should be given to dealing with precipitation on the embankment and cut slopes, to prevent erosion • Seepage and subsurface water are detrimental to the stability of cut slopes and the bearing capacity of subgrades. An effective system of subsurface drainage must be provided to decelerate the onset of any slope failures. • Landslide-prone zones require special investigations for improving drainage. • Relatively poor embankment soils can perform satisfactorily if drainage is considered at the design stage. Waterlogged and flood-prone zones demand detailed consideration for improving the overall drainage pattern of the area surrounding the road. This guidance must be followed without endangering the road or adjacent areas through increased erosion or risk of instability. An external drainage system consists of several complementary components, including: • Surface drainage, to remove water from the road surface quickly; • Side drainage, to: • take water from the road, and • prevent water from reaching the road. • Turnouts, to take the water in the side drains away from the road; • Cross-drainage, to allow the water in the side drains, and from any other source, to cross the road line by channelling it under, or across, the road. This includes structures to allow permanent or seasonal water courses to cross the road line, and includes bridges. 74 Pavement Drainage & Climate Resilience 6 5 7 4 3 2 1 • Interceptor drains, to collect surface water before it reaches the road; • Erosion control (often simple scour checks), to slow the water in the side drains and prevent erosion in the drains themselves and downstream of drainage outlets or crossings. All these types of drain have to work together to protect the road from being damaged by water. Most road drainage problems can be solved by ensuring that the road surface is even, with a uniform crossfall toward the shoulders. Rutting and potholing will also interfere with the water flow and increase any potential problems. Similarly, the common practice of building up the shoulders, or allowing them to build up, usually with either grass or soil, but often both (Figure 7-2), results in an accumulation of water at the edge of the surfacing. This water then flows into the shoulders and the edges of the pavement structure, often leading to extensive outer wheel-path failures (Cedegren, 1988; ReCAP, 2019b). The following measures should be considered to prevent the ingress of water into the pavement: • Improving the geometric characteristics of the pavement (e.g. crossfall); • Making the structure impermeable to the infiltration of surface water (e.g. through the use of bitumen surfaces and densely graded, or cement-stabilised, materials); • Taking account of the local hydrology of the land to ensure that water flows away from the road and not toward it; • Constructing a seal that prevents ingress of water. Such seals should be well maintained, to minimise or delay cracking. This might be achieved using, for example, fog sprays and reseals; • Preventing ingress of moisture from the pavement edges by sealing the shoulders, raising the embankment, lining the side drain, etc. 7.3.1.2 Side drainage and crown height above drain invert The location, type and depth of side drainage is important for effective pavement performance (Figure 7-3). The recommended minimum crown height of 0.75 m applies to roads with unlined drains in relatively flat ground (longitudinal gradient of less than 1%). The recommended value for sloping ground (gradient > 1%) or where lined drains are used should not be less than 0.5 m. However, the distance (D) of the lateral ditch from the pavement and height (H) of the crown above drain invert level depend on soil type, the expected flood risk to the particular section of the road and the type of road surface material used. Hence, side drainage and crown height should be assessed on a case-by-case basis. Deformations, low bearing capacity Lack of ditch High grass Ingress of water Ingress of water Figure 7-2: Water ingress on roads without ditches Source: Berntsen & Saarenketo, 2005 D Carriageway Ditch H Figure 7-3: Road drainage and crown height arrangement Source: Rolt, Gourley & Hayes, 2002 75 Pavement Drainage & Climate Resilience 6 5 7 4 3 2 1 7.3.2 Internal and Subsurface Drainage Subsurface drainage is intended to reduce the groundwater level and to intercept, and drain, water infiltrating from adjoining areas and the road surface, or rising from the subgrade. The following are components of subsurface drainage systems, (refer to Section 7.7 for sketches and diagrams of internal and subsurface drainage): • Trench drains. These are installed within, and adjacent to, pavements. They are used to drain water from within pavements, intercept groundwater and lower the water table. • Edge drains. These are installed in rigid pavements to drain water from the interface between the roadbase and the sub-base. • Pavement interface drains. These drain the interface between pavements with a different structure. They may be orientated transversely or longitudinally. • Intra-pavement drains. These drain water from pavements on steep grades and sag curves where water flows are likely to be more parallel than transverse to the road alignment. • Drainage layers. These are permeable structural formation layers designed to remove water from wet subgrade areas, which might be caused by springs or groundwater seepage. • Outlets. These may be at stormwater pits or headwalls on batters. Intercepting subsurface drains are used where wet spots are encountered in the subgrade, caused by seepage through permeable strata underlain by an impervious material. In general, the water table should be prevented from rising to within 0.60 m below the sub-base. Good subsurface drainage is particularly important in swampy areas, to prevent excessive moisture in the upper subgrade, which would ultimately cause loss in stability through low resistance to wheel loads. Moisture is the single most important factor affecting pavement performance and long-term maintenance costs. Thus, one of the significant challenges faced by the designer is to provide a pavement structure in which the detrimental effects of moisture are contained to acceptable limits in relation to the traffic loading, the nature of the materials being used, construction/maintenance provisions and the degree of acceptable risk. The conditions or circumstances that require the provision of a suitable subsurface drainage system include: • The road is at the foot of a hill and there is a probability of the road being damaged by water coming from above; • The road is in cutting and there is a probability of considerable seepage in the slopes; • The road is passing through flat country and the water from the adjacent lands stagnates and makes the roadbed soft and unstable; • The soil below the road is subjected to the action of springs passing nearby; • The surface of the road has a normal underground water table, which is sufficiently below the crust of the road, but there is a tendency for the moisture to rise to the surface of the road or subgrade through capillary action through a pervious pavement, from a raised median and from side ditches. Subsurface drains should be installed at the following locations: • Along the low side of pavements; • Along the high side of pavements in cuts; • Along kerbed medians where infiltration from the median is likely, typically on both edges of the median; • Along both sides of the pavement and transversely at cut and fill locations; • Transversely at low points in sags; • At joints between an existing pavement and an adjoining pavement where pavement courses do not match, and where course thicknesses or relative permeabilities could create a moisture trap, either longitudinally or transversely; • At approaches to bridges, including immediately behind the bridge abutment to the full depth of the abutment, in the subgrade at the interface of the road pavement and the approach slab, and along the low side of the approach slab; • At the toes of embankments; • On the high side of slab anchors required for rigid pavements; • Along both sides of the pavement where the crossfall is flatter than 1% in a superelevation development, and transversely at superelevation changes, to limit the length of the longest drainage path within the pavement; • On the high side of a pavement where seepage is evident, or where water may enter from batters, medians, a full-width pavement, service trenches or abutting properties (i.e. properties adjacent to a road, street or easement in which a public sewer is located); • In areas where the groundwater table is high or seepage is expected, such as at springs; 76 Pavement Drainage & Climate Resilience 6 5 7 4 3 2 1 • Along both sides of a depressed median in fill sections of the road where the median drain invert level is above the underside of the Selected Material Zone (SMZ) and the longitudinal grade is less than 2%; • Along both sides of a median with a permeable surface (e.g. landscaped or grassed medians), or one that is generally greater than 2 m in width for its entire length; • Along all sides of a median with a fixed watering system; • At other locations deemed necessary by the pavement designer, or by road agency requirements. The following guidance is provided for achieving effective internal drainage of the road structure: 7.3.3 Drainage Within Pavement Layers. Drainage within the pavement layers themselves is an essential element of structural design because the strength of the subgrade in service depends critically on the moisture content during the most likely adverse conditions. Since it is impossible to guarantee that road surfaces will remain waterproof throughout their life, it is critical to ensure that water is able to drain away quickly from within the pavement. This can be achieved in several ways, as described in the following sections. 7.3.3.1 Avoiding a permeability inversion A permeability inversion exists when the permeability of the pavement and subgrade layers decreases with depth, thereby reducing the potential for vertical drainage and trapping water between. A permeability inversion often occurs at the interface between sub-base and subgrade. Thus, a permeability inversion should be avoided, to ensure good internal drainage. This is achieved by ensuring that the permeability of the pavement and subgrade layers are at least equal, or that permeability increases with depth. For example, the permeability of the roadbase must be less than or equal to the permeability of the sub-base, in a three-layered system. Since many subgrades are cohesive fine-grained materials with low permeability, a more conservative design approach is required that specifically caters for these conditions, for example constructing a 150 mm filter layer (see Section 4.3.4) on top of the cohesive subgrade or designing the pavement to take into account saturated subgrade conditions. 7.3.3.2 Shoulders Shoulders have three major functions: they provide a lane for non-motorised traffic (NMTs), they protect the vehicle lanes from adverse ingress of water and they provide a lateral restraint to the pavement layers, especially the unbound layers. Laterally restraining unbound materials enhances their strength. For this purpose, it is necessary for the shoulders to be of an acceptable width, and to use suitable materials. Acceptable shoulder widths are designated by the appropriate road agency, given local needs and traffic characteristics. A good shoulder should be at least 1.5 m wide to fulfil its purposes. The shoulder surface should not be rougher than the motorised vehicle lanes. This minimises the tendency of NMTs to choose to travel in the motorised lanes, thus improving road safety. Unpaved shoulders on paved roads are discouraged, due to the safety issues posed to NMTs, and because they permit water ingress into the pavement, thus weakening the area under the wheel-paths. They also permit carriageway edge breaks and edge drops, which both compromise safety. 7.3.3.3 Cross-section geometry Cross-section geometry may be used to add a safety factor to the thickness of the layers of the pavement. This is done by varying the camber (crossfall), as follows: subgrade 4%, sub-base 3%, roadbase 2 - 3% and surfacing 2 - 2.5%, as shown in Figure 7-4. Consequently, the layer is slightly thicker at the wheel-paths. Additionally, this facilitates internal pavement drainage due to the high camber at subgrade level. The recommended shoulder camber is 3 - 5%. SURFACING 4% camber Finished grade Drain invert Shoulder camber equal to carriageway camber or 3%-5% SUBGRADE 2.0-2.5% camber 3% camber SUB-BASE ROAD BASE Figure 7-4: Alternative cross section geometry 77 Pavement Drainage & Climate Resilience 6 5 7 4 3 2 1 Crossfall 1 in 20 Camber or crossfall at least 1 in 40 Running surface S Shoulder ide drain 1 4 CL 2 3 5 7 6 Crossfall 1 in 20 Camber or crossfall at least 1 in 40 Running surface S Shoulder ide drain 1 CL 2 8 5 6 (a) Separate shoulder material (b) Extended roadbase and sub-base It is evidently beneficial for the shoulders to have a steeper camber than the carriageway; this promotes quick drainage of water from the carriageway. Negative consequences, however, are that the construction process takes longer, and that NMTs will be discouraged from using the shoulders if the camber is too steep. Where permeability inversion is unavoidable, the road shoulder should be sealed to an appropriate width, to ensure that the lateral wetting front does not extend under the outer wheel-track of the pavement. Ensuring effective shoulder design. When permeable roadbase materials are used, particular attention must be given to the drainage of the roadbase layer. Ideally, the roadbase and sub-base should extend right across the shoulders, to the drainage ditches (Figure 7-4). In addition, an adequate crossfall is required, to assist the shedding of water into the side drains. A suitable value of crossfall for paved roads is about 2.5 - 3% for the carriageway, with a slope of about 4 - 6% for the shoulders. There is evidence that there are benefits to be obtained from applying steeper crossfalls to layers at successive depths in the pavement. The top of the sub-base should have a crossfall of 3 - 4% and the top of the subgrade should be 4 - 5%. If it is too costly to extend the roadbase and sub-base material across the shoulder, drainage channels at 3 - 5 m intervals should be cut through the shoulder to a depth of 50 mm below sub-base level. These channels should be back-filled with material that is of roadbase quality but more permeable than the roadbase itself. There should be a fall of 1 in 10 to the side ditch. Alternatively, a continuous drainage layer of pervious material, of 75 - 100 mm thickness, can be laid under the shoulder such that the bottom of the drainage layer is at the level of the top of the sub-base. In circumstances where the subgrade itself is permeable and can drain freely, it is preferable that vertical drainage is not impeded. If this can be achieved by ensuring that each layer of the pavement is more permeable than the layer above, then the additional drainage layer through the shoulders (layer No. 7 in Figure 7-5) is not required. Figure 7-5: Cross section of road showing drainage arrangement 1 Impervious surfacing 2 Shoulder surface dressed (providing a contrasting texture to the running surface) 3 Roadbase extending under shoulder for at least 500 mm 4 Shoulder material capable of supporting occasional traffic 5 Impervious sub-base across full width of construction 6 Formation and sub-base constructed with crossfall of 1 in 30 (providing a drainage path for any water that enters and also a thicker and stronger pavement on the outside wheel-track) 7 Drainage layer of pervious material 8 Roadbase extending through shoulder 78 Pavement Drainage & Climate Resilience 6 5 7 4 3 2 1 7.3.4 Moisture Zones in a Typical Road In terms of pavement cross section, the two moisture zones in the pavement that are of critical significance are the equilibrium zone and the zone of seasonal moisture variation, (see Figure 7-6: Right with a sealed shoulder; left with an unsealed shoulder). • In sealed pavements over a deep water table, moisture content in the equilibrium zone normally reaches an equilibrium value about two years after construction and remains fairly constant thereafter. • In the zone of seasonal variation, pavement moisture does not reach an equilibrium and fluctuates with variations in rainfall. Generally, this zone is wetter than the equilibrium zone in the rainy season and drier in the dry season. Thus, the edge of the pavement is of extreme importance to ultimate pavement performance, with or without paved shoulders. The edge is the most failure-prone region of a pavement when moisture conditions are relatively severe. To ensure that the moisture and strength conditions under the outer wheel-track will remain fairly stable and largely independent of seasonal variations, the shoulders should be sealed to an approximate width of between 1.0 and 1.2 m from the edge of the sealed area (Figure 7-6). 7.3.5 Avoiding Trench Construction Under no circumstances should a trench (or boxed in) type of cross section be used in which the pavement layers are confined between continuous impervious shoulders. This type of construction has the undesirable feature of trapping water at the pavement/shoulder interface and inhibiting flow into drainage ditches. This, in turn, encourages damage to the shoulders, even with light traffic. 7.3.6 Unpaved Raised Medians Raised medians are used to separate opposing lanes of traffic, (usually one lane going in each direction). Traffic engineers use raised medians for safety reasons, by creating barriers for drivers. Regardless of the number of transverse drains employed, quantities of rainwater will drain from a raised median into the pavement structure and subgrade, weakening the pavement. A depressed median is recommended wherever possible. When conditions make it mandatory to construct an elevated median, however, transverse drains should be connected with a longitudinal drain in the median deep enough to collect all groundwater before it can find its way into the pavement structure (Figure 7-7). Carriageway Subgrade Unsealed Carriageway Sealed Shoulder Shoulder Outer wheel track Outer wheel track Zone of seasonal Equilibrium moisture content moisture variation Zone of seasonal moisture variation Stable moisture Stable strength Variable moisture Variable Strength Variable moisture Variable Strength Figure 7-6: Moisture cones in a typical road Source: Dawson, 2009 Carriageway Carriageway Longitudinal pipe drain Transverse drain Transverse drain Raised Median Grass Figure 7-7: Drainage of unpaved raised medians 79 Pavement Drainage & Climate Resilience 6 5 7 4 3 2 1 7.4 Protection From Damage From Extreme Rainfall (Climate Resilience) 7.4.1 Hydrodynamic and Geotechnical Failure Mechanisms During extreme events, roads and road embankments are subjected to hydraulic loads in terms of water height, flow velocities, waves and rain. Cross-drainage structures are also subjected to high flow velocities that cause various different damage mechanisms to road embankments and to road surfacings, but most current drainage design guidelines do not differentiate between the different damage mechanisms. When a mass volume of water builds up behind the embankment and the acting force is greater than the resisting force, the embankment will fail. In this case, overtopping may not occur. To protect the embankment against this mechanism, geotechnical design is required. Another failure mechanism involves the overtopping of the embankment by flowing water. This is a hydrodynamic mechanism. 7.4.2 Overtopping Mechanisms Overtopping of the road by moving water during flooding subjects the pavement, the subgrade and the embankment to hydraulic forces not normally considered in roadway design. If instantaneous shear forces of the moving water exceed the resisting forces of the roadway or embankment materials, there is a high probability that embankment failure will occur. The overtopping undercuts the pavement on the downstream slope, causing the loss of the pavement's supporting structure. Turbulent flow of the overtopping water causes erosion of the shoulder. Once the shoulder is eroded, the pavement layers are easily eroded and washed away. When overtopping events continue for long periods of time (i.e. hours to days), a breach or washout of the entire roadway is possible. Repairing the damage caused by flooding and overtopping can be costly and time-consuming, requiring lengthy road closures. 7.4.3 Washouts after Extreme Rainfall A washout is the result of the combination of flood and erosion. For roads that are near stream banks, or that run across streams, severe erosion may cause a washout of the road. Blocked drains, due to poor maintenance, as well as inadequate drainage capacity for the event, can lead to washouts. Extreme rainfall events can cause washouts to occur more frequently, as they generally entail a heavy downpour of rain within a very short period. The stabilisation of stream banks can prevent washout from occurring, through the installation of adequate drainage or the use of structural containment of stream banks. A culvert should be installed for roads that cross non-perennial streams, to accommodate flows during wet weather. Stream banks can be stabilised through the use of gabions, riprap or increased vegetation. 7.4.4 Reducing Vulnerability Extreme flood events are increasing in both frequency and magnitude. Future climatic conditions will not resemble the past. Sea Level Rise (SLR) is already having an impact on coastal zones and sunny sky flooding (flooding often associated with coastal regions, where sea level rise attributed to global warming can send water into the streets on days with elevated high tides) is becoming a common occurrence (Dean, 2020). Climate and watershed changes may also increase the vulnerability of the road drainage system to extreme events. Vulnerability is a function of exposure, sensitivity and adaptive capacity. Planners and designers can lessen vulnerability by either reducing the sensitivity of the road to extreme events or enhancing the adaptive capacity of the drainage system, or both. To do this, road planners and designers need to: • expect that exceedances and overtopping events will occur; • estimate how many events to expect in an area within a given timespan; • anticipate the potential effects; • implement design and construction strategies to mitigate detrimental effects. • Strategies for reducing vulnerability during the design of new road infrastructure might include designing embankments to resist damage or to enable easy restoration when overtopped, including, where applicable: • flexible armouring of approach embankments to prevent erosion; • sacrificial embankment sections to enhance flow capacity during extreme flooding; • design of bridges to engage weir flow over embankments prior to overtopping of the bridge itself; • restraining slab units / bridge spans to prevent the lifting of the substructure if inundated or subjected to lateral hydraulic loading; • flexible armouring of culvert ends to maintain end conditions; • evaluation of the watershed for likely debris potential, and planning for debris transport; • evaluation of stream geomorphology for channel stability and sediment transport characteristics. • Many of these strategies are already standard practice in the USA and road agencies in LICs are encouraged to adopt broader application of these practices (Dean, 2020). Many are also applicable to the retrofitting and rehabilitation of existing roads. In addition, there are several strategies that may reduce vulnerability when retrofitting, rehabilitating or maintaining existing roads. They include: • evaluating how the stream and road drainage systems have interacted geomorphologically since construction. Is the stream stable or unstable? Is an extreme event likely to initiate or worsen instability? • modifying existing features to reduce damage from overtopping. As on-going maintenance activities and periodic rehabilitation projects are implemented, asset managers should endeavour to anticipate, and mitigate, design exceedances, including overtopping events. 80 Pavement Drainage & Climate Resilience 6 5 7 4 3 2 1 7.4.5 Extreme Event Mitigation Strategies Extreme event mitigation strategies can be based on either resistance (i.e. try to prevent damage) or resilience (i.e. contain and minimise damage). Both have their advantages and disadvantages (see Table 7-2). The resistance strategy, in principle, aims to prevent and regulate floods and hence has a strong impact on natural floodplain dynamics. The resilience strategy aims to minimise the consequences of floods, but at the same time intends to maintain the natural floodplain dynamics as much as possible (Mekong River Commission, 2011). The rationale for the resilience strategy is that, although the strategy might require higher initial investment, the longer-term costs in terms of road damage and ecological impacts will be lower. Clearly, the selection of a strategy requires an integrated assessment of all relevant aspects and impacts. 7.4.6 Planning and Design It is important for decision-makers to consider, and account for, extreme weather conditions during the planning, design and construction phases of the road. There are a number of ways to better cope with these conditions, including improved climatic and design modelling, the use of more resilient materials, appropriate technical specifications and improved construction techniques. Addressing the need for greater resilience in road infrastructure should be a major focus of road agencies. Significant long-term benefits could be realised from investing more heavily in critical routes to minimise the impact of road closures and reconstruction following extreme events. Technical design options in road design and rehabilitation include: • the resistance of the road structure to erosion (e.g. through selection of the type of pavement or protection of embankment slopes); Table 7-2: Advantages and disadvantages of the resistance and resilience strategies for road development on floodplains Strategy Advantages Disadvantages Resistance strategy • Better protection against floods • Reduction damage in high-density areas • Fragmentation of floodplains and hydraulic changes, and impact on flood-related functions • Downstream impacts • More expensive to protect roads against damage • Potential for increased complacency toward the dangers of floodplain living Resilience strategy • Less fragmentation of floodplains and hydraulic changes • Less damage to roads • Long-term benefits to both financial investment in development, and biodiversity conservation • Increased awareness of the dangers of floodplain living • More costly, due to construction through flow structures • Reduced access (low embankment roads) • Greater need for integrated planning and management Source: Mekong River Commission (2011) • changing the elevation of the road structure (e.g. increasing or lowering the elevation of roads); • providing cross-drainage structures for the road (e.g. culverts and bridges); • changing the alignment of the road; • increasing distance from rivers. 7.4.6.1 Materials selection Preserving roads in a good condition in remote regions is extremely important to maintaining access between communities during extreme weather events. Sourcing good-quality road materials can, however, be challenging, and locally occurring natural materials are often moisturesensitive and they perform poorly when exposed to highmoisture conditions. In urban and semi-urban environments, asphalt materials can provide good resistance to water and recover well in the event of flooding, if properly designed and constructed. As an example, foamed bitumen stabilisation has a proven track record in providing resilient pavements during flooding (Ethiopian Road Authority, 2013). Crumb rubbermodified binders are increasing in popularity across Australia as a sustainable and resilient technology that can provide improved performance when used in sprayed seals and asphalts, especially in severe and challenging locations (Ethiopian Roads Authority, 2013). 7.4.6.2 Provision of balancing culverts A sufficient number of cross-drainage structures, according to site requirements, should be provided for the movement of water across the embankment. For the free flow of water across the embankment, at least two culverts per km should be provided. In case water depth rises to within 1.0 m of the top of the embankment, cross-drainage structures with an adequate opening should be planned. 81 Pavement Drainage & Climate Resilience 6 5 7 4 3 2 1 7.4.6.3 Allow flood water to overtop the road Raising the roadway to prevent overtopping is not a feasible solution, because this simply moves the problem elsewhere by backing up the water. The most cost-effective option is to allow floodwaters to overtop roadways and to try to protect their embankments from scour (Figure 7-8). Protecting roads from destructive scour and erosion by developing cost-effective scour prevention measures could greatly reduce the cost of repairs, as well as the time required to reopen the roadway after a flood event. For high-depth, short-duration and high-velocity events, embankments can be protected with concrete and boulders, while embankments with low depth, low velocity and longer duration floods can be protected using soft armouring, reinforced vegetation or temporary techniques. Full-scale modelling of scour prevention and erosion control techniques will lead to an understanding of which protection method works best, under which conditions. The most feasible soft scour protection measures include: • armoured sod hydraulic soil stabilisation; • turf reinforcement mat (Enkamat); • flexible concrete geogrid mat (Flexamat). All three are alternatives to riprap and other 'hardscapes'. They all encourage vegetation to grow through a mat, helping to stabilise the soil and protect the embankment from scour and erosion. 7.4.7 Effect of Different Types of Pavement on Performance with Flooding The rapid flow of flood water scours and washes out the pavement structure. For this type of flow, pavement type has little impact. Pavement type is, however, significant during inundation and when rising water submerges the pavement with no rapid flow. If flooding causes the subgrade to become fully saturated, moisture infiltrates the roadbase, pushes the subgrade particles apart and weakens the system. Pavement layers should remain at or near optimum moisture condition if the system has been specifically designed to direct, and keep, water away. This might, however, not be the case, due to climate changes (which might have been substantial) since the road was designed. Soaking of the road material by inundation from extreme flows will also affect the road pavement by reducing the strength of its materials. More extreme rainfall events reduce the structural capacity of unbound base and subgrade when pavements are submerged. Development of a better understanding of how submergence affects the pavement layer's structural capacity, and strategies to address the problem, are therefore very important. Higher average annual precipitation also reduces the pavement's structural capacity due to the increased level of saturation. To reduce the moisture-susceptibility of unbound roadbase / subgrade materials, stabilisation is required. A comparative analysis of different pavement performances showed that a rigid and strong pavement built to a high standard was the most flood-resilient, indicating that this may be adopted as a flood protection strategy (Hankare et al., nd). Generally, a pavement's performance when subjected to flooding for the initial two to three years of its life depends on pavement type, traffic loading and set maintenance standards. The greater the flooding potential, the higher the risk of early failure (Misbah et al., 2017). Rigid pavements generally perform better than composite and flexible road groups when subjected to flooding (Misbah et al., 2017). Both composite and flexible road groups show similar performance up to two to three years after construction. Composite systems are potentially more prone to distresses, such as reflective cracking and rutting. Reflective cracks are undesirable in a composite pavement structure as they tend to undergo a progressive width increase, permitting the leakage of surface water to the Figure 7-8: Cross section of road that is overtopped by flood water, with erosion protection Source: Redrawn from IRC:34 (2011) HFL: High Flood Level 82 Pavement Drainage & Climate Resilience 6 5 7 4 3 2 1 layer beneath. An unbound granular layer is placed between the HMA and the Chemically Stabilised Material (CSM) layer as a crack relief layer. When the top layer is deteriorated, the layer underneath becomes compromised after a few years and behaves in the same way as a flexible pavement. A pavement's strength can be enhanced by strengthening with an overlay and layer stabilisation. The stabilisation of granular layers can be carried out to convert a road into a rigid or composite pavement. Full Depth Reclamation (FDR) is an alternative technique for road hardening. For new roads: • Assess inundation potential through flash floods (using flood maps); • Design a stiffer pavement section (soils, roadbases, pavements etc.). For existing roads: • When repair or rehabilitation is needed, assess flash flood and inundation potential; • Use a resilient hardening solution (overlay or FDR); • Start with emergency evacuation routes. 7.4.8 Specific Recommendations for Climateresilient Drainage The following measures are recommended: • In an open floodplain, a strategy for resilience is much preferred over one for resistance; • The number, and dimensions, of cross-drainage openings (bridges and culverts) should minimise interference with the natural hydraulics of the floodplain, in terms of duration and extent of the flooded area; • Scour protection near bridges and other cross-drainage openings, which are part of a resilience design strategy, needs to be robust, to prevent massive and recurring damage to the abutments, and eventually the structure itself; • For national, and major provincial, roads there is a preference for slope protection using gabion mats or stone covers when hydraulic studies indicate flow velocities exceeding 2.7 m/s and soil conditions are prone to erosion; • The use of hedges to prevent wave erosion of the upper part of the embankment slope and shoulder; • The crest level for national roads and major and provincial roads should match the highest recorded flood level (if historical data are available), plus 0.5 m freeboard. For major regional roads, the crest level should correspond to the minimum height of the water level of floods with a recurrence rate of 10 years, plus 0.25 m freeboard. • For road embankments up to 4 m high, a slope gradient of 1 in 3 provides sufficient safety protection against the macro-instability mechanism during cycles of rise and fall of the water level. • Investigate the geotechnical characteristics of top soils and take any required action, such as removing and replacing inappropriate top soils. 7.4.8.1 Coastal road washout protection The following adaptation measures are recommended: • Using appropriate structural materials and providing lateral protection; • Raising road and pavement levels; • Constructing levy banks with drainage/seawalls; • Road realignment; • Including an additional longitudinal and transverse drainage system; • Constructing seawalls, jetties, offshore breakwaters, groins and ripraps to protect shorelines from coastal erosion and submersion; • Protecting levy banks with suitable mangroves; • Planting artificial reefs; • Replacing metal culverts with reinforced concrete; • Developing or strengthening flood risk management plans; • Re-siting of critical infrastructure from areas that are forecast to be most at risk from rising sea levels; • Developing a Coastal Strategy that identifies the most appropriate shoreline management plan and assesses whether coastal defences are required/needed, etc. 83 Pavement Drainage & Climate Resilience 6 5 7 4 3 2 1 7.5 Sustainable Drainage Systems 7.5.1 General Sustainable Drainage Systems (SuDS) are drainage solutions that provide an alternative to the direct channelling of surface water via lined channels, through networks of pipes and sewers to nearby watercourses. They are approaches to managing surface water that take account of water quantity (flooding), water quality (pollution), biodiversity (wildlife and plants) and amenity. A SuDS is specifically used as a climate change adaptation measure in highway drainage design, while Sustainable Urban Drainage Systems (SUDS) have been applied in urban areas, covering residential streets, car parks and green roofs. The third type of SuDS is a Rural Sustainable Drainage System (RSuDS) (Environment Agency, 2012), which is applicable for rural roads and also includes farmland drainage. It is Sustainable Drainage Systems (SuDS) that are dealt with in this chapter. The traditional drainage principle is to remove water from the road pavement and its surrounding areas with little regard for the damage it causes to the receiving water body or the environment, or in terms of the erosion of arable land. Unfortunately, this often results in heightened peak runoff volumes and consequent increases in erosion and pollution problems in natural rivers and streams. Groundwater recharge may also be restricted. Good road drainage design should consider not just the removal of runoff water, but also the maintenance of sensitive environments, public health, natural water resources and the cost-effectiveness of future maintenance activities. Many countries are now introducing strict regulations against the pollution of natural water resources. As a result, the discharge of polluted water into natural water bodies will be reduced in the future. In very dry areas, sustainable road drainage can be designed to retain water in small dams or maintain a high water level, in order to increase the availability of water for wildlife and local inhabitants and recharge local aquifers. In areas prone to flooding, road works can incorporate retarding basins to reduce runoff peaks, or they can improve drainage in farming areas that are excessively sensitive to flood damage. Surface water drains should be designed to carry uncontaminated rainwater to a local stream, river, pond, detention pond or soakaway. Nothing that could cause pollution should be allowed to enter these drains. Although Sustainable Urban Drainage Systems (SUDS) were initially applied in an urban environment, for residential roads, carparks and footpaths in the UK, their application has been expanded to rural trunk roads ('SuDS for Roads', Pittner & Allerton, 2009) and their label has been changed to 'Sustainable Drainage System (SuDS)' by removing the word 'Urban'. SuDS schemes have been informally practised in LMICs (for example, in the form of vegetated swales along rural roads). The pillars of SuDS are Quantity, Quality, Amenity and Biodiversity. The following are SuDS schemes currently practised in countries such as the UK, the USA, Australia and South Africa, which can be replicated in tropical countries. • Swales; • Filter strips; • Filter drains; • Detention basins, ponds and wetlands; • Attenuation storage. A detailed description of the design and construction of SuDS schemes for road drainage is provided in 'CIRIA C753 - The SuDS Manual' (CIRIA, 2015), 'SuDS for Roads' (Pittner & Allerton, 2009) and 'South African SuDS Guidance' (Armitage et al., 2013). 84 Pavement Drainage & Climate Resilience 6 5 7 4 3 2 1 7.5.3 Filter Drains Filter drains are trenches alongside the carriageway filled with a permeable material or media designed to filter, temporarily detain and then convey runoff. At the base of the trench there is a perforated pipe, which conveys runoff downstream. The filter drains for the road drainage will be designed to allow infiltration, unless a requirement is identified by the contractor during detailed design to include an impermeable liner (e.g. due to groundwater levels or geotechnical constraints). Figure 7-10 shows a typical schematic representation of a filter drain. Figure 7-10: Filter drain 7.5.2 Swales Swales are shallow, flat-bottomed, vegetated channels designed to convey runoff and provide attenuation and treatment. Berms can be installed perpendicular to the flow path to allow runoff to temporarily pond, thus increasing pollutant retention and infiltration, as well as further reducing flow velocity. It is proposed that dry swales are adopted in order to allow infiltration into groundwater, which will provide enhanced treatment and attenuation. Figure 7-9 shows a typical schematic representation of a dry swale. Scour check at intervals as per design Sealed shoulder Wider than usual side drains e.g. 1.5m Grassed slope Grassed shallow slope Grass Figure 7-9: Cross section through a grassed Swale 85 Pavement Drainage & Climate Resilience 6 5 7 4 3 2 1 7.5.4 Infiltration Basin An infiltration basin is a vegetated, open impoundment where incoming stormwater runoff from the road pavement is stored until it gradually infiltrates into the soil strata, thus reducing flooding and erosion downstream. Infiltration basins are used primarily to enhance the quality of water but flooding and channel erosion control may also be achieved within an infiltration basin by using a multistage riser and barrel spillway to provide controlled release of the required design storms above the water quality (infiltration) volume (Figure 7-11). Infiltration basins may also be used where the subsoil is sufficiently permeable to provide a reasonable infiltration rate, and where the water table is low enough to prevent the pollution of groundwater. Infiltration material Carriageway Out flow: used if water body nearby Grassed basin PLAN SECTION Shoulder Shoulder Grassed infiltration area To natural water body if nearby Figure 7-11: Infiltration basin 7.5.5 Wetlands Wetlands are features that include a permanent volume of water (normally a maximum of 1.2 m deep) and that are designed to temporarily detain and treat runoff. They are largely similar to retention ponds, but a larger area is apportioned to aquatic plants and there are shallow zones that promote the growth of bottom-rooted plants, a more varied depth profile and the optional inclusion of islands (CIRIA, 2015). This increased biological and morphological diversity can increase pollutant removal efficiency, compared with retention ponds. 86 Pavement Drainage & Climate Resilience 6 5 7 4 3 2 1 7.6 Climate Resilient Drainage in Difficult Terrain 7.6.1 General Drainage of road pavements in sloping, flat and low-lying valley areas often poses problems and is a design issue that requires sound guidance for practitioners and road authorities. The following are critical drainage issues need to be considered in flat and low-lying areas: • It is common for the entire catchment around a road to be inundated with water during the rainy season. It is also possible for water to travel underground (infiltration), which can damage the road subgrade. An efficient drainage system is necessary to allow water to flow off and away from the road as quickly as possible. • A road pavement may be constructed on a low embankment with the formation being relatively close to the natural water table. If the subgrade soil is finegrained, the water may be drawn up into the subgrade through capillary action (suction), with consequent detrimental effects on pavement stability and design life (Nordic Development Fund, 2009). • In flat terrain, where obtaining minimum drainage gradients may not be possible and where water flow at the outlet of a culvert may be constrained by downstream flow restrictions, considerably more care is needed to ensure sufficient flow to minimise siltation. Some engineering work (e.g. stream training) may be required to ensure that the downstream flow is not restricted. • Drainage water may also cross private land. This can be a legal issue in some countries, especially if it is agricultural land. Before a road is constructed the rainfall runoff is normally distributed across the field, but when a road crosses agricultural land it causes the flow to be concentrated so that it passes under the road (e.g. at a single point, such as a culvert). The concentrated flow creates a gully erosion downstream of the road and damages crops, which may attract a compensation claim from the farmer. • If there are long distances to the natural drainage system, it can be difficult to remove water fully. Water that cannot infiltrate into the subsoil can create large local pools that raise the groundwater table and eventually pose problems for traffic. • During periods of heavy rainfall, the subsoil, depending on its permeability, may not be able to drain the excess surface water quickly. 7.6.2 Countermeasures for Dealing with Drainage in Flat and Low-lying Areas Once the road is constructed, many of the problems in flat and low-lying areas are quite difficult to solve. Good drainage design begins with good route location; hence, if possible, it is important to avoid unstable foundation soils, frequently flooded areas and unnecessary stream crossings. This will greatly reduce costs. If this is not possible, the following countermeasures should be considered. 7.6.2.1 Raising the formation level of the road In flat and low-lying terrain, the road should be raised above the predicted maximum flood level, plus some free board that is added to account for uncertainties with climate change (Figure 7-12). In situations where extended inundation is likely from storm surges or precipitation events, enhancing drainage may not be enough to avoid damage to critical roads. Also, in areas where the topography means that a road is in a low-lying area that naturally collects water, it may be difficult or too expensive to put systems in place that always remove water under such inundation scenarios. Some roads, however, are critical as emergency routes and so must be kept accessible for as much time as possible. In all these cases, the solution may be to raise the profile of the road, or at least critical parts of the road, such as an intersections, to ensure the road remains viable throughout an emergency. Road design standards in many countries stipulate subgrade elevation to be a minimum of 1.5 m above the highest flood level, to prevent water from entering and submerging the substructure of the road. The raised road can nevertheless block water flowing from one side of the road to the other, so it is important that effective cross-drainage of the road is provided and to use coarse-graded embankment materials that are not susceptible to water. Drain/stilling basin Concrete Embankment Mortared rip-rap Carriageway Pavement Flow direction of over topping flood Figure 7-12: Raised formation level 87 Pavement Drainage & Climate Resilience 6 5 7 4 3 2 1 A road embankment constructed on a flat and wet section will act as a dam, blocking the water from flowing from one side to the other, causing ponding and possibly threatening the integrity of the road formation. Hence, it is important that effective cross drainage is provided, but it will be difficult, if not impossible, to discharge flood water from the upstream of the embankment to the downstream side through cross drainage structures in the absence of an adequate slope to the outlet side. Drainage (outlet) ditches may be required, but because of the terrain these will be long, deep and expensive. In addition to the above, raising the road level will divide the floodplain and alter the natural flow mechanisms, which is neither sustainable nor resilient. Therefore, raising the road level should be considered in conjunction with additional measures, such as trenches and infiltration basins etc. The following conditions for raising the formation level should be investigated: • Exposure and risk to inundation – Review the likelihood of inundation due to either severe precipitation events or storm surge conditions; • Roadway criticality – How critical is the road? Are there alternative routes of acceptable length? Where a roadway is considered critical, are other drainage options available and likely to be sufficient?; • Adjoining area compatibility – The ability for the raised roadway to connect with adjoining roads. The result of raising the road profile is to raise the critical vulnerabilities of the road above the threat of flood events. By channelling water through culverts under the road, or utilising techniques to harden the road, the road can be protected from flood events so that its service life is extended. Additionally, once the road is raised, there is no further cost that is needed to maintain the raised profile. This single investment can then be offset by the protection offered to the road itself and to surrounding structures. 7.6.2.2 Lowering the water table by installing longitudinal subdrains Longitudinal subdrains can be installed in the verges on either side of the road, parallel to the centreline, to a depth that is greater than the desired minimum level of the lowered water table below the middle of the pavement. To lower the level of the water table for roads running in flat terrain with low embankments, longitudinal subsurface drains, or pipe drains, are placed below the surface of the ground in the permeable saturated stratum. The longitudinal pipe drains may be laid on each side of the road, as shown in Figure 7-13. When placed on sites with the required slope, subsurface drains discharge water into the surface drain. If the provision of longitudinal pipe drains on each side of the road fails to lower the groundwater table to the desired extent, then transverse drains can be laid in section, as shown in Figure 7-14. The transverse drains should be laid with a suitable slope and discharge water into longitudinal drains, which should be inclined at an angle of about 60° and staggered in plan. They should also be placed 6 - 20 m apart, depending on moisture conditions. SECTION Longitudinal pipe drain Original water level Clay seal Transverse drains Road surface Figure 7-13: Longitudinal subsurface drains / pipes Longitudinal pipe drain Transverse drains 60° 60° PLAN Figure 7-14: Longitudinal subsurface drains / pipes Source: CementConcrete.org 88 Pavement Drainage & Climate Resilience 6 5 7 4 3 2 1 They can only be used when the flat area is less than a kilometre in length. If the flat / low-lying area is several kilometres long, a realignment (if possible) is always the best option. The second-most cost-effective and environmentally sustainable option is the use of filter mattresses. 7.6.2.3 Interception and drainage of groundwater in a low-lying area Where wet conditions occur under the embankment, it may be possible to intercept groundwater flow by installing deep subsurface drains, intercepting drains and/or culverts to reduce moisture content and flow in the soil beneath the road. For the effective interception and drainage of groundwater in flat terrain, where the ground comprises fine-grained and moisture-susceptible clayey silt soils, it is generally necessary to install such drainage well in advance of earthworks. This is to allow time for the lowering of the groundwater table in soils, which are typically of relatively low permeability. Satisfactory results can be achieved by providing 1.50 - 1.80 m deep drainage channels (below the ground line), as close to the road bank as possible. These channels should be connected by suitable outfalls to natural drainage. Alternatively, buried drains of suitable design, such as French/Fin drains, could be provided at the edges of the pavement, to lower the water table. Either of these measures will be effective in keeping the bottom of the subgrade above the capillary fringe. This method of drainage is applicable to all types of pavement construction (whether rigid or flexible) and is preferred wherever economically feasible. Vertical subsurface drainage structures are also commonly used along roads in wet areas, for example, in a wet cut bank with seepage. The purpose of these vertical drainage structures is to remove groundwater and keep the subgrade dry under the road. Vertical subsurface drains can be divided into two main groups: • Interceptor drains; • Water table-lowering drains. It can sometimes be more cost-effective to use vertical drainage structures than to add a thick structural section to the road or make frequent road repairs. This is especially the case with high volume roads. A typical under drain comprises an interceptor trench (depth of 1 - 2 m) and a back-fill. The drains are usually filled with a highly permeable material and wrapped in a geotextile, with a perforated tube or permeable material near the bottom. Geo-composite-based drainage systems, otherwise known as 'fin drains', are typically only a few centimetres thick. These types of drainage system are usually placed at the edge of the pavement structure, parallel to the road centreline. 7.6.2.4 Use of Permeable Layers Permeable layers may be used to provide cross-drainage, as an alternative to culverts. They can be used in either cuttings or embankments, at vulnerable sections of the road. These layers typically consist of coarse, clean rock enveloped in a geotextile or a local alternative material. They are known as filter mattresses/drains and have added value over culverts in a number of situations: • Where water saturation risks destabilising the roadbase (also between two culverts); • Where a two-directional flow of water through the roadbase should be allowed; • Where it is possible to disperse flows to prevent gully erosion that may occur downstream of a culvert in areas with considerable slope; • Where the lowering of wetland water levels could occur as the result of there being a large number of culverts, since the release of excess water through filter mattresses is more gradual. Filter mattresses may be used in different ways, depending on the local hydrology. A number of short sections may be installed at set intervals, or, particularly in very wet conditions, a long section over a large area (up to 300 m) may be used. Although the cost of transporting rocks may be considerable and result in a high initial investment, filter mattresses require virtually no maintenance and have a long service life. Unlike culverts, they are difficult for rodents to block. Moreover, they help maintain natural vegetative communities and habitats by keeping different sections of floodplains connected. Benefits of Filter Mattresses: • Stabilising the roadbase in areas where the road is weakened by water saturation; • Allowing the free movement of water through the roadbase (can be bi-directional); • Maintaining dispersed flows and preventing the gully erosion associated with concentrated outlets; • Being usable in wetland situations where a traditional pipe may not lower the wetland water level; • Requiring little or no maintenance and having a long service life; • The maintenance of floodplain connectivity through the roadway; • Effectively insulating the road surface from water under the road and keeping the travel-way high and dry. Controlling capillary rise: In waterlogged areas, there is a possibility of water rising from the water table, by capillary action, to the subgrade and softening it. In such situations, as an alternative to lowering the water table, a capillary cutoff must be provided to prevent capillary rise. 89 Pavement Drainage & Climate Resilience 6 5 7 4 3 2 1 When the construction of a road in an embankment is in progress, the capillary cut-off may be provided by means of a layer of granular material of suitable thickness, as shown in Figure 7-15. Using an impermeable membrane is not recommended, because of the arial well effect, which will cause water to be retained. The cut-off should be placed at least 0.15 m above ground level or the standing water level, whichever is higher, as illustrated in Figure 7-15. Nevertheless, in no case shall it be positioned higher than 0.6 m below the top of the subgrade. When provided, the cut-off medium should extend under the berms, i.e. for the full formation width, as shown in Figure 7-15 (for location of cut-off with respect to ground level / High Flood Level (HFL)). For any cut-off medium (e.g. high-density polythene sheet or drainage composite), it is advisable to cover it with a 15 cmthick layer of granular material, such as sand. This will have the dual purpose of acting as a drainage course for water infiltrating from the top and of protecting the envelope against rupture by sharp particles in the fill material during construction. With drainage composite, there is no need for the additional cover provided by a granular layer. This is because the composite contains a geotextile that both provides protection and acts as a filter. The core of the drainage composite (geonet) will provide a drainage path. The granular layer thicknesses recommended for different situations are shown in Table 7-3. The thickness of the blanket needed to intercept capillary action depends on the particle size of sand and may be determined from the following Equation 7-1 (Vuorimies & Kolisoja, 2006): Where: t = thickness of sand layer, in cm d = mean particle diameter, in mm d1 = aperture size of sieve (mm) through which the fraction passes d2 = aperture size of sieve (mm) through which the fraction is retained The sand shall be compacted after adding sufficient moisture to permit easy rolling. Alternatively, it can be compacted if a vibratory roller is available. Natural ground level Sub-base level FILL MATERIAL: can be rock fill, if permanent swamp FILTER LAYER: (0.15 − 0.3m) as specified in Chapter 4 can be impermeable layer At least 0.2m FIRM SOIL Geotextile >0.6m HFL or standing water level Figure 7-15: Controlling capillary rise using a granular layer Table 7-3: Recommended thickness of the layer of capillary cut-off S. No Situation Minimum thickness of the granular layer (mm) Fine Sand (425 microns to 2 mm) Coarse Sand (2 mm to 4.75 mm) Graded Gravel (4.75 mm to 20 mm) 1 Subgrade 0.6 – 1.0 m Above HFL (Plasticity Index (PI) > 5) 350 150 150 2 Subgrade 0.6 – 1.0 m Above HFL*, the subgrade soil being sandy in nature (PI < 5; Sand content not less than 50%) 300 100 100 Note: HFL = High Flood Level Source: Vuorimies & Kolisoja, 2006 0.92 8 d t = Equation 7-1 2d1 x d2 d = d1 x d2 90 Pavement Drainage & Climate Resilience 6 5 7 4 3 2 1 7.7 Critical Drainage Issues in Sloping Ground and Mountainous Terrain In the greater part of mountainous countries, the roads are constructed on sloping ground, where one half of the road is situated in a cutting and the other half of the road is situated on an embankment. The hydrology of mountainous terrain is characterised by highly variable precipitation and water movement over and through steep land slopes. In addition, some rock types underlying soils may be highly weathered or fractured and may transmit significant additional amounts of flow through the subsurface. With hilly or mountainous terrain, it is important to select road alignments that do not require steep road gradients. Roads with steep gradients are often susceptible to excessive erosion of both the road surface and the drains. By reducing road gradients, water can be drained away from the road more efficiently and at a lower velocity, thereby reducing erosion. In such cases, the groundwater table will normally be nearer to the road surface, (and, as such, to the wheel load), on the road cut side. The moisture content is a function of the distance from groundwater table. When the groundwater table rises, the moisture content will increase according to the matric suction curve for the materials in the road structure. 7.7.1 Climate-resilient Drainage for Roads in Hilly and Mountainous Areas The components of hill roads are as follows.: 1. Retaining wall. The wall constructed down-slope of the hill side of the road, to resist the pressure of earth fill and traffic load on the road. This type of wall is required when the cross section of the road is partially in cut and partially in fill. A high retaining wall can be built of brick masonry or cement concrete. The width of the top of the retaining wall should not be less than 600 mm, while the width of the bottom should not be less than 0.4 times the height of the wall. The retaining wall should have a front face batter of 1 in 4, while the rear face, or the earthretaining face, should be vertical. 2. Breast wall. This wall is constructed on the uphill side of the roadway, to retain earth from slippage. The wall has a vertical back face and battered front face. The width of the top of a breast wall should be 600 mm and it should have a number of weep holes to relieve water pressure at the back of the wall. This type of wall is constructed of stone masonry, brick masonry or cement concrete. 3. Parapet wall. This type of wall is constructed above the formation level of a hill road, usually toward the downhill side. They are provided to give protection, both physical and psychological, to motorists travelling on a road with steep valley slopes. This type of wall should not be continuous but should have suitable gaps. Generally, these walls are 3.6 m long, with gaps of 1.5 m. 4. Catch water drains. This type of drain is constructed high up on a slope to intercept and divert water (Figure 7-16). Catch water drains are provided at suitable intervals, parallel to the roadway. These drains have a slope of about 1 in 33 to 1 in 50. They should not be less than 4.5 m from the edge of the road. 5. Cross-drain. A cross-drain drains rainwater from one side of the road to the other. A scupper is a cheap type of cross-drain, 0.9 - 1.0 m wide, made of random rubble masonry. 6. Side drain. A side drain is provided on the roadside, usually at the foot of a slope, to collect and drain water from the hill slope, as well as from the road surface. 7.7.2 Controlling Seepage If the road is partly in cutting and partly in embankment, as shown in Figure 7-17, any seepage flow can be arrested on the cutting side by a perforated drainpipe and the water can be disposed of through cross-drainpipes on the sloping side. The trench for laying the drainpipe should remain above the sloping impervious layer. Roadway Side drain Side drain Catch water drain Breast wall Breast wall Catch water drain Figure 7-16: Typical catch water drain arrangement in a box cut 91 Pavement Drainage & Climate Resilience 6 5 7 4 3 2 1 7.8 Key Points 1. Drainage of water away from pavements has been an important consideration in road construction for many years. Pavement designers need to understand and analyse the conditions under which the pavement must function. Highway / pavement geometrics, surface drainage, non-pavement subsurface drainage, climate and soil properties all have a significant impact on drainage design. With this information the designer is able to: (1) predict the amount of free water that will enter the pavement structure; (2) to predict surface free water / runoff; and (3) establish the design subgrade moisture content. 2. Climate change is expected to lead to more frequent extreme precipitation events and floods. The frequency of road closures and other incidents, such as flooding and roads being washed out, will probably increase. Hence, a resilient drainage system with an adequate capacity to cater for increased flows is critical for the integrity and performance of a road infrastructure. 3. Road design in most parts of the world has traditionally been based on the use of historical data for many design inputs, such as environmental conditions (climate), drainage requirements, material performance, etc. In addition, many design methodologies are based on empirical criteria, relating to observation of what has worked in the past, making predictions through relatively simple extrapolation, assuming the same conditions will apply in the future. The risk to road infrastructure is that, with changing conditions, design assumptions become less valid, which may lead to a reduced service life, poor in-service performance and ultimately additional, or more frequent, maintenance. Pavement drainage design should take account of changes (such as climatic changes) that might occur during the design period. 4. There is a need to incorporate the impacts of climate change into hydrological design and to adjust drainage design standards. This includes road drainage infrastructure design standards, as well as the revision of flood frequency standards (including IDF curves) to reflect climate projections, rather than taking only historical trend data into account (e.g. the 100 year flood in the past may now be a 25 year flood). 5. In the absence of local climate change model projections in LMICs, it is generally recommended that all drainage scheme designs incorporate an assessment of, and mitigation against, the potential impacts of climate change. All drainage scheme designs should include the latest climate change allowances, in accordance with relevant national policy. In the absence of a national design policy for the design of carriageway drainage, calculation of a 20% uplift in peak rainfall intensity, together with a sensitivity test to include a 40% uplift in peak rainfall intensity, should be undertaken and documented within the design report that describes the technical basis of the drainage design. The difference between the 20% and 40% scenarios will enable understanding of the range of impact between climate change risk scenarios (Table 7-1). 6. For roads that are near stream banks, or that run across streams, severe erosion may cause a washout of the road. A washout is the result of the combination of flood and erosion. Extreme event mitigation strategies can be based on either resistance or resilience. Both have their advantages and disadvantages (Table 7-2, Figure 7-7). It is important for decision-makers to appropriately consider, and account for, extreme weather conditions during the planning, design and construction phases of the road. Figure 7-17: Control of seepage flow using a perforated pipe Source: cementconcrete.org 92 Pavement Drainage & Climate Resilience 6 5 7 4 3 2 1 7. Although problem soils are a geotechnical issue, drainage is also important. Problem soils include expansive clays, dispersive or erodible soils, and saline soils. Building new roads, especially on greenfield sites, often requires dealing with problem subgrade soils, some of which occur in most countries. The impact of poor, or 'problem', subgrades can be as important as, if not more important than, climate change in many cases. The combined impact of climate and the subgrade is critical to the performance of road pavements. Changes in subgrade moisture due to climate change effects will have a significant impact on ground surface movements and associated drainage structures. Increased cracking of pavement structures will be likely, and necessary countermeasures against such changes will need to be implemented (Figure 7-8). 8. The traditional drainage principle is to remove water from the road pavement and its surrounding areas with little regard to the damage it causes to the receiving water body or the environment, in terms of the erosion of arable land, etc. Unfortunately, this often results in heightened peak runoff volumes and increases in erosion, and pollution problems in natural rivers and streams. Good road drainage design should consider, therefore, not just the removal of runoff water, but also the maintenance of sensitive environments, public health, natural water resources and the costeffectiveness of future maintenance activities. Sustainable drainage systems (SuDS) are drainage solutions that provide an alternative to the direct channelling of surface water via lined channels, through networks of pipes and sewers to nearby watercourses. Approaches to managing surface water that take account of water quantity (flooding), water quality (pollution), biodiversity (wildlife and plants) and amenity are collectively referred to as Sustainable Drainage Systems (SuDS) Drainage designers should consider the implementation of SuDS schemes, including pervious pavements, swales, filter drains, infiltration basins and wetlands (Figure 7-9 to Figure 7-13). 9. Drainage of road pavements in sloping, flat and lowlying valley areas often poses problems and is a design issue that requires sound guidance for practitioners and road authorities. Good drainage design begins with good route location. Avoiding poorly drained areas, unstable foundation soils, frequently flooded areas and unnecessary stream crossings will greatly reduce costs. This is not, however, always possible and the following countermeasures should be considered: (a) raising the formation level of the road (Figure 7-12), (b) lowering the water table by installing longitudinal subdrains (Figure 7-13 and Figure 7-14), (c) the interception and drainage of groundwater in low-lying areas, (d) the use of permeable sections (e.g. filter mattresses ) and (e) controlling capillary rise (Table 7-3 and Figure 7-15). In most mountainous countries, the roads are constructed on sloping ground, where one half of the road is situated in a cutting and the other half of the road is situated on an embankment. With hilly or mountainous terrain, it is important to select road alignments that do not require steep road gradients. Roads with steep gradients are often susceptible to excessive erosion of both the road surface and the drains. By reducing road gradients, water can be drained away from the road more efficiently and at a lower velocity, thereby reducing erosion. In such cases, the groundwater table will normally be nearer to the road surface, (and, as such, to the wheel load), on the road cut side. Climate-resilience drainage for roads in hilly and mountainous areas should be considered (Figure 7-16 and Figure 7-17). 93 Flexible Pavement Design 6 5 7 8 4 3 2 1 8 Flexible Pavement Design 8.1 Introduction and Scope Pavement design in this Road Note has been simplified by basing the pavement structure on one of five foundation designs. Each foundation class must meet a level of support defined by the resulting surface modulus before the main pavement layers are added. The structure of each foundation class depends on the strength of the subgrade, but the choice of foundation class provides the design engineer with a wide range of options for the main layers (sub-base and roadbase) of the pavement in terms of both the materials to be used, and the thicknesses required. The advantage of choosing to use a strong foundation is that the required thickness of the upper, and more expensive, layers of the pavement are reduced. Again, a choice is normally available. This chapter will present the technical basis for the design catalogues that are included in Chapter 9. 8.2 Foundation Design 8.2.1 General The foundation class method is simply a development of the CBR method. It provides a logical method for designing the supporting layers, i.e. the selected subgrade (capping) and sub-base that produces only five foundations (number 5 is rarely needed), which are the same for all traffic levels, in contrast to the rather diverse range of lower layers found in most design charts. This provides a good opportunity for better quality control and better overall performance. The development of the foundation classes in this Note were based on the principles presented by Chaddock & Roberts (TRL, 2006) which have been calibrated for tropical materials. Each foundation class must meet a level of support defined by the resulting surface modulus before the main pavement layers are added. The structure of each foundation class depends on the strength of the subgrade but the choice of foundation class provides the design engineer with a wide range of options for the main layers of the pavement in terms of both the materials to be used, and the thicknesses required. This 'end-product' specification has several advantages: • It allows a wide range of materials and thicknesses to be used to achieve the required modulus. Generally, a two-layer system is used that comprises a capping layer and a sub-base layer, especially if the subgrade is weak, requiring a relatively thick foundation. The weaker lower capping layer usually comprises a less expensive, and more abundant, material, with the upper sub-base layer being made of a stronger material. Sometimes, however, a single layer can be used, depending on the materials that are available. • The specification is relatively easy to check using deflection methods. This enables identification of areas that are weaker than the design modulus, where additional material must be added to bring the foundation up to the required strength. This is particularly useful where weak subgrade at depth is encountered that only deep sampling could otherwise identify. In normal circumstances, subgrades often show variable strength, especially where the terrain is not exceptionally flat, but uniform support for the main pavement layers is important and the use of foundation layers helps to achieve this. • By enabling the choice of a strong foundation system, the foundation should be capable of supporting construction traffic without serious damage. Indeed, the capacity to support construction traffic was one of the reasons for adopting the foundation system. The criteria for supporting construction traffic is applicable to "Performance Foundation Design" as described in Section 8.2.3. The criteria requires that on the trial section, after 1000 equivalent standard axles, rutting on both wheel tracks should not exceed 30 mm. • A strong foundation enables a reduction in the required thickness of the more highly processed and expensive upper layers and would typically reduce the carbon footprint and construction cost of the project. 8.2.2 Restricted Designs Restricted foundation design options are based on a limited selection of materials linked to an assumed performance (based on empirical studies), which does not require verification via performance testing of the foundation. The Foundation Classes used in this Guideline are shown in Table 8-1; Foundation Classes 1 to 4 may be referred to as 'restricted designs'. Selected options for achieving the Foundation Classes are shown in Chapter 9 using capping and sub-base materials meeting the specifications shown in Chapter 4. Foundation Class 5 is referred to as a 'performance design' and is reserved for design traffic of more than 60 MESA. Table 8-1: Pavement foundation classes and stiffness modulus Foundation Class Surface Stiffness Modulus (MPa) Minimum CBR (%) Equivalent Subgrade Class F1 50 5 S3 F2 90 8 S4 F3 125 15 S5 F4 250 30 S6 F5 400 80 - Note: Foundation Class F5 is a performance class designed and determined through trials during construction. 94 Flexible Pavement Design 6 5 7 8 4 3 2 1 8.2.3 Performance Foundation Designs Performance foundation designs cover all of the foundation classes and provide flexibility to the designer. The acceptance criterion for construction is the in situ Foundation Surface Modulus measured immediately prior to the placement of the overlying pavement layers. The choice as to which approach, and which foundation class, is selected is usually made on economic grounds, based on the materials that are available and relevant costing information. It is expected that designers will fully consider the use of local and secondary materials. In this method, the design consists of trying several different materials by constructing a 50 - 100 m trial section and checking the surface modulus using a Falling Weight Deflectometer (FWD). Trial sections are required, to enable the adequacy of the performance of each foundation design to be assessed. This also allows material production and laying procedures to be proved, prior to construction of the main works. Generally, the trial sections should be situated along the proposed alignment at a location where the in situ subgrade CBR is equal to the design CBR. Where this is not possible, however, the in situ subgrade CBR in the trial section area should be less than the design CBR, so that the thickness design that meets the surface modulus specification is slightly larger than might be necessary. Direct foundation strength verification measurements (surface modulus) using a Falling Weight Deflectometer or Light-Weight Deflectometer should be adjusted for seasonal effects. Usually, a reduction by multiplying by 0.5 - 0.8 adjusts the strength to equivalent wet season strength, as shown by Popik, Olidis & Tighe (2005). 8.3 Long-life Pavements The principles of pavement structural design have been to increase pavement strength (thickness or materials strength) as design traffic increases. These criteria have ensured that future pavements have been at no greater risk of fatigue cracking and subgrade rutting than roads constructed previously. Investigations commissioned by the (then) Highways Agency (now National Highways), producing a report entitled Deterioration mechanisms for thicker flexible pavements and effects on design and maintenance, failed to detect evidence of deterioration in the main structural layers of thicker, more heavily used, pavements (Leech & Nunn, 1997). These investigations indicated that deterioration is far more likely to be found in the surfacing than deeper in the pavement structure. They also found that the great majority of the thick pavements examined had maintained their strength or become stronger over time, rather than having gradually weakening with trafficking, as assumed in the pavement assessment method based on deflection measurements (Kennedy & Lister, 1978). This finding means that, beyond a certain design traffic level (taken as 80 MESA), there is no structural benefit in increasing the pavement thickness or strength. Pavements designed for higher traffic levels are referred to as long-life pavements. The thickness of asphaltic material for the higher traffic levels is in the range that is considered to be 'long-life'. In other words, no fatigue failure is ever likely to occur; all cracking will be 'top-down' and rehabilitation should consist solely of milling off the top 30 to 50 mm of aged and brittle material and replacing it. 8.4 Basis of Development of the Pavement Design Catalogues The pavement designs incorporated into this edition of Road Note 31 are based primarily on: • The results of full-scale experiments where all factors affecting performance have been accurately measured and their variability quantified; • Studies of the performance of as-built existing road networks. These studies have been supplemented with performance data gathered from a number of roads authorities. Where direct empirical evidence is lacking, designs have been interpolated or extrapolated from empirical studies using road performance models (Parsley & Robinson, 1982; Paterson, 1987; Rolt et al., 1987) and standard analytical, mechanistic methods (e.g. Gerritsen & Koole, 1987; Powell et al., 1984; Brunton et al., 1987). In view of the statistical nature of pavement design, because of the many uncertainties related to traffic forecasting and variability in the properties of materials, climate and road behaviour, the design charts have been presented as a catalogue of structures, each structure being applicable over a range of traffic and subgrade strength. With the design subgrade class determined as described in Chapter 3, a design Foundation Class is selected and achieved as described in Section 8.2. With the design foundation class known and the design traffic known (Chapter 2), structure options are selected from the catalogues on the basis of available materials (Chapters 4, 5 and 6). Such a procedure makes the charts extremely easy to use but it is important that the reader is thoroughly conversant with the notes applicable to each chart. Economic comparison of the structure options is then undertaken, as described in Chapter 12, before the final choice of structures is made. 95 Flexible Pavement Design 6 5 7 8 4 3 2 1 8.5 Basis of the Low volume Roads Catalogues For the purposes of this Note, low volume roads are tertiary or secondary roads designed to carry less than three million equivalent standard axles. The pavement design catalogues in this Note, for this traffic level (less than 3 MESA), do not use the foundation class system. They were first developed by Gourley & Greening (1999), to make the pavement structures for traffic of less than 3 MESA, in Overseas Road Note 31 (TRL, 1993), less conservative, and to utilise locally available materials. The Gourley & Greening (1999) catalogues were further updated by Otto et al. (2020), based on further empirical evidence and research studies. The revisions by Otto et al. (2020) took account of three important aspects that govern the performance of low volume sealed roads, namely: • Appropriate and adequate drainage; • A robust bituminous seal that is resealed in a timely manner; • Allowance for occasional overloaded axles. The updated pavement design catalogues and materials specifications for low volume roads are contained in Chapter 9. They provide for two situations: one where individual axles are predominantly less than 8 tonnes, and another where individual axles predominantly exceed 8 tonnes. 8.6 Conversion of Roadbase and Sub-base Thicknesses It is often the case that, for a given project, there is scarcity of materials for some pavement layers and abundance of other materials for other layers. For example, there could be scarcity of sub-base quality material but abundance of roadbase quality material. In such a scenario, the same material should be used for both layers. This means that there is potential to save on the thickness of the lower layer (the sub-base, in this case). It is important to note that, before a material is used for any layer, it should meet the specifications for that layer. This is particularly useful for Chart F (Chapter 9), and for cases where it is desirable to replace granular bases with bitumen-stabilised materials (BSM). The conversion should be carried out using the structural number approach, as presented in Equation 8-1. hc = (h2 ×a2 )/a1 Where: hc = the converted new thickness of the layer whose material is to be substituted (e.g. sub-base) h2 = the catalogue thickness of the layer whose material is to be substituted (e.g. sub-base) a2 = the material coefficient of the layer whose material is to be substituted (see Table 11-2, Chapter 11) a1 = the material coefficient of the layer with abundant material to be used (e.g. roadbase) (see Table 11-2, Chapter 11) Equation 8-1 96 Pavement Structure Catalogues 6 5 7 8 4 3 2 1 9 9 Pavement Structure Catalogues Key 1: Traffic and Subgrade Classes Traffic Classes (106 ESA) Subgrade Strength Classes (Lowest 10 percentile CBR per cent) T1 For T1 and some categories of T2, use the LVR Catalogue Chart F S1 < 3 T2 S2 3, 4 T3 0.7 – 1.5 S3 5 - 7 T4 1.5 – 3.0 S4 8 - 14 T5 3.0 – 6.0 S5 15 - 30 T6 6.0 – 10 S6 > 30 T7 10 – 17 *The T10 designs are suitable for traffic of 80 MESA and are considered 'long life' pavements. They should be used for all higher traffic levels. T8 17 – 30 T9 30 – 50 T10 50 – 80* Note: Materials of S2 and S3 quality may be used as fill for an embankment, provided they are not classified as Clays of High plasticity (CH) or Silts of High Plasticity (MH) (See Table 3-1). They must be compacted to at least 93% MDD (BS Heavy BS 1377 or AASHTO T180). Key 2: Foundation Classes (Effective Subgrade Classes) Foundation Class Surface Stiffness Modulus (MPa) Minimum CBR (%) Effective Subgrade Class F1 50 5 S3 F2 90 8 S4 F3 125 15 S5 F4 250 30 S6 F5 400 80 - Note 1: Foundation Class F5 is a performance class designed and determined through trials during construction. Note 2: For subgrade classes S1 and S2, capping layers using the options in Key 3 must be applied before using the subsequent pavement design catalogues. This means that they must be converted to an effective Subgrade Class S3 (also known as Foundation Class F1) or higher [F2 (S4), F3 (S5), F4 (S6)]. Note 3: Subgrades of classes S3 to S5 may also be converted to higher effective classes using the capping options in Key 3. The highest Subgrade Class is S6 (also known as Foundation Class F4), this cannot be converted to a higher effective Subgrade Class. Key 3: Materials for Capping Required to Achieve Foundation Classes (Effective Subgrade Class) Native Subgrade Class Capping Options Foundation Class (Effective Subgrade Class) Achieved Layer 1 Layer 2 Material (as per Table 4-1) Thickness (mm) Material (as per Table 4-1) Thickness (mm) S1 G8 425 F1 (S3) G8 200 GC 150 GC 300 G8 275 GC 200 F2 (S4) GC 375 GC 300 GS2 175 F3 (S5) GS2 225 F3 (S5) S2 GC 150 F1 (S3) GC 250 F2 (S4) GC 350 F3 (S5) GS2 400 F4 (S6) S3 GC 150 F2 (S4) GC 225 F3 (S5) GS2 275 F4 (S6) S4 GS2 200 F4 (S6) S5 GS2 150 F4 (S6) Note 1: Any combination of capping may be used to achieve the required Foundation Class, provided that the surface modulus is achieved. If required, a trial section of 50 m can be constructed to verify the surface modulus by FWD/LWD testing during the construction stage of the project. Note 2: Foundation Class F5 is a performance class designed and determined through trials during construction 97 Pavement Structure Catalogues 6 5 7 8 4 3 2 1 9 Key 4: Pavement Materials Layer Material Code (as per Table 4-1, Table 5-2 and Chapter 6) Description Surfacing DBST Double Bituminous Surface Treatment HMA Hot Mix Asphalt AC Asphalt Concrete HRA Hot Rolled Asphalt DBM Dense Bituminous Macadam SMA Stone Mastic Asphalt EME2 Enrobé à Module Élevé (High modulus bituminous mix) Type 2 Roadbase GB1 Granular Base Type 1 GB2 Granular Base Type 2 GB3 Granular Base Type 3 Mac Macadam (Wet/Dry Bound Macadam) BSM Bitumen Stabilised Material ETSB Emulsion Treated Sand Base CB1 Hydraulically-Modified Material/Base Class 1 CB2 Hydraulically-Modified Material/Base Class 2 Sub-base/ Capping CB3 Hydraulically-Modified Material/Base Class 3 GS1 Granular Sub-base Class 1 GS2 Granular Sub-base Class 2 GC Granular Capping Class 1 98 Pavement Structure Catalogues 6 5 7 8 4 3 2 1 9 Chart A1: Traffic Range: 0.3 to 10 MESA Surfacing: Double Bituminous Surface Treatment (e.g. Surface Dressing/Chip Seal, Cape Seal, Otta Seal). This can be replaced with 40 mm flexible AC/HRA if required. Roadbase: Granular Base/Crushed Rock/Macadam/Bitumen Stabilised Material/Emulsion Treated Sand Base (with minimum 1.5% cement). Sub-base: Granular Material or Hydraulically-Modified Material To enhance climate resilience, GS1 should be used in place of GS2, and Triple Bituminous Surface Treatment should be used. 99 Pavement Structure Catalogues 6 5 7 8 4 3 2 1 9 Chart A2: Traffic Range: 0.3 to 17 MESA Surfacing: Double Bituminous Surface Treatment (e.g. Surface Dressing/Chip Seal, Cape Seal, Otta Seal). This can be replaced with 40 mm flexible AC/HRA if required. Roadbase: Granular Base/Crushed Rock/Bitumen Stabilised Material/Emulsion Treated Sand Base (with minimum 1.5% cement). Sub-base: Hydraulically-Bound Material To enhance climate resilience, GS1 should be used in place of GS2, and Triple Bituminous Surface Treatment should be used. 100 Pavement Structure Catalogues 6 5 7 8 4 3 2 1 9 Chart A3: Traffic Range: 0.3 to 17 MESA Surfacing: Double Bituminous Surface Treatment (e.g. Surface Dressing/Chip Seal, Cape Seal, Otta Seal). This can be replaced with 40 mm flexible AC/HRA if required. Roadbase: Hydraulically-Bound Material Sub-base: Granular Material or Hydraulically-Modified Material To enhance climate resilience, GS1 should be used in place of GS2, and Triple Bituminous Surface Treatment should be used. The use of stress alleviating membranes and geogrids increases the longevity of hydraulically bound bases. Adjustment in the designs should be undertaken with the geogrid supplier. 101 Pavement Structure Catalogues 6 5 7 8 4 3 2 1 9 Chart B: Traffic Range: 0.7 to 10 MESA To enhance climate resilience, GS1 or HBM should be used in place of GS2, and a surface treatment applied on the HMA surfacing. Surfacing: Flexible Hot Mix Asphalt/Bitumen-Bound Materials e.g. HRA or Flexible AC Roadbase: Granular Base/Crushed Rock/Macadam/Bitumen Stabilised Material/Emulsion Treated Sand Base (with minimum 1.5% cement). Sub-base: Granular Material or Hydraulically-Modified Material. 102 Pavement Structure Catalogues 6 5 7 8 4 3 2 1 9 Chart C1: Traffic Range: 6 to 50 MESA To enhance climate resilience, GS1 or HBM should be used in place of GS2, and a surface treatment applied on the HMA surfacing. Surfacing: • Wearing Course: Can be flexible or structural mixes e.g. AC, HRA, SMA • Binder Course/Base Course: Structural Hot Mix Asphalt/Bitumen-Bound Materials e.g. DBM, EME2, SMA The surfacing layers should be designed for rut-resistance and durability as described in Chapter 6. Roadbase: Crushed Rock/Macadam/Bitumen Stabilised Material/Emulsion Treated Sand Base (with minimum 1.5% cement). Sub-base: Granular Material or Hydraulically-Modified Material. 103 Pavement Structure Catalogues 6 5 7 8 4 3 2 1 9 Chart C2: Traffic Range: 6 to 80 MESA To enhance climate resilience, a surface treatment should be applied on the HMA surfacing. Surfacing: Structural Hot Mix Asphalt/Bitumen-Bound Materials e.g. AC, SMA. This should be on binder course for traffic class T10. The surfacing layers should be designed for rut-resistance and durability as described in Chapter 6. Roadbase: Crushed Rock/Macadam/Bitumen Stabilised Material/Emulsion Treated Sand Base (with minimum 1.5% cement). Sub-base: Hydraulically-Bound Material. 104 Pavement Structure Catalogues 6 5 7 8 4 3 2 1 9 Chart D: Traffic Range: 30 to 80 MESA This is a climate-resilient alternative to Chart C2, and for use where vehicles with super-single (wide-base) tyres are expected to be prevalent. The binder course can be made using EME2 to enhance climate resilience or reliability. To further enhance climate resilience, a surface treatment should be applied on the HMA surfacing. Surfacing: • Wearing Course: Can be flexible or structural mixes e.g. AC, HRA, SMA • Binder Course/Base Course: Structural Hot Mix Asphalt/Bitumen-Bound Materials e.g. DBM, EME2, SMA The surfacing layers should be designed for rut-resistance and durability as described in Chapter 6. Roadbase: Crushed Rock/Crushed Stone/Macadam. Sub-base: Hydraulically-Bound Material. 105 Pavement Structure Catalogues 6 5 7 8 4 3 2 1 9 Chart E: Structural Number Chart (SNR of materials required to protect the subgrade) Subgrade Class T1 & T2 T3 T4 T5 T6 T7 T8 T9 T10 0.3-0.7 0.7-1.5 1.5-3.0 3.0-6.0 6.0-10 10-17 17-30 30-50 50-80 F1 (S3) 1.88 1.95 2.12 2.32 3.93 4.11 4.28 4.63 4.97 F2 (S4) 1.57 1.63 1.78 1.95 3.50 3.68 4.03 4.37 4.71 F3 (S5) 1.2 1.26 1.4 1.56 3.19 3.37 3.63 3.97 4.32 F4 (S6) 0.8 0.88 1.01 1.15 2.78 2.96 3.36 3.70 4.05 106 Pavement Structure Catalogues 6 5 7 8 4 3 2 1 9 Chart F: Roads Classified as Low Volume Secondary or Tertiary Roads A double or triple bituminous surface treatment must be provided with adequate drainage provisions, and it should be well maintained. An alternative is a primer seal followed by a double bituminous surface treatment. To enhance climate resilience, GS1 should be used in place of GS2, and Triple Bituminous Surface Treatment should be used. For climatic regions of N < 4 or in areas where drainage is likely to be poor, the pavement layer materials should be assessed in the soaked state; for regions of N > 4 the CBR of pavement layer materials should be assessed at OMC. N is defined as 12*E/Pa, where E is evaporation, in mm, in the warmest month of the year and Pa is the annual precipitation, in mm. If the subgrade is expansive, then a protective capping of at least 600 mm, compacted in three equal layers, is required. The capping should have a PI of between 10 and 20 but the material should not be expansive. The G15 layer in this table should form part of the protective capping. Other additional treatments for expansive clays should also be applied. LVR1 where axle loads are predominantly > 8 tonnes LVR2 where axle loads are predominantly < 8 tonnes Key 5: Material Classification for Chart F Only Code Material Specification Description G80 Natural gravel or modified natural gravel or crushed boulders Min. CBR: 80% @ 95% MDD AASHTO T180 or BS Heavy Compaction and 4 days soaking. In situ, compaction to a minimum of 98% MDD. Max. Swell: 1.0% @ 95% MDD PI: < 10 or as otherwise specified (material specific) PM: <200 or as otherwise specified (material specific) G60 Natural gravel or modified natural gravel Min. CBR: 60% @ 95% MDD AASHTO T180 or BS Heavy Compaction and 4 days soaking. In situ, compaction to a minimum of 98% MDD. Max. Swell: 1.0% @ 95% MDD PI: < 13 or as otherwise specified (material specific) PM: <270 or as otherwise specified (material specific) G45/ GS1 Natural gravel or modified natural gravel Min. CBR: 45% @ 95% MDD AASHTO T180 or BS Heavy Compaction and 4 days soaking. In situ, compaction to a minimum of 98% MDD. Max. Swell: 1.0% @ 95% MDD PI: < 16 or as otherwise specified (material specific)PM: <540 or as otherwise specified (material specific) G30/ GS2 Natural gravel Min. CBR: 30% @ 95% MDD AASHTO T180 or BS Heavy Compaction and 4 days soaking. In situ, compaction to a minimum of 97% MDD. Max. Swell: 1.5% @ @ 95% MDD PI: <18 or as otherwise specified (material specific) PM: <780 or as otherwise specified (material specific) G15/GC Gravel/soil Min. CBR: 15% @ 95% MDD AASHTO T180 or BS Heavy Compaction and 4 days soaking Max. Swell: 1.5% @ 95% MDD PI: < 18 or 3GM + 10 or as otherwise specified (material specific) G8 Soil Min. CBR: 8% @ 93% MDD AASHTO T180 or BS Heavy Compaction and 4 days soaking Max. Swell: 1.5% @ 95% MDD PI: < 18 or 3GM + 10 or as otherwise specified (material specific) 107 Design of Rigid Pavements 6 5 7 8 4 3 2 1 9 10 10 Design of Rigid Pavements 10.1 Introduction and Scope This Chapter provides information on the design and construction of different types of concrete road, including: • Jointed Unreinforced Concrete Pavement (JUCP); • Jointed Reinforced Concrete Pavement (JRCP); • Continuously Reinforced Concrete Pavement (CRCP); • Continuously Reinforced Concrete Base (CRCB); • Roller Compacted Concrete (RCC). Some of the tables include Roller Compacted Concrete (RCC) for comparison purposes, but design details for RCC are not included here, as it is less widely used. It should be noted that this chapter provides guidance on the design of concrete pavements for rural and urban roads. It is not intended to be used in the design of residential pavements, car parks or industrial pavements, as these are likely to carry significantly different HGV traffic levels. Many readers may be unfamiliar with concrete, so this chapter starts by introducing concrete as a material, summarising the benefits and problems associated with concrete roads, the main factors affecting concrete pavement performance and information regarding asphalt surfacings on concrete pavements. There is then a description of the five different concrete pavement types listed above, together with information aimed at helping the reader select an appropriate pavement type. This information includes indications of their relative cost, the suitability of each pavement type to various traffic levels, examples when concrete roads might perform better than asphalt roads and the type of concrete pavement that would be most suitable for a particular situation. A table of the advantages and shortcomings of each type of pavement is also presented. This is followed by a section on how to design each of the pavement types. The key features of concrete pavements (joints, dowel bars and tie bars) are then introduced; it is important that these are understood and that an understanding is developed of how they relate to the different types of concrete pavement. The chapter concludes with a basic guide to the rehabilitation of existing concrete roads. 10.2 Introduction to Concrete 10.2.1 Understanding Concrete as a Material Concrete is usually made up of three main components: cementitious binder (mainly cement), aggregate (coarse and fine) and water. Chemical admixtures can also be added if required, maybe to retard setting or increase workability. When a sufficient quantity of water is added to the mix, chemical reactions take place and, if the quantities and conditions are correct for the 'curing' process to occur, chemical bonds are formed, leading to strong concrete. Curing is one of the most important stages in the construction of a concrete pavement. Cracking Hardened concrete is a very durable material, which does not erode easily. Furthermore, it does not rut, is not damaged directly by fuel spills or floods and does not weaken significantly as it ages. The main issue with concrete, however, is that when transforming from a wet mix to a hard material (the curing process) it shrinks in volume and hence cracks can appear. Hardened concrete is good in compression and weak in tension, and hence any parts of concrete that are subjected to tensile forces will usually crack. In reinforced concrete, many fine cracks are produced during curing, but the concrete is held tightly together by longitudinal steel reinforcement and, to a lesser extent, transverse steel reinforcement, so that the pavement generally acts as a single long slab. In the absence of reinforcement, concrete will generally crack, during curing, at approximately 3 - 5m intervals, with a meandering crack that is difficult to seal. In unreinforced concrete pavements, to make these cracks neater and easier to seal, a 'contraction joint' is created. According to this process, a straight, transverse saw-cut is made in the top of the semi-cured concrete, approximately every 5 m, to force the crack to start at this neat line of weakness. (It should be noted that there are alternatives to saw-cutting, including the use of a crack inducer). A 'contraction joint' is basically a shrinkage crack that separates the concrete into individual slabs, but the crack has a neat, straight top that can be sealed. A joint is a discontinuity in the concrete; it is basically a weakness in the pavement, where problems can (and frequently do) occur. 108 Design of Rigid Pavements 6 5 7 8 4 3 2 1 9 10 Expansion / contraction and warping It may not be evident, but concrete expands / contracts and warps (i.e. it curls up and down) with changes in temperature and moisture. With reinforced concrete, the concrete is generally held in place by steel reinforcement. There can still be significant movement at the end of a CRCP pavement, so ground anchors and expansion joints (which will be described later) are used to control this movement, to protect bridges, etc. For unreinforced jointed concrete, vertical temperature gradients in the slab produce warping moments which cause the slab to 'hog' during the day (where the slab top centre is higher than the top corners) or 'curl' during the night (where the top corners are higher than the slab top centre). This diurnal movement at the joints can cause stresses both at the joints and at unsupported locations (such as slab ends / the centre of the slab, as shown in Figure 10-1). This can lead to cracking, especially under wheel loads. The movement at joints also explains why asphalt overlays on jointed concrete pavements frequently crack above the concrete joints. Other types of concrete pavement behave differently. For example, Roller Compacted Concrete (RCC) starts with a much stiffer mix and a roller is used, almost as soon as the concrete is laid, to deliberately create multiple fine cracks. This material looks more like reinforced concrete, with multiple fine cracks at frequent intervals, than unreinforced jointed concrete, which generally has a wide crack at 4.5 m intervals. Figure 10-1: Jointed unreinforced concrete slab movement and warping (at different temperature gradients) DAY TIME HOGGING NIGHT TIME CURLING Cracks on slab Cracks on slab Concrete slab Concrete slab 10.2.2 Benefits and Challenges with Concrete Roads 10.2.2.1 Benefits of concrete roads The benefits of using concrete as a road building material are increasingly being recognised. These include: • Traffic volumes and axle loads are increasing worldwide, requiring stronger pavements. This is leading to a growing acknowledgement of the inherent strength and loadcarrying ability of concrete. • Concrete pavements typically have a design life of 40 years or more, compared with 20 years for asphalt pavements. • The increasing cost of asphalt and other oil-based products can make the building and maintenance costs of a concrete road less than those of a fully flexible pavement over the same time period. • A concrete surface is more durable than one made of asphalt. Concrete is, for example, not affected by rutting, ultraviolet (UV) degradation or age hardening, and it is less prone to flooding, where asphalt would fail. • Well-built concrete pavements typically require less maintenance than asphalt roads, although this depends on design and construction quality. • Environmental benefits, since studies have found that HGVs use significantly less fuel (with savings of up to 6.7%) and emit less CO2 when using concrete roads, compared with asphalt roads. This is mainly due to the reduction in rolling resistance, which aids fuel economy (Eupave, 2011). Another environmental benefit of concrete roads is that by-products can be used as part of the concrete mix. In addition, at the end of the pavement's life, the concrete can be 100% recycled. • Concrete roads can better withstand extreme weather conditions, which may become more frequent, due to climate change. For example, they do not soften and rut during periods of high summer temperatures and can be less damaged by flooding. 109 Design of Rigid Pavements 6 5 7 8 4 3 2 1 9 10 • Concrete can 'bridge' small weak areas in the supporting layer, through 'beam action', depending on the pavement type and slab size. This allows some types of rigid pavement to be placed on relatively weak supporting layers, provided that the supporting layer cannot be eroded by the combined effects of water and the pumping action caused by wheel loads. • Many countries have limestone (which provides the raw material for cement), meaning that they can be self-reliant in terms of road building materials, rather than having to rely on imported asphalt and oil-based products with expensive and unpredictable price variations. 10.2.2.2 Challenges with concrete roads • Quality control during construction is key. Misaligned dowels, too few expansion joints or inadequate curing can cause significant issues, for many years. • Concrete roads are liable to crack and warp and they can also be difficult, and costly, to repair. • The performance of unreinforced concrete roads is very dependent on the support, and erosion resistance, of the underlying layers. If these are inadequate, then the pavement will inevitably fail. • External factors such as overloading and running vehicles close to an unsupported edge can significantly affect the lifespan of a concrete road. • A concrete road surface is reflective and, in extreme sunlight, the surface glare can make it difficult for drivers to see white lines and can also disturb drivers' concentration. • Access to buried services, such as water mains, sewers and electric cables, is more difficult than with an asphalt road. • Concrete repairs to a concrete road often take longer than repairs to an asphalt road, mainly due to the curing time of the repair material, although delays to road users can be minimised by the use of rapid-hardening cement. • The surface texture of a concrete running surface should last much longer than an asphalt surfacing but it will inevitably wear smooth after about 20 - 30 years and require some form of resurfacing or retexturing. Retexturing (e.g. diamond grooving) is an expensive process and resurfacing (usually with asphalt) can be problematic and/or expensive, particularly if transverse joints are present, as further measures will be required to reduce reflection cracking in the asphalt above joints. A lack of knowledge about concrete as a material, concrete pavement design and concrete pavement construction often contributes to a reluctance to use concrete as a road building material. In any country, there is likely to be a case for using either asphalt or concrete pavements. The choice of pavement type can often be made on the basis of economics and suitability of the pavement to the local environment and traffic. 10.3 Types Of Rigid Pavements The types of concrete pavement discussed in this section are: • Jointed Unreinforced Concrete Pavement • Jointed Reinforced Concrete Pavement • Continuously Reinforced Concrete Pavement • Continuously Reinforced Concrete Base • Roller Compacted Concrete 10.3.1 Jointed Unreinforced Concrete Pavement (JUCP) A Jointed Unreinforced Concrete Pavement (JUCP) is the most basic form of concrete road. It is usually constructed with no steel reinforcement in the concrete, with compaction achieved using a poker vibrator. A concrete lane will naturally crack at about 4 - 5 m spacings, so transverse contraction joints are created at a similar spacing, (usually 4.5 m). These joints effectively dictate where the natural shrinkage cracks will occur, so dowel bars can be pre-installed at these locations to provide load transfer across the joint and to minimise the vertical movement of the slab ends as traffic runs from one slab to the next. At the joint, instead of a meandering crack, a neat, straight groove is created in the surface that can be sealed to prevent detritus and water entering the joint. The concrete should have a minimum flexural strength of 4.5 MPa at 28 days. A JUCP is one of the cheapest forms of concrete pavement to construct but it will often require significant and costly maintenance over its lifetime. Most of the problems occur at the joints, which need to be correctly constructed and adequately maintained, to avoid years of problems. For example, during construction dowel bars must be correctly aligned, both vertically and horizontally, and protected from corrosion. Joints must be regularly resealed to prevent detritus and water from entering the joint and causing issues such as: (i) erosion of pavement layers under the joint, (ii) detritus stopping the joint from opening, leading to stress cracking, spalling and joint failure or (iii) corrosion of the dowel bars, leading to 'lock up' of the joint and further problems. There should also be enough expansion joints to allow for exceptionally hot weather and to protect adjacent bridges etc. from lateral expansion. To achieve a long lifespan, it is recommended that all JUCPs, apart from, perhaps, very minor urban or rural roads with few HGVs, should have a non-erodible sub-base (preferably cement bound material) and dowel bars at transverse joints. When two or more lanes are constructed, all lanes need to be tied together with tie bars, irrespective of whether the lanes are constructed at the same time or at different times. For some JUCPs, adding steel reinforcement to some slabs may be necessary, to control cracking and increase the life of particular slabs, including odd-shaped slabs, slabs containing utility access covers, pits and other structures, and slabs with mismatched joints. 110 Design of Rigid Pavements 6 5 7 8 4 3 2 1 9 10 10.3.2 Jointed Reinforced Concrete Pavement (JRCP) A jointed reinforced concrete pavement (JRCP) is a modified version of a jointed unreinforced concrete pavement. It is used instead of a jointed unreinforced concrete pavement where differential settlement is anticipated or when there is doubt regarding materials and workmanship. The concrete should have a minimum flexural strength of 4.5 MPa at 28 days. For a JRCP, steel reinforcement is used to control cracks. There are transverse joints (contraction and/or expansion joints) spaced at approximately 8 - 25 m, (compared with 4 - 5 m for a Jointed Unreinforced Concrete Pavement). Dowel bars are used at all transverse joints to provide load transfer across the joints. Joint spacings for JRCP vary throughout the world. In Australia, the spacing is recommended to be 8 - 10 m, compared with 25 m in the UK. 10.3.3 Continuously Reinforced Concrete Pavement (CRCP) A Continuously Reinforced Concrete Pavement (CRCP) is constructed with steel reinforcing bars (or mesh) placed at approximately the mid-depth of the concrete slab along the entire length of the pavement. The longitudinal bars are most important and greater in number, as they hold the multiple transverse cracks together. Transverse reinforcement is less frequent, but it will hold any longitudinal cracking in place. As the concrete cures, multiple fine transverse cracks occur at 0.5 - 2 m intervals, but these cracks are held tightly together by the reinforcement used and do not compromise the structural integrity of the pavement. The concrete should have a minimum flexural strength of 4.5 MPa at 28 days. As there are no transverse joints, the CRCP acts as a single large slab, which provides a continuous, even surface capable of withstanding the heaviest traffic loads and the most adverse environmental conditions. The CRCP is not affected by the transverse joint problems that occur on a jointed concrete pavement. With CRCP, traffic loading is effectively spread over a large area, so this type of payment can often be used in conditions with poor and uneven subgrade. It is less crucial that the sub-base is non-erodible. As with any concrete pavement, thermal expansion and contraction of the concrete still takes place, but this consists of very small movements at each of the microcracks, rather than a larger movement at a transverse contraction joint, as found in a jointed concrete pavement. Reinforcement will also restrict the curling and hogging that can occur due to differential temperatures at the top and base of the slab throughout the day and night. If a thin asphalt overlay were placed on (a) a JUCP and (b) a CRCP, it is likely that asphalt cracks would occur above the transverse joints in the JUCP within a few years, but the asphalt on the CRCP may not develop any cracks. CRCP is normally laid by a paver, so ride quality is usually very good. Depending on the size of the paver and onsite arrangements, one or two lanes can be paved at the same time. If two lanes are paved at the same time, then, depending on the width of the construction, a longitudinal construction joint with tie bars may need to be constructed to form separate lanes. If a thin asphalt surfacing layer is also added onto the reinforced concrete, then the pavement will have the following combined benefits of concrete and asphalt materials: • The strength of the reinforced concrete pavement, to carry very heavy loads, with minimal maintenance required over a 40 to 60 year lifespan, and • The ability to plane off and relay a new road surface when required, with minimal traffic disruption and delay. For CRCPs, deep reinforced ground anchors are required at each end to restrict any horizontal end movement that could damage adjacent bridges etc. Run-on slabs with expansion joints may also be required when changing from CRCP to a different type of pavement (see Section 10.5.6). 10.3.4 Continuously Reinforced Concrete Base (CRCB) A Continuously Reinforced Concrete Base (CRCB) is very similar to a CRCP, but it has slightly thinner concrete and a thick asphalt layer (approximately 100 mm) that is part of the structure. A CRCB is used for heavily used roads. Its asphalt layers make the surfacing easier to replace and reduce the thermal stresses in the underlying concrete. Because there are no transverse joints, reflection cracking in the asphalt is not usually a problem, in contrast to Jointed Unreinforced and Jointed Reinforced Concrete Pavements. 111 Design of Rigid Pavements 6 5 7 8 4 3 2 1 9 10 10.4 Selection of Pavement Type 10.4.1 Which Concrete Pavement Type? The choice of concrete pavement type will depend on many factors, including: • Budget • Traffic levels (See Table 10-1, which shows the suitability of pavement type to different levels of traffic) • Ride quality required, e.g. paver-laid CRCP usually has a good ride quality, but block paving and RCC often have a poor ride quality. • Type of Plant available, e.g. CRCP is normally likely to require a concrete paver; RCC could be laid using an asphalt paver, while URC is usually laid by hand. • Whether the project relates to a new build or the rehabilitation of an existing pavement; if resurfacing is required, then UTRCP might be considered. • The availability of local labour, which might favour labour-intensive options. • Environmental, since careful consideration needs to be given to the type of pavement in different environmental areas, e.g. in areas prone to differential settlement, CRCP would be beneficial. The following section presents the advantages and shortcomings of each pavement type, in the context of different traffic levels. 10.4.2 Advantages and Shortcomings of Each Concrete Pavement Type Each concrete pavement type is best suited to a particular traffic level. The different types also have distinct advantages (pros) and disadvantages (cons). Table 10-1 lists these for the main concrete pavement types in the context of different traffic levels. Table 10-1: Main types of concrete pavement – advantages and disadvantages No. Concrete Pavement Type Traffic Level Suitability Relative Cost Advantages Shortcomings 1a Jointed Unreinforced Concrete pavement (unreinforced, square joints with dowels) Low/ Medium/ High Moderate • Basic (cheap) form of concrete pavement. • Less steel required than CRCP. • Better performance than undowelled JUCP. • Good ride quality if paver-laid. • Durable pavement, if timely repairs. • Joints are the main weakness and can be a source of problems. • Recurring maintenance required. • Less suitable for areas with high temperature ranges. 1b Jointed Unreinforced Concrete pavement (unreinforced, skew joints without dowels) Low traffic routes such as rural roads Low • Cheapest form of concrete pavement. • Joints are a weakness and will cause problems throughout pavement life. • Skew joints prone to corner cracks. • Poor load transfer means HGVs likely to cause pavement damage. 2 Jointed Reinforced Concrete Pavement Medium/ High/ Very High High • > 80% fewer joints than JUCP (joints at 25 m rather than 4.5 m), so far fewer joint problems. • Reinforced, fewer cracking issues than JUCP. • Less joint movement and end movement. • Good ride quality if paver-laid. • Better than JUCP if subgrade settlement issues. • Joints are a weakness and can cause problems. • Recurring maintenance required. 3 Continuously Reinforced Concrete Pavement Medium/ High/ Very high Very high • Greater durability. No problematic joints. • Suitable for very heavy traffic loadings. • Very long life expectancy (40 - 60+ years). • Lower maintenance costs over its lifetime. • Good ride quality. • Can be used in areas with poor subgrades. • For areas with high temperature ranges, CRCP will perform better than JUCP. • High construction cost. • Laying reinforcement is labourintensive. • Specialist plant required to pave. 4 Continuously Reinforced Concrete Base High/ Very high Very high • Combines benefits of concrete strength with replaceable asphalt surface. • Excellent durability. No problematic joints. • Suitable for very heavy traffic loadings. • Very long life expectancy (40-60+ years). • Lower maintenance costs over its lifetime. • Good ride quality if paver-laid. • Can be used in areas with poor subgrades. • High construction cost. • Laying formwork and tying reinforcement is labour-intensive. • Specialist plant required to pave. 5 Roller Compacted Concrete Pavement (For design guide see references). Medium/ High/ Very High Moderate • Can be built using existing asphalt plant. • Quick to construct and no formwork required. • Can be used by traffic/overlaid soon after paving. • Likely poor ride quality/skid resistance. • Higher-speed roads (> 60 kph) need an asphalt surfacing for good skid resistance and surface evenness. 112 Design of Rigid Pavements 6 5 7 8 4 3 2 1 9 10 10.5 Design of Rigid Pavements 10.5.1 Design Introduction The design of a concrete pavement will depend on many factors, including: the traffic that will use the road, the required design life, the environment, the subgrade/subbase (together forming the foundation), the type of concrete pavement (e.g. whether steel reinforcement is included), whether a concrete shoulder is included, the strength of concrete and whether an asphalt surface is required. The selection of the overall pavement configuration should be based on its suitability for a particular project and on economic considerations. The concrete pavement thickness designs presented here for JUCP, JRCP and CRCP are from the 'Austroads Guide to Pavement Technology, Part 2: Pavement Structural Design' (2019). The Austroads designs have been developed from many years of experience in tropical and sub-tropical environments. They are based on the USA Portland Cement Association (PCA) method (Packard, 1984), with revisions to suit Australian tropical and sub-tropical conditions (Jameson, 2013). The designs assume a typical design period of 30 - 40 years, and that the concrete base / subbase layers are not bonded. The design procedure is based on two distress modes: (1) flexural fatigue cracking at the base of the concrete and (2) subgrade / sub-base erosion arising from repeated deflections at joints and planned cracks. The thickness design method is based on assessments of the following: • predicted traffic volume and composition over the design period; • strength of the subgrade in terms of its California Bearing Ratio; • flexural strength of the concrete. • A bound or lean concrete sub-base (LCS) is recommended for all pavements with a concrete base to: • resist erosion of the sub-base and limit 'pumping' at joints and slab edges; • provide uniform support under the pavement; • reduce deflection at joints and enhance load transfer at joints (especially if dowels are not used). Concrete pavements can also be sensitive to their environment and should be designed accordingly. For example, sulphate resisting concrete can be specified for roads likely to be regularly in contact with sea water, while in environments with large diurnal temperature ranges JUC pavement slab lengths can be reduced to lower stresses on joints caused by curling / hogging. Traffic running close to the outer unsupported edge of a concrete slab (Mayhew & Harding, 1987) is likely to cause damage in the form of corner cracking and/or edge cracking. To reduce this damage, it is sensible to either widen the slab by at least 600 mm and mark this area as a shoulder with white lines to keep traffic away from the edge, or have a tied concrete shoulder (i.e. an additional slab, which is the same thickness as the main slab and is at least 1.5 m wide, joined to the main concrete lane with tie bars). If this is not possible, then, for all types of concrete pavement, the slab thickness needs to be increased to reduce the damage to the edge / corners. 10.5.2 Design Traffic It has been well established that light vehicles contribute very little to structural deterioration, so only heavy vehicles are considered in pavement design. Heavy vehicle classifications vary from country to country and have already been discussed in Chapter 2. Rigid pavements can be sensitive to axle load magnitudes (which might reflect overloading) but they are relatively insensitive to axle load repetition (i.e. the volume of traffic). Concrete pavements must therefore be designed for the maximum axle loads that they are likely to carry. If overloading is a problem in a given country, then it might be prudent to select a stronger pavement type, such as a CRCP. A sensitivity analysis for design traffic could also be carried out. The Austroads rigid pavement design method is used to determine the design thickness of JUCP, JRC and CRCP. This means that the Austroads method for calculating design traffic is also used. For more information, see 'Austroads Guide to Pavement Technology, Part 2: Pavement structural Design, Section 7: Design Traffic'. For pavement design purposes, there are six Heavy Vehicle Axle Group (HVAG) types: • SAST = Single Axle with Single Tyres • SADT = Single Axle with Dual Tyres • TAST = Tandem Axle with Single Tyres • TADT = Tandem Axle with Dual Tyres • TRDT = TRiaxle with Dual Tyres • QADT = Quad-Axle with Dual Tyres The axle load for each group is shown in Table 10-2. 113 Design of Rigid Pavements 6 5 7 8 4 3 2 1 9 10 Table 10-2: Loads for axle groups, which cause the same damage as a Standard Axle Axle Group (Dual Tyres) Load (kN) Axle Group (Single Tyres) Load (kN) Single axle with dual tyres (SADT) 80 Single axle with single tyres (SAST) 58 Tandem axle with dual tyres (TADT) 135 Tandem axle with single tyres (TAST) 98 Triaxle with dual tyres (TRDT) 182 Triaxle with single tyres (TRST) 132 Quad-axle with dual tyres (QADT) 226 Quad-axle with single tyres (QAST) 164 Note: Where single tyre widths are 375 – 450 mm Source: Austroads, 2019 To calculate the design traffic loading, the Heavy Vehicle Axle Groups (HVAG) and the Traffic Load Distribution (TLD) are required. Procedure for determining Design Traffic (NDT): 1. Select a design period. The Austroads Guide uses a typical pavement design period of 30 - 40 years for rigid pavements. 2. Identify the most heavily used lane in the carriageway; this will be designated the 'design lane'. 3. Estimate the average daily number of heavy vehicles in the design lane for the first year of project life. 4. Estimate the cumulative number of heavy vehicles over the design period, using annual growth rates. 5. Estimate the cumulative heavy vehicle axle groups (HVAG) over the design period 10.5.3 Design Local Environment The environment in which the concrete pavement is to be built can have a significant effect upon its lifespan. The design of the pavement, including the type (e.g. JPC, JRC, CRCP), joint type, joint spacing, whether it has an asphalt surfacing and even the concrete mix design (cement type and admixtures), should be tailored to its environment, to reduce damage and maximise its life. Salt damage Concrete can be damaged by salts, which might be present in the aggregate or they may enter the concrete in water. If a road is near the sea or is regularly flooded with salt water, with the concrete exposed to salt water for long periods, then the concrete and any exposed steel can be significantly damaged. To counter this, sulphate-resistant cement can be used. Temperature Hardened concrete undergoes significant changes in volume with temperature changes (and, to a lesser extent, with changes in moisture). This volume change must be accommodated by contraction and expansion joints. In some tropical climates (notably in humid, low-lying areas near the equator) there is hardly any change in temperature, so expansion joints can be quite widely spaced. In other regions (notably deserts) there can be large fluctuations in both diurnal and annual temperatures, so joint design and spacing are crucial. A high diurnal temperature range will mean significant movement at joints and a higher risk of joint failure. For concrete pavements constructed in high temperatures, extra care must be taken to reduce evaporation. Curing is a crucial stage in the development of concrete strength, when bonds are formed within the concrete, and fresh concrete is extremely susceptible to the drying effects of sun and wind. In dry climates, particular care must be taken to protect fresh concrete, keeping it damp for at least seven days after laying. If concrete is constructed at a cooler time of the year, then additional expansion joints should be added to reduce the risk of 'blow-ups' that can occur at hotter times of the year, particularly in exceptional heatwaves. A blow-up might occur when the concrete has already expanded as much as it can at the joints, but needs to expand more, causing the ends of slabs to move vertically. This will severely damage the road. Rainfall In drier areas, there should be an emphasis on keeping water out of the pavement through cross-section design and sealing gaps, etc.; drainage layers within the pavement should not be needed. In high rainfall regions that are subject to high groundwater levels and tunnels / underpasses, the use of a properly designed drainage layer underneath the pavement (using a coarse filter material such as a graded Macadam or no-fines concrete) may be an effective means of removing water that has infiltrated through the surface or the shoulders, or from beneath the pavement. Noise Concrete-surfaced roads are generally noisier than asphalt-surfaced roads. For roads in an urban environment where vehicle tyre / road surface noise is considered to be an issue, concrete roads can be used with an asphalt surfacing. The concrete pavement type and/or asphalt surfacing should be carefully chosen. 114 Design of Rigid Pavements 6 5 7 8 4 3 2 1 9 10 If the subgrade, within 1 m of the underside of the sub-base, shows vertical stratification, then the design CBR must be determined from multi-layer subgrade calculations. The equivalent subgrade design strength (CBRE) may be determined from Equation 10-1 (Japan Road Association, 1989), below: Where: CBRE = equivalent subgrade design strength CBRi = the CBR value of layer i (%) hi = the thickness of layer i (m) ∑hi = taken to a depth of 1.0 m 10.5.4 Design Subgrade, Sub-base and Separation Membrane 10.5.4.1 Subgrade It should be noted that all rigid pavements perform best with uniform support. In areas where the subgrade is prone to differential settlement, a CRCP pavement will perform better than a JRC pavement, which will perform better than a JUCP. The strength of the subgrade is assessed in terms of the California Bearing Ratio (CBR). This can be carried out with field tests, using equipment such as the Dynamic Cone Penetrometer (DCP) (TRL, 1999; Smith & Pratt, 1983), or with laboratory testing. The weakest layer within 1 m below the sub-base must be assessed. Use of a bound, or lean-mix, concrete sub-base (as is recommended for JUCP, JRC and CRCP in this guide) increases the effective subgrade strength (CBR). The effective increase in subgrade strength is shown in Figure 10-2. Figure 10-2: Effective increase in subgrade strength due to bound / LCS Source: Modified from Austroads, 2019 Equation 10-1 CBRE = ∑i (hi CBRi 0.333 3 ∑i hi 115 Design of Rigid Pavements 6 5 7 8 4 3 2 1 9 10 10.5.4.2 Sub-base A bound, or lean-mix concrete, sub-base is recommended under a concrete pavement for many reasons, including: • to resist erosion of the sub-base, (one of the main causes of problems associated with concrete pavements), which can lead to 'pumping' at joints or slab edges, voids, faulting at joints and slab cracking; • to provide uniform support under the concrete pavement; • to reduce deflection at joints and enhance load transfer across joints; • to assist in the control of shrinkage and swelling of subgrade soils. The minimum sub-base thicknesses for design traffic levels are shown in Table 10-3. Table 10-3: Minimum sub-base thickness, by type Design Traffic (HVAG) Minimum Sub-base Thickness, by type Up to 1,000,000 (i.e. up to 106 ) 125 mm bound (1) Up to 5,000,000 (i.e. 106 to 5x10⁶ ) 150 mm bound or 125 mm LCS Up to 10,000,000 (i.e. 5x10⁶ to 107 ) 170 mm bound or 125 mm LCS More than 10,000,000 (i.e. ≥ 107 ) 150 mm LCS (2) Notes: (1) For pavements bearing very light traffic, a 100 mm granular sub-base (typically crushed rock) should suffice. (2) Under a CRCP, a heavily bound subbase with an asphalt surfacing is also acceptable. LCS = Lean-mix concrete sub-base. Source: Austroads, 2019 For rigid pavement design, a bound sub-base is one defined as being composed of one of the following: • Cement-stabilised crushed rock with not less than 5%, by mass, cementitious content, to ensure satisfactory erosion resistance (which is verifiable by laboratory erodibility testing). The cementitious content may include cement, lime / fly ash and/or ground granulated blast furnace slag. • Dense-graded asphalt. • Lean-mix concrete sub-base (LCS). This will have a characteristic 28-day compressive strength of not less than 5 MPa and be designed to have low shrinkage, typically less than 450 microstrain. This is constructed without transverse joints and is likely to develop narrow and relatively closely spaced cracks. These fine cracks will provide some load transfer and they should not reflect into the base (and this can be prevented with the aid of a debonding layer). Limiting both the upper strength and the shrinkage of the sub-base concrete controls cracking. If a longitudinal joint is required in the LCS, then it should be offset from the concrete slab longitudinal joint by 100 – 400 mm, to avoid reflection cracks. A cementitious-bound, or bituminous-bound, sub-base is recommended for all rigid pavements. Beneath this bound sub-base there should be a layer of unbound granular material or selected subgrade material with a minimum thickness of 150 mm. In drier areas, emphasis should be on keeping the water out of the pavement, through cross-section design, sealing gaps, etc., and drainage layers should not be needed. If a drainage blanket is to be used, then it should consist of an open-graded 20-mm crushed rock (with < 3% material finer than 75 μm), produced by blending 20-mm, 14-mm and 10-mm aggregates with coarse, washed sand. This material can also be cement-stabilised, to improve its strength when wet. For further details, see Austroads AGPT10-09 (2018). If a drainage blanket is used on a fine-grained subgrade, then a geotextile separation layer is recommended under the drainage blanket, to limit the migration of fines from the subgrade into the drainage blanket, which could block it. A geotextile can also be used above the drainage blanket. 10.5.4.3 Separation membrane During construction of most types of concrete pavement, a separation membrane is placed beneath the concrete slab to perform the following functions: • prevent loss of moisture / fine material from the concrete mix into the sub-base; • reduce the friction between the sub-base and the concrete slab, which is particularly important as the slab dries, to prevent mid-slab cracking; • prevent any loose material from the sub-base becoming attached to the underside of the fresh concrete slab, since this could add to stresses in the concrete as it expands / contracts; • prevent reflection cracks in the concrete slab above shrinkage cracks in a lean concrete sub-base; • minimise slab curling - in the longer term, the membrane will act as a moisture barrier, reducing moisture transference from the subgrade to the concrete slab, which can reduce moisture variation within the slab and help to minimise slab curling. It should be noted that a separation membrane is not used in a CRCP, where friction between the sub-base and the concrete is required. The absence of a separation membrane is also to restrict movement at the ends of the pavement. The separation membrane is usually a polythene sheet, 125 microns thick, studded onto the surface of the underlying layer. A bitumen emulsion powdered with a little fine sand can also be used. Where a separation membrane is present there is no need to wet the sub-base before adding the wet concrete. 116 Design of Rigid Pavements 6 5 7 8 4 3 2 1 9 10 Table 10-4: Concrete pavement design procedure for JUCP, JRCP AND CRCP Step Activity Further Information 1 Select a concrete pavement type, either JUCP (undowelled), JUCP (dowelled), JRCP or CRCP. – 2 Decide whether integrally-cast or tied concrete shoulders are to be provided. This will affect the variable F2 in Equation 10-6 and the coefficients in Equation 10-5. Table 10-8 to Table 10-10 3 Determine the sub-base thickness and type, using the subgrade design CBR and the predicted number of HVAG over the design period. Table 10-3: Minimum sub-base thickness, by type 4 Determine the Effective Subgrade Strength (CBR), using the subgrade design CBR and the selected sub-base. (Modified from: Austroads, 2019) Figure 10-2 and Equation 10-1 5 Select the 28-day characteristic flexural strength of the concrete base (fcf), in MPa. Where no information on flexural strength is available, designers may use a flexural strength of 4 MPa for thickness design purposes when a minimum characteristic compressive strength of 32 MPa is specified. Default = minimum 4MPa 6 Select the desired project reliability and hence the load safety factor from Table 10-5. Table 10-5 7 Select an initial concrete base thickness (this must be the same as, or greater than, the minimum values given in Table 10-6), or estimate from experience. Table 10-6 8 Calculate the expected load repetitions of each axle group load (10kN, 20kN, etc.) for each HVAG type. To do this, create a table for each HVAG type (e.g. SAST) with the following five columns: 1. Axle group load (10kN, 20kN, etc.), 2. Proportion of loads (%/100), 3. Proportion of axle group (%/100) – this will be the same value for the whole column, 4. Design traffic (HVAG) (e.g. 107 ) – this will also be the same value for the whole column, and 5. Expected repetitions (calculated by multiplying columns 2, 3 and 4 together). - 9 Obtain, from the project Traffic Load Distribution data, the highest axle load for the SAST axle group. Determine the allowable repetitions in terms of fatigue. Equation 10-2 and Equation 10-3 10 Calculate the ratio of the expected fatigue repetitions (Step 8) to the allowable repetitions (Step 9). Multiply by 100 to determine the percentage fatigue. – 11 Using Equation 10 6, determine the allowable number of repetitions for erosion for the highest axle load for the SAST axle group. Equation 10-6 12 Calculate the ratio of the expected erosion repetitions (Step 8) to the allowable repetitions (Step 11). Multiply by 100 to determine the percentage erosion damage. – 13 Repeat steps 9 to 12 for each axle group load, up to a load level where the allowable load repetitions exceed 1011, at which point further load repetitions are deemed not to contribute to pavement distress. – 14 Find the total of the percentage fatigue for all relevant loads of this axle group type; similarly, find the total of the percentage erosion for all relevant loads of this axle group type. – 15 Repeat steps 9 to 14 for each axle group type (i.e. SADT, TAST, TADT, TRDT and QADT). – 16 Calculate the total fatigue and total erosion damage for all axle group types. – 17 Repeat steps 7 to 16, increasing the thickness until a value is obtained that has both: 1. a total fatigue less than or equal to 100%, and 2. a total erosion damage less than or equal to 100%. – 18 Take the thickness calculated in step 17 and round up to the neatest 5mm. This is the design base thickness. 19 Check that the design base thickness (from step 18) is greater than the minimum thickness required (see Table 10-6). Table 10-6 20 Consider increasing the design base thickness to allow for other factors (e.g. limitations of paving equipment and measurements, future retexturing, etc). – Source: Austroads, 2019 117 Design of Rigid Pavements 6 5 7 8 4 3 2 1 9 10 10.5.5 Design of Concrete Pavement Thickness (JUCP, JRCP, CRCP) The concrete pavement thickness designs presented here for JUCP, JRCP and CRCP are from the Austroads 'Guide to Pavement Technology, Part 2: Pavement Structural Design' (2019). They are for pavements with design traffic greater than 1 million axles (HVAG). This design method was chosen because it allows for actual heavy vehicle loads to be included in the design, so that any overloading, which can crucially affect concrete pavements, can be factored into the designs. The Austroads designs are the result of many years of experience in tropical and sub-tropical environments. They are based on the USA Portland Cement Association (PCA) method (Packard, 1984), with revisions to suit Australian tropical and sub-tropical conditions (Jameson, 2013). The method assumes a typical design period of 30 - 40 years and that the concrete base / sub-base layers are not bonded. Minimum sub-base type and thickness information is presented in Table 10-3, while Table 10-5 presents minimum concrete base thicknesses for different pavement types and design traffic levels. The thickness design method is based on assessments of: • predicted traffic volumes and composition over the design period; • the strength of the subgrade in terms of its California Bearing Ratio; • the flexural strength of the concrete. To carry out the design, multiple computer spreadsheets containing some complicated equations are required. Alternatively, AUSTPADS Online Pavement Design Software can be used. 10.5.5.1 Concrete thickness design Concrete thickness is calculated using the Austroads design procedure described in Table 10-4, below. This is applicable to JUCP, JRCP and CRCP. Information is required on both axle group types, the distribution of each axle group type and the number of repetitions of each axle type / load combination that is expected to use the pavement during its design life. All of the Tables, Figures and Equations referred to in the Design Procedure Table, below, are provided in the following section. Load Safety Factors (Lsf) for concrete pavements are presented in Table 10-5. Minimum concrete base thicknesses are shown in Table 10-6, and a design catalogue in Table 10-7. Table 10-5: Load Safety Factors (LSF) for concrete pavements Pavement Type Project Design Reliability 80% 85% 90% 95% 97.5% JUCP (no dowels) 1.15 1.15 1.2 1.3 1.35 JUCP (dowelled), JRCP, CRCP 1.05 1.05 1.1 1.2 1.25 Source: Austroads, 2019 Table 10-6: Minimum concrete base (i.e. slab) thickness Concrete Pavement Type Design Traffic HVAG < 1 M 1 M < HVAG < 10 M 10 M < HVAG < 50 M HVAG > 50 M Jointed Unreinforced (JUCP) 125 mm 150 mm 200 mm 250 mm Jointed Reinforced (JRCP) 125 mm 150 mm 180 mm 230 mm Continuously Reinforced (CRCP) 125 mm 150 mm 180 mm 230 mm Source: Austroads, 2019 Table 10-7: Design Catalogue for concrete pavements based on MESA Assumptions: 1. fcf = 4.5 2. ESA/HVAG = 1.5 - 2.0 3. Proportion of axles SAST = 40%, SADT = 20%, TADT = 25%, TRDT/TRST = 14%, TAST = 1%, CB1 = 3.0 - 6.0 MPa, CB3 = 0.75 - 1.5 MPa, LMC = Lean Mix Concrete, PCC = Portland Cement Concrete i.e. slab. JUCP, JRCP with concrete shoulders (No dowels) Load Safety Factor 1.15 1.20 1.30 Traffic Class T1-T (0.1-3) T5-T7 (3-30) T8-T10 (30-80) Foundation Classes F1 (S3) 200 PCC 215 PCC 230 PCC 125 CB2 150 CB1 150 LMC F2 (S4) 200 PCC 215 PCC 230 PCC 125 CB2 150 CB1 150 LMC F3 (S5), F4 (S6) 195 PCC 210 PCC 230 PCC 125 CB2 150 CB1 150 LMC Dowelled JUCP, JRCP and CRCP with concrete shoulders Load Safety Factor 1.05 1.1 1.2 Traffic Class T1-T4 (0.1-3) T5-T7 (3- 30) T8-T10 (30-80) Foundation Classes F1 (S3) 190 PCC 205 PCC 220 PCC 125 CB3 150 CB3 150 LMC F2 (S4) 185 PCC 205 PCC 220 PCC 125 CB3 150 CB3 150 LMC F3 (S5), F4 (S6) 185 PCC 200 PCC 220 PCC 125 CB3 150 CB3 150 LMC 118 Design of Rigid Pavements 6 5 7 8 4 3 2 1 9 10 The allowable axle load repetitions may be determined from the following equations (Jameson, 2013): Fatigue distress mode Allowable load repetitions (Nf ) for a given axle load are Equation 10-2 and Equation 10-3. When: Sr > 0.55 When: 0.45 < Sr < 0.55 The equivalent stress (Se) and erosion factor (F3) is determined from Equation 10-5 using the coefficients a-j in Table 10-8 to Table 10-10. Equation 10-2 | Source: Austroads, 2019 Equation 10-3 | Source: Austroads, 2019 Equation 10-4 | Source: Austroads, 2019 log10Nf = 0.9719 – Sr 0.0828 Nf = 4.258 Sr – 0.0828 3.268 Sr = PLSF 4.45F1 S 0.94 e 0.944fcf Equation 10-5 | Source: Austroads, 2019 Se or F3 = a + ln(Ef ) D b D +c.ln(Ef )+ d D2 +e.[ln(Ef )] 2 +f. +h.[ln(Ef )] 3 + +i. g D3 [ln(Ef )]2 D +j. ln(Ef ) D Where: a, b, c, d, f, g, h, i, j are coefficients in Table 10-8 to Table 10-10. D = thickness of concrete base (mm) Ef = effective subgrade design CBR (%) Where: Se = equivalent concrete stress, in MPa fcf = design characteristic flexural strength at 28 days, in MPa, (minimum = 4.5) P = axle group load (kN) LSF = load safety factor F1 = 9 for single axle with single tyres (referred to as SAST axle group) 18 for single axle with dual tyres (referred to as SADT axle group) 18 for tandem axle with single tyres (referred to as TAST axle group) 36 for tandem axle with dual tyres (referred to as TADT axle group) 54 for triaxle with dual tyres (referred to as TRDT axle group) 72 for quad axle with dual tyres (referred to as QADT axle group) Nf is infinite or commonly referred to as unlimited when Sr is less than 0.45. Erosion distress mode Allowable load repetitions (Ne) for a given axle load are calculated using Equation 10-6. Where: P and LSF are as for Equation 10-2 and Equation 10-3. F2 = adjustment for slab edge effects = 0.06 for base with no concrete shoulder = 0.94 for base with concrete shoulder F3 = erosion factor F4 = load adjustment for erosion due to axle group = 9 for single axle with single tyres (referred to as SAST axle group) = 18 for single axle with dual tyres (referred to as SADT axle group) = 18 for tandem axle with single tyres (referred to as TAST axle group) = 36 for tandem axle with dual tyres (referred to as TADT axle group) = 54 for triaxle with dual tyres (referred to as TRDT axle group) = 72 for quad axle with dual tyres (referred to as QADT axle group) The erosion factor (F3) is determined from Equation 10-5, using the coefficients a to j in Table 10-8 to Table 10-10. There are no limits set for the axle load input and load safety factors used in Equation 10-2 and Equation 10-3, but caution is advised when using allowable loadings calculated with values of (4.5 × PLSF /F1) or (4.5 × PLSF /F4) exceeding 65 kN. Equation 10-6 | Source: Austroads, 2019 log10(F2Ne ) = 14.524 – 6.777 max (0, PLSF 4.45F4 2 10F3 41.35 . – 9.0 0.103 119 Design of Rigid Pavements 6 5 7 8 4 3 2 1 9 10 Table 10-8: Coefficients for prediction of equivalent stresses Coefficient Without concrete shoulders With concrete shoulders Axle group type Axle group type SAST & TAST SADT TADT TRDT & QADT SAST & TAST SADT TADT TRDT & QADT a 0.118 0.560 0.219 0.089 -0.051 0.330 0.088 -0.145 b 125.4 184.4 399.6 336.4 26.0 206.5 301.5 258.6 c -0.2396 -0.6663 -0.3742 -0.1340 0.0899 -0.4684 -0.1846 0.0080 d 26,969 44,405 -38 -10,007 35,774 28,661 4,418 1,408 e 0.0896 0.2254 0.1680 0.0830 -0.0376 0.1650 0.0939 0.0312 f 0.19 19.75 -71.09 -83.14 14.57 2.82 -59.93 -61.25 g -352,174 -942,585 681,381 1,215,750 -861,548 -686,510 280,297 488,079 h -0.0104 -0.0248 -0.0218 -0.0120 0.0031 -0.0186 -0.0128 -0.0058 i -1.2536 -4.6657 3.6501 5.2724 1.3098 -1.9606 4.1791 4.7428 j -1,709 -4,082 2,003 4,400 -4,009 -2,717 1,768 2,564 Source: Austroads, 2019 Table 10-9: Coefficients for prediction of erosion factors for undowelled bases Coefficient Without concrete shoulders With concrete shoulders Axle group type Axle group type SAST & TAST SADT TADT TRDT & QADT SAST & TAST SADT TADT TRDT & QADT a 0.745 1.330 1.907 2.034 0.345 0.914 1.564 2.104 b 533.8 537.5 448.3 440.3 534.6 539.8 404.1 245.4 c -0.2071 -0.1929 -0.1749 -0.2776 -0.1711 -0.1416 -0.1226 -0.2473 d -42,419 -43,035 -35,827 -36,194 -44,908 -44,900 -32,024 -15,007 e 0.0405 0.0365 0.0382 0.0673 0.0347 0.0275 0.0256 0.0469 f 27.27 26.44 0.64 15.77 20.49 16.37 -9.79 8.86 g 1,547,570 1,586,100 1,291,870 1,315,330 1,676,710 1,654,590 1,150,280 518,916 h -0.0044 -0.0039 -0.0060 -0.0084 -0.0038 -0.0032 -0.0052 -0.0075 i -1.4656 -1.4547 -1.0741 -1.2068 -1.3829 -0.9584 2.1997 1.5517 j -1,387 -1,344 50 -625 -913 -765 469 -599 Source: Austroads, 2019 120 Design of Rigid Pavements 6 5 7 8 4 3 2 1 9 10 Table 10-10: Coefficients for prediction of erosion factors for dowelled or CRCP Coefficient Without concrete shoulders With concrete shoulders Axle group type Axle group type SAST & TAST SADT TADT TRDT & QADT SAST & TAST SADT TADT TRDT & QADT a 0.072 0.643 1.410 2.089 -0.184 0.440 0.952 1.650 b 679.9 684.5 498.9 351.3 602.3 609.8 544.9 359.4 c -0.0789 -0.0576 -0.1680 -0.3343 -0.0085 -0.0484 -0.0404 -0.1765 d -58,342 -58,371 -39,430 -25,576 -50,996 -52,519 -47,500 -28,901 e 0.0179 0.0128 0.0322 0.0723 -0.0122 0.0017 0.0179 0.0435 f 6.70 4.61 13.80 29.58 8.99 9.62 -31.54 -15.97 g 2,139,330 2,131,390 1,437,580 923,081 1,874,370 1,949,350 1,719,950 1,085,800 h -0.0021 -0.0017 -0.0044 -0.0086 0.0008 -0.0007 -0.0051 -0.0084 i -0.5199 -0.2056 -0.0380 -1.6301 -0.4759 -0.6314 3.3789 3.2908 j -187 -185 -697 -1,327 -374 -326 1,675 758 Source: Austroads, 2019 The reinforcement should terminate at least 40 mm, and not more than 80 mm, from the edge of the slab and from all joints except longitudinal joints. The amount of reinforcing steel in JRCP and CRCP are given below. These are from the Austroads Pavement Guide (2019). Jointed Reinforced Concrete The required amount of steel reinforcement in a JRCP is calculated as a required area of steel (mm2) per metre width of slab, using the Subgrade Drag Theory (Equation 10-7). 10.5.5.2 Design of reinforcement The steel mesh reinforcement within a JRCP or CRCP concrete slab should be located at approximately 1/4 to 1/3 of the depth of the slab. A minimum cover of concrete is required to protect the steel reinforcement and minimise corrosion. These minimum values are shown in Table 10-11. Table 10-11: Minimum concrete cover to steel reinforcement and tie bars for JRC and CRCP Slab thickness (mm) Minimum Concrete Cover (mm) Steel Mesh Reinforcement Minimum Concrete Cover (mm) Tie Bars Top Cover Bottom Cover Top Cover Bottom Cover Up to 150mm 50 50 50 50 180 60 80 60 70 200 60 90 70 80 220 70 100 70 90 240 70 110 80 100 260 80 120 90 110 280 80 130 100 120 Notes: The longitudinal steel bars can be placed either above or below the transverse bars. For slab thicknesses between the values shown, use the cover shown for the greater slab thickness. Adapted from 'Roads and Maritime Services 2015b, Pavement standard drawings: rigid pavement: standard details, construction: volume CC: CRCP, Table 12-3, RMS, Sydney, NSW'. As = µLgÏD 1000fs Where: As = required area of steel (mm2/m width of slab) µ = coefficient of friction between the concrete base and the sub-base (see Table 10-12, for indicative values) L = distance to untied joints or edges of the base (m) Ï = mass per unit volume of the base (kg/m3 ) g = acceleration due to gravity (m/s2) D = concrete base thickness (mm) including any asphalt surfacing fs = allowable tensile stress of reinforcing steel (MPa), which is usually 0.6 times the characteristic yield strength (Fsy) Equation 10-7 | Source: Austroads, 2019 121 Design of Rigid Pavements 6 5 7 8 4 3 2 1 9 10 Table 10-12: Estimated values of the coefficient of friction Sub-base type Base type Recommended treatments Estimated friction coefficient(2, 3) Lean-mix concrete sub-base curing Debonding treatment Lean-mix Concrete PCP and CRCP Wax emulsion Bitumen-sprayed seal with 5 – 7 mm aggregate 1.5 JRCP Wax emulsion, or hydrocarbon resin (i) Bitumen seal with 5 – 7 mm aggregate, or (ii) bitumen emulsion (i) 1.5 (ii) 2.0 RCC and CTCR (1) All Bitumen-sprayed seal with 5 – 7 mm aggregate 2.5 Dense graded asphalt All Note 4 2.5 - 3.0 (4) Notes: (1) RCC = Roller Compacted Concrete; CTCR = Cement Treated Crushed Rock. (2) Friction values will vary depending on factors such as the surface smoothness of the lean-mix concrete sub-base and the amount of residual curing compound present at the time of the debonding treatment. To guard against under-design of tie bars and other reinforcement, conservative (i.e. high) friction values have been adopted. (3) The table is to be interpreted as follows: for JRCP, for example, wax emulsion curing followed by either of the debonding treatments can be assumed to yield a friction value of 1.5. (4) Friction values for asphalt could vary widely depending on factors such as age, modulus and surface texture. Aged, stiff asphalt with an open-textured surface could yield a high friction level. In contrast, new and relatively flexible asphalt is likely to have a lower effective friction level. Source: Austroads, 2019 Continuously Reinforced Concrete For CRCP, sufficient continuous longitudinal steel reinforcement is provided to induce transverse cracking at random spacings of about 0.5 - 2.5 m, and to hold the cracks together. Transverse reinforcement is provided to support the longitudinal steel and to tie any longitudinal cracks together. (i) Longitudinal steel reinforcement The longitudinal reinforcing steel in a CRCP pavement should comply with the following: • Deformed bars should be used; • The diameter of the bars should preferably be 16 mm, and in any case not exceed 20 mm; • The centre-to-centre spacing of the bars should not exceed 225 mm; • The minimum proportion of longitudinal steel is 0.67%. The proportion of the cross-sectional area of the pavement which is to be longitudinal reinforcing steel in CRCP is given by Equation 10-8. p = ( ft ´ / fb´) db ( εs+ εt ) 2W Where: p = required proportion of longitudinal reinforcing steel – this is the ratio of the cross-sectional area of the reinforcing steel to the gross area of the cross section of the base ft ´ / fb´ = the ratio of the direct tensile strength of the immature concrete to the average bond strength between the concrete and steel. The value of this ratio may be assumed to be 1.0 for plain bars or 0.5 for deformed bars db = diameter of longitudinal reinforcing bar, in mm εs = estimated shrinkage strain – this should be in the range 200 - 300 microstrain for concrete with a laboratory shrinkage not exceeding 450 microstrain at 21 days when tested in accordance with AS 1012.13 after three weeks of air drying εt = estimated maximum thermal strain from the peak hydration temperature to the lowest likely seasonal temperature – a value of 300 microstrain may be assumed, except when the average diurnal temperature at the time of placing concrete is 10°C or less, when a value of 200 µε may be assumed W = maximum allowable crack width, in mm – a value of 0.3 mm should be used in normal conditions, with 0.2 mm for severe exposure situations, such as in locations adjacent to Equation 10-8 | Source: Austroads, 2019 marine environments 122 Design of Rigid Pavements 6 5 7 8 4 3 2 1 9 10 For deformed bars, Equation 10-8 may be simplified as Equation 10-9. p = 0.25 db( εs+εt ) W Where: pcrit = minimum proportion of longitudinal reinforcement to match the specified (or target) concrete strength fct = concrete tensile strength (MPa) – a value equal to 60% of the 28-day concrete flexural strength (f cf) may be assumed µ = coefficient of friction between concrete base and subbasefsy = the characteristic yield strength of the longitudinal reinforcing steel (AS/NZS 4671) m = ratio of the elastic moduli of steel to concrete, (Es/Ec) a value of 7.5 may be assumed. (ii) Transverse reinforcement The required area of transverse reinforcing steel in a CRCP (As) is consistent with that provided in a JRC, and is calculated using Equation 10-7, except that a maximum spacing of 750 mm is typically adopted to prevent sagging in the longitudinal steel. 10.5.6 Design of Concrete Mix and Admixtures Only basic information is provided in this chapter, due to limited space. For more detailed information about concrete mix design, see the list of guides at the end of Section 10.5.6.2. 10.5.6.1 Concrete mix constituents Cement There are many different types of cement produced around the world, including general purpose cement, blended cement, high early strength cement and limited shrinkage cement. Ordinary Portland Cement is usually a good starting point. If the surrounding soil has sulphates in excess of 0.5%, or if the road will be exposed to salt water, the cement should be sulphate-resistant. The Portland Cement may be mixed (i.e. blended) with binders such as ground granulated blast furnace slag and/or pulverised fly ash, lime or other chemical binder. There needs to be a sufficient quantity of binder to produce a bound layer with significant tensile and compressive strength. For more detailed information, see the list of Mix Design Guides at the end of Section 10.5.6.2. Equation 10-9 | Source: Austroads, 2019 To ensure against yielding of the steel, the steel reinforcement ratio should exceed the critical value given by Equation 10-10. Equation 10-10 | Source: Austroads, 2019 pcrit = f ct (1.3 – 0.2µ) f ct –mfct Coarse aggregate The properties of aggregates suitable for use in a concrete mix vary according to (a) the natural properties of the material (toughness, durability and soundness, density, water absorption/porosity, surface microtexture and chemical properties including alkali reactivity and thermal expansion) and (b) properties that can be controlled (shape, size, distribution, cleanliness). There are numerous tests for the suitability of aggregates in concrete mixes which, for space reasons, cannot be included in this chapter. For further information, see the list of Mix Design Guides at the end of Section 10.5.6.2. In concrete, it is beneficial to use aggregates with a low coefficient of thermal expansion (e.g. limestone) so that slab movement, and hence problems at joints, are minimised. Limestone, however, can be polished by traffic, leading to dangerously slippery road surfaces in the wet. In wet climates, it can be prudent to limit limestone aggregate concrete to more lightly used roads or use a two-layer approach to building the concrete slab, with non-limestone aggregate in the upper (surfacing) layer. Coarse aggregates shall consist of clean, hard, strong, non-porous pieces of crushed stone / crushed gravel. The maximum size shall not exceed 25 mm. Continuously graded, or gap-graded, aggregates may be used, depending on the grading of the fine aggregate. Fine aggregate Where natural sand is used as the fine aggregate, there is a temptation to use sand at the finer end of the grading, as it is often cheap and plentiful and cheaper, but this will produce concrete with poor workability, which can be particularly problematic in hotter climates, with more rapid hardening times. It is better to use sand with gradings near the coarse limits. Water Water free of sulphates and chlorides is considered to be satisfactory for mixing and curing. Admixtures Admixtures may be used to improve the workability of the concrete or to extend setting time, etc. The most common types of admixtures are retarding admixtures, water-reducing admixtures, air-entraining admixtures and pozzolans (e.g. crushed rock powder, bentonite, fly ash and ground granulated blast furnace slag). For more information, see the Austroads 'Guide to Pavement Technology Part 4C: Materials for Concrete Pavements' (2021). 123 Design of Rigid Pavements 6 5 7 8 4 3 2 1 9 10 10.5.6.2 Concrete mix design Concrete mix design can be complex, as it needs to include many components, including the aggregate type/ size/grading/shape, the cement type/content, water content and any admixtures or air entrainment. In order to construct a quality concrete pavement with good performance, the following factors are key: • For fresh concrete – workability, compaction, curing, no bleeding • For hardened concrete – strength (flexural/compressive), durability, minimal shrinkage and a skid resistant surface The correct mix design is important, to ensure all of these factors. It is important to note that there is no unique concrete mix design that can be used for all types of highway construction. Looking at just one of the above factors - workability of the fresh concrete mix* - the mix design will even depend upon the type of concrete pavement and the method of laying: • A mix suitable for slip-form construction will need a stiffer mix (because side forms are not used) requiring a typical slump value of 20 - 40mm. • A mix suitable for mechanised fixed-form paving will require a typical slump value of 35 - 50mm. • A mix suitable for manual fixed-form construction will require a typical slump value of 55 - 65mm. The mix design process is often based on experience with past mixes and knowledge of local aggregates. The following example of the mix design process is an abbreviated run-through on how to design a mix. The concrete mix designer is given requirements that the mix must fulfil, e.g. (a) Characteristic compressive strength required at 28 days e.g. 40 N/mm2, (b) Nominal maximum size of aggregate e.g. 20 mm, (c) Shape of Crushed Aggregate e.g. Angular, (d) Degree of workability required at site e.g. target 55 - 65mm slump, (e) Type of cement to be used e.g. blended cement with pfa. The designer is also given laboratory test data for the materials to be used in the mix. The following steps are then used to design the concrete mix: 1. Determine target strength (this is different to characteristic strength). 2. Estimate the water and air content from tables. 3. Select the water-cement ratio. 4. Select water content and correct this based on slump. 5. Select cement content (by dividing the water content by the water-cement ratio). 6. Estimate the coarse aggregate content. 7. Estimate the fine aggregate content and other mix ingredients. 8. Carry out trial mixes and adjust mix. * While there is no test to measure workability directly, useful indicator tests include the slump test, the Vebe test and the compacting factor test. After the concrete mix has been designed, it is essential that the contractor carries out laboratory, and then field, trials to evaluate both the fresh, and hardened, properties of the proposed concrete base (and the lean concrete sub-base). The trials will need to demonstrate workability, compactability, slipformability (if required), strength, a skid resistant surface, etc. There is not enough space in this chapter to cover concrete mix design in detail but there are many excellent guides available, including: Australia: • Austroads (2021). Guide to Pavement Technology. Part 4C: Materials for Concrete Road Pavements. AGPT04C-17, Edition 2.1, May 2021. Sydney, Australia: Austroads. USA: • Portland Cement Association (PCA) (2021). Design and Control of Concrete Mixtures. 17th Edition, 2021. • American Concrete Institute (ACI) (1991). ACI 211.1: Standard Practice for Selecting Proportions for Normal, Heavyweight and Mass Concrete, 1991. • American Concrete Institute (ACI) (2017). ACI 325.14R: Guide for Design and Proportioning of Concrete Mixtures for Pavements, 2017. (To be used as a supplement to ACI 211.1.). • AASHTO (2020). PP84 Standard Practice for Developing Performance Engineered Concrete Pavement Mixtures. South Africa: • South African Pavement Engineering Manual (SAPEM) (2014). Chapter 09: Materials Utilisation and Design. 2nd Edition, 2014. India: • Indian Roads Congress (2017). IRC 44-2017: Guidelines for Concrete Mix Design for Pavements, 3rd Revision, 2017. UK: • MCHW Volume 1: Specification for Highway Works, Series 1000: Road Pavements - Concrete Materials. (For URC, JRC, CRCP and CRCB the concrete strength class required is usually C40/50, with a minimum of C32/40). This references the following British and European Standards: • BS 8500-1:2015 Concrete. Method of specifying and guidance for the specifier. • BS 8500-2:2015 Concrete. Specification for constituent materials and concrete. • BS EN 206:2013 Concrete. Specification, performance, production and conformity. • BS EN 13877-1:2013 Concrete Pavements – Materials. • BS EN 13877-2:2013 Concrete Pavements – Functional requirements for concrete pavements. 124 Design of Rigid Pavements 6 5 7 8 4 3 2 1 9 10 10.5.6.2 Strength of cement-bound sub-base and concrete base Sub-base strength A cement-bound (lean-mix) sub-base would be expected to attain a characteristic 28-day compressive strength of 5 MPa (with fly ash) and 7 MPa (without fly ash). It should be noted that the rate of strength increase of concrete made using fly ash-blended cement is less than that of concrete without fly ash for up to 28 days. Concrete strength In the Austroads designs used for JUCP, JRCP and CRCP, concrete strength is the characteristic 28-day flexural strength (modulus of rupture). A concrete pavement base for a road pavement would be expected to attain a minimum characteristic 28-day flexural strength of 4.5 MPa. A concrete wearing surface would be expected to attain a minimum characteristic 28-day compressive strength of 32 MPa. A typical relationship for converting 28-day compressive strength to 28-day flexural strength for concrete with crushed aggregate is shown below, as Equation 10-11. fcf = 0.75 X fc Equation 10-11 | Source: Austroads, 2019 Where: fcf = 28-day concrete flexural strength, in MPa fc = 28-day concrete compressive strength, in MPa fcf = 1.37 fcs Equation 10-12 | Source: Austroads, 2019 Where: fcs = 28-day concrete splitting or indirect tensile strength (MPa) The actual strength relationships for a given concrete mix will be dependent on the properties of its constituents, particularly the microtexture and particle shape of the coarse aggregate. Where no information on flexural strength is available, designers may use a flexural strength of 4 MPa for thickness design purposes when a minimum characteristic compressive strength of 32 MPa is specified. 10.6 Concreted Joints, Dowel Bars And Tie Bars 10.6.1 Concrete Joints Joints are made in some types of concrete pavement to control cracking, relieve stresses, allow movement of the concrete and enable breaks in construction. There are different types of transverse and longitudinal joints, and these perform different functions. The main types of concrete joint are summarised in Table 10-13, below, with more details given in subsequent sections. The different types of concrete joint are discussed in the following section. Table 10-13: Main types, and purpose, of concrete joints No. Joint Type Purpose of Joint Joint Fixing * 1 Transverse Contraction Joint Used in JUCP or JRCP. These transverse joints are created using saw-cut or crack inducers to force the natural shrinkage crack to occur in a straight line at a chosen location, which can be easily sealed. Dowel bars (these can be omitted for very low volume roads). 2 Transverse Expansion Joint Used in most concrete pavement types. A deliberate transverse gap (approximately 25 mm wide) is made between slabs to allow the slabs to expand. These are crucial to protect adjacent bridges and other pavement types etc. in extreme heat. The joints are filled with a compressible material (foam, etc.) and dowel bars are used to transfer loads across the joint. Dowel bars. 3 Transverse Construction Joint (a type of Tied Joint) Used in all concrete pavement types. This transverse joint locks two vertical slab ends firmly together, e.g. where today's fresh concrete meets yesterday's hardened concrete. Tie bars. 4 Longitudinal Hinged or Warping Joint (a type of Tied Joint) Used in all concrete pavement types. Where two lanes (laid separately) are tied together to stop them moving apart. If both lanes are laid at the same time, then a joint can be created in the wet mix using tie bars and saw-cut / crack inducers. The joint allows the slabs to slightly 'flex' up and down. Such a joint can also be used at manhole positions, when unreinforced slabs are alongside reinforced slabs, or in long, narrow JUC slabs between normal joint positions, to reduce the length / width ratio of the slabs to two or fewer. Tie bars. * Most joints incorporate dowel bars for load transfer or tie bars to lock the slab sides together, so that load transfer is carried out using aggregate interlock. Dowel bars and tie bars will be discussed in Section 10.6 The indirect tensile or splitting (Brazilian) test has also been used for the control of concrete strength in pavement work. A typical relationship for converting splitting strength into flexural strength is illustrated by Equation 10-12, below. 125 Design of Rigid Pavements 6 5 7 8 4 3 2 1 9 10 10.6.1.1 Contraction joints Contraction joints are the main type of transverse joint in a jointed concrete pavement. In an unreinforced concrete pavement without joints, as the wet mix concrete 'cures' into hardened concrete, it will naturally create shrinkage cracks at approximately 3 - 5 m intervals. These meandering cracks would be difficult to seal, so, in a JUC pavement, contraction joints are created at approximately 4 - 5 m intervals, to control the shape and location of these cracks. They are created by using either saw-cutting transversely in the semihardened concrete, crack inducers or grooving tools. Contraction joints formed by a saw-cut and a crack inducer are shown in Figure 10-3, above. All of these methods introduce a plane of weakness into the concrete that will cause the natural shrinkage crack to form at this location, leaving a neat transverse 'joint' at the surface. A groove at the top of the joint can be neatly sealed with an elastomeric (hot- or cold-poured) material or preformed neoprene strip. This sealant will allow the slab's ends to move as the concrete expands / contracts / warps (due to daily temperature and moisture changes) but will stop detritus from entering the joint, which could prevent movement at the joint that might lead to a build-up of stresses and possible joint failure. The sealant will also stop water entering the pavement, which could cause damage, particularly if the sub-base is erodible. The spacings of contraction joints for various concrete pavement types are presented in Section 10.6.3. Details of the joint and sealant should be as per the sealant manufacturer's recommendations. 10.6.1.2 Expansion and isolation joints Concrete is a material that expands when hot and contracts when cold. Expansion joints are usually used in JUCP, JRCP and CRCP. They are generally 25 mm wide transverse joints, which can allow for greater expansion of the concrete slabs than contraction joints. They are usually filled with a compressible material such as foam matting, polystyrene or fibreboard. They are required when: Figure 10-3: Contraction joint (formed by saw-cut and crack inducer) Fully coated or half coated dowel bars Plastic crack inducer inserted into fresh concrete Steel reinforcement terminated 60+/ - 20mm from joint Dowel bars supported on cradles Crack inducer Dowel bars supported on cradles JUCP transverse joint JRCP transverse joint Joint groove saw cut in semihardened concrete (depth between ¼ and the thickness of the slab) • the concrete pavement abuts with a permanent structure, e.g. a bridge, culvert or other type of pavement. Even an increase in the length of each slab by a few millimetres can lead to significant movement and damage to an adjacent bridge, or the concrete slabs themselves, unless this additional movement is accommodated with expansion joints; • the concrete pavement is laid at a cooler time of the year, e.g. winter. In summer, when temperatures are significantly higher than when the concrete was laid, particularly during a heatwave, the concrete slabs need significant room to expand, (i.e. more than would be provided by contraction joints on their own). If expansion joints are required, they are deliberately built into the concrete pavement at either specific locations (e.g. where they meet a permanent structure, such as a bridge deck or an asphalt road), or at regular intervals along a concrete pavement (e.g. if future expansion is thought to be an issue, as in (b), above). Most expansion joints will need load transfer across the joint, in the form of dowel bars, as the slabs do not touch so there is no aggregate interlock to provide any form of load transfer. The dowel bars should be provided with a cap at the de-bonded end, containing a thickness of 25 mm of compressible material to allow the joint to open and close. Details of an expansion joint are shown in Figure 10-4. Figure 10-4: Diagram of an expansion joint Fully coated or half coated dowel bars Seal Dowel bars supported on cradles 25mm compressible material Plastic cap with 25mm expansion gap at end Mid-depth 126 Design of Rigid Pavements 6 5 7 8 4 3 2 1 9 10 An isolation joint is an undowelled expansion joint. These are required at intersections or junctions, to restrict conflicting movements among the different pavements. For Jointed Reinforced Concrete Pavements (JRCP), every third joint should usually be an expansion joint; the remainder are contraction joints. Reinforcement must be discontinuous (i.e. omitted) at both contraction and expansion joints. The required spacing for expansion joints for various concrete pavement types is presented in Section 10.6.3. 10.6.1.3 Construction joints In a transverse construction joint, two concrete slabs are locked together with tie bars (also called tie rods), which are typically 12 mm-diameter deformed steel bars, approximately 600 - 1,000 mm long, spaced at 300 - 500 mm centres. Tie bars are provided purely to hold the faces together and load transfer is provided by the aggregate interlock (in sawn joints) or by corrugations (in formed joints) – see Figure 10-5. At the end of each day's work, (or when a stoppage is required), formwork is placed transversely and secured in place. This formwork should have 15 - 20 mm diameter holes, at a 300 - 500 mm spacing. The wet concrete is laid up to this formwork, creating a vertical face. Tie bars are then pushed half-way into the end of the concrete at mid-slab depth, through holes in the formwork. To protect the tie bars from corrosion, about 100 mm of the centre rod (which will be at the joint) should be painted with bituminous paint or similar impervious material. Figure 10-5: Tie bar at longitudinal joint Deformed steel tie bar Neat step created using formwork to aid load transfer Base depth Cast first d Concrete slab Concrete slab LCS Top of the groove widened Deformed steel tie bar for sealing purposes 100m length painted with bituminous paint d ¼ to depth Both lanes constructed at same time One lane constructed later Source: Adapted from Roads and Maritime (2016) When laying restarts, the formwork is removed and the new concrete is laid against the old concrete, with the tie bars locking the two sections together. For an unreinforced jointed concrete pavement, a transverse construction joint is normally made approximately 2 m away from a dowelled joint (i.e. NOT directly at the contraction / expansion joint). 10.6.1.4 Hinged, or warping, joints Hinged, or warping, joints are like construction joints, but are located on the longitudinal joint. Tie bars are used to hold the two lanes together and prevent water entering the joint. There should be minimal horizontal movement at this type of joint, but some curling / hogging movement can occur where the joint acts as a hinge. When lanes are laid separately, the lanes are tied together with tie bars pushed into the longitudinal side of the fresh concrete. If a wide paver is used that lays two lanes of concrete at once, then a longitudinal tied joint will need to be created by pre-placing the tie bars at the planned longitudinal joint location and saw-cutting or using a crack inducer to make the longitudinal joint. In general, sawn joints are sealed but formed joints are left unsealed. Hinged joints can also be used: • when unreinforced slabs are alongside reinforced slabs; • in long narrow, or tapered, URC slabs between normal joint positions; • to reduce the length / width ratio of the slabs to 2 or less; • for extra joints at manhole positions. 127 Design of Rigid Pavements 6 5 7 8 4 3 2 1 9 10 10.6.2 Dowel Bars and Tie Bars 10.6.2.1 Dowel bars Dowel bars are usually solid lengths of smooth steel (24 - 36 mm diameter, with a circular cross section and approximately 450 mm long) that are placed across transverse contraction and expansion joints, at approximately 300 mm intervals. The use of dowel bars allows the two slabs to expand and contract, due to temperature changes, without a build-up of stresses / strains at the joint, whilst maintaining load transfer from one slab to the next across a transverse contraction or expansion joint. They are most commonly used in jointed unreinforced concrete pavements (JUCP) and jointed reinforced concrete pavements (JRCP). Recommended dowel bar sizes are given in Table 10-14 below. The most common type of dowel bar is a traditional round steel cylinder, but dowel bars of other shapes and materials are being developed, including flat bars and Glass Reinforced Plastic (GRP) material. To protect against corrosion, most steel dowel bars are coated in a smooth epoxy material, or have a stainless steel coating. Traditionally, one half of the steel dowel bar was left uncoated, so that it would bond with the concrete and become fixed to one slab. The other half of the dowel bar had either a plastic sleeve / coating, or was painted with a debonding agent (e.g. bituminous paint) to ensure effective debonding from the concrete on that side of the joint. Currently, however, the corrosion resistance of dowel bars is considered to be a much higher priority, so this method is still acceptable if the dowel bar has been coated to provide corrosion resistance. It is now more common to coat the whole dowel bar in a smooth polymeric corrosion-resistant coating. At expansion joints, the dowel bars should be provided with a cap at the de-bonded end, containing a thickness of compressible material (expansion width +10 mm) to allow the joint to open and close. Table 10-14: Minimum dowel bar sizes for concrete pavements Concrete design thickness D (mm) Dowel Diameter Dowel length Dowel spacing 150 < D < 175 24 mm 450 mm 300 mm 175 < D < 200 28 mm 450 mm 300 mm 200 < D < 260 32 mm 450 mm 300 mm D > 260 36 mm 450 mm 300 mm Source: Austroads, 2019 It is crucial that dowel bars are accurately positioned both horizontally, and parallel to the centre line and each other; otherwise, joint failure could occur. Dowel bars are usually wired onto a metal cradle (also known as a dowel basket) that can be lifted into place and securely fixed to the sub-base at the planned joint location, ahead of the placing of the concrete. The metal cradle must be in two parts, so that no parts of the cradle extend across the line of the joint, as this could lock the joint together and stop it opening / closing. The dowels must thus be able to slip freely in their housing, but the dowels and dowel cradles must be secure enough to prevent them from moving when the concrete is placed around them. The joints are then formed at the dowel bar locations, (expansion joints will have the compressible filler board, or equivalent, already in place), and contraction joints will be formed by either inserting a crack inducer into the fresh concrete, or saw-cutting the semi-cured concrete above the centre of the dowel bars. Alternatively, modern slip-form pavers can automatically insert dowel bars into the freshly-poured concrete, using a dowel bar inserter. In some cases, dowel bars may be omitted from JURC transverse joints, usually for cost reasons. This should, however, only be for low volume roads where the concrete pavement is less than 150 mm thick or has a design life of less than 0.15 MESA. 10.6.2.2 Tie bars Tie bars, sometimes called tie rods, are simple deformed steel bars (approximately 12 mm diameter and 750 mm to 1 m long). They are placed in the fresh concrete, at midheight in concrete slabs, to tie two slabs together (see Figure 10-5). Tie bars are used in transverse joints to form a construction joint, and in longitudinal joints to form a hinged, or warping, joint. It is important to understand the differences, in terms of role and appearance, between dowels and tie bars. Dowel bars are thicker, shorter, smooth steel bars, whose main role is to provide load transfer across a contraction, or expansion, joint. Tie bars are not load transfer devices, but they lock concrete slabs together, which allows load transfer across a longitudinal joint or transverse construction joint using aggregate interlock. In longitudinal joints, the spacing of tie bars is determined in accordance with subgrade drag theory (see Equation 10-7) and is influenced by parameters such as base thickness, interlayer friction and distance to the nearest free edge of pavement. To protect the tie bars from corrosion, a 100 mm length at the centre of the rod (where the joint will be) should be coated in epoxy material or painted with bituminous paint or a similar material. 128 Design of Rigid Pavements 6 5 7 8 4 3 2 1 9 10 Tie bars are usually pushed into the fresh concrete through holes in the formwork, but if two lanes are being laid together by a paver, then tie bars can be placed on formwork transversely across where the centre longitudinal joint will be. After the concrete has been poured, a longitudinal joint can be created using a crack inducer or by saw-cutting the semi-cured concrete longitudinally at the required location. Tie bars are usually placed at mid depth of the slab. The minimum concrete cover that should be given both above and below the tie bar is shown in Table 10-11. Tie bars must also be kept away from transverse joint locations where they could inhibit movement. 10.6.3 Design of Joint Spacing This section describes the joint spacings required for each pavement type and the sizes / spacings of dowel bars and tie bars. 10.6.3.1 Joint spacing of longitudinal joints Slab widths should be about 3.7 - 4.3 m. All longitudinal joints should be tied, with a maximum total tied width of four lanes (approximately 16 m) for JUC, and 30 m for JRC and CRCP. Longitudinal joints should be located away from concentrated heavy vehicle wheel-paths. 10.6.3.2 Joint spacing of transverse joints The spacing between transverse joints will depend on the type of pavement, the type of joint and concrete slab thickness. Advice on spacing is as follows: JUCP For JUCP with undowelled (possibly skewed) joints, the contraction joints should be at a maximum spacing of approximately 20 times the slab thickness, with a typical joint spacing of 4.2 m. For JUCP with dowelled, square joints, the contraction joints should be at a maximum spacing of 4.5 m. Unreinforced JUCP slabs should be kept approximately square and not exceed a 3/2 (length/width) ratio. Where this is not possible, then steel reinforcement should be used. Transverse expansion joints are usually only required at fixed objects, at certain locations in intersections and where transverse contraction joints have not been sealed in streets with low traffic volumes. JRCP For JRC pavements with steel mesh reinforcement, the joints should be square, with a spacing of 8 - 12 m. Dowels are required in all transverse joints, to provide effective load transfer. Reinforcement must be discontinuous (i.e. omitted) at both contraction and expansion joints. CRCP For CRCP, no transverse contraction joints are required. There should be enough longitudinal steel reinforcement for the concrete to naturally crack at 0.25 - 2.5 m spacings, but these will be fine cracks (usually less than 0.25 mm wide) which are held together by the steel reinforcement. 10.6.4 Design of Concrete Shoulders Concrete shoulders are either 'integral' or 'structural'. An integral shoulder is cast as part of the concrete base (same thickness, etc.), with a minimum width of 600 mm. A structural shoulder can be cast at the same time as the concrete base (with a longitudinal joint created between the two), or added later. It should be the same concrete and thickness as the concrete base, at least 1.5 m wide, and should be tied to the concrete base with tie bars. Most concrete pavement designs acknowledge the benefits of keeping heavy traffic away from the slab edge; if an integral, or structural, shoulder is present, then the main concrete pavement thickness can be reduced. Research in the USA (Colley, 1978) has shown that a 230 mm-thick concrete slab that is well supported with a tied concrete shoulder provides the equivalent robustness to that of a 300 mm-thick concrete slab with no shoulder support. The incorporation of a concrete shoulder can have other benefits, such as minimising the infiltration of water under the pavement edge, which extends pavement life. It has been reported that it is often easier to construct the main slab wider than to add tied concrete shoulders, particularly if a paver is being used (RTA, 1991). 10.6.5 Design of Ground Anchors, Terminal Ends and Transitions Concrete slabs expand and contract on a daily basis. As well as these daily movements, whole pavements can 'creep', i.e. gradually move in the direction of traffic, or downhill. This can result in the build-up of considerable horizontal pressure on adjoining bridge structures and pavements. To contain this pressure, and hence prevent damage to an adjoining structure, reinforced concrete ground anchors (also known as 'base anchors', 'anchor beams' or 'ground anchor beams') should be built into a reinforced terminal slab. Ground anchors are effectively large, reinforced concrete 'blocks' that are buried in the ground and fixed to the end concrete slabs. In all cases, dowelled expansion joints should be constructed between the concrete pavement and any other type of pavement or fixed structure such as a bridge. Jointed concrete pavements A single ground anchor should be provided at all ends of the concrete pavement, e.g. at a bridge or where it transitions to an asphalt pavement. On slopes that are steeper than 4%, intermediate ground anchors should be inserted at approximately 300 m spacings, to stop downhill creep of the pavement. Continuously Reinforced Concrete Pavements At the ends of CRCP, three smaller ground anchors should be inserted, to restrain movement of the pavement. 129 Design of Rigid Pavements 6 5 7 8 4 3 2 1 9 10 10.6.6 Design of Surface Texture To provide friction and skid resistance, texturing has to be carried out on a newly-laid concrete surface before the concrete begins to harden. A good surface texture will have both microtexture (dependent on the type of aggregates used in the concrete) and macrotexture (which can be created with brushes etc.). Texturing can normally be applied using a long-handled broom or rake, from a wooden walkway built across the lane that can be moved along. The most popular methods of texturing are: • Tine and burlap (metal tined rake with burlap, i.e. hessian, drag). A tined rake is dragged transversely across the slab to make the main texture grooves. The actual tine groove depths should be 1.5 - 3.0 mm deep, giving an average texture depth of 0.3 - 0.65 mm. A burlap drag is then drawn longitudinally to roughen up the surface. If possible, the tines should be adjusted to be at random spacings, as this can reduce tyre-road noise and vibrations, to benefit road users and those living nearby. • Canvas belt. As an alternative to a burlap drag, a canvas belt (150 – 300 mm wide and longer than the width of the lane) with handles at each end can be used in a saw-cut motion, both transversely and longitudinally, to roughen up the concrete surface, prior to the tine grooves being added. • Metal, nylon or coir brush. This method provides a texture that is not as deep as that made by a tine rake, and the surface texture can be worn away by traffic after several years. For a high-speed road requiring good skid resistance, retexturing by diamond grooving would be required, which is very expensive. • Exposed aggregate surface. This decorative finish is not recommended for anything other than low-speed roads, due to its low skid resistance. The method is not shown here. Texturing can be carried out transversely or longitudinally. Transverse texturing is recommended, since it allows water to drain off faster from the carriageway than longitudinal texturing. Longitudinal texturing, which is particularly popular in the USA, has some advantages, including ease of construction, slightly reduced rolling resistance and slight noise reduction, (although some studies have reported greater objection levels to the noise from longitudinally grooved concrete surfaces). The disadvantages of longitudinal texturing include its failure to aid the drainage of water from the carriageway; this can even lead to aquaplaning in high rainfall situations, and this type of texturing can actually channel water into the pavement through transverse joints with imperfect seals (if they are present). If skew transverse contraction joints are used, then transverse texturing should be parallel to the skew joints, to minimise the amount of water that is channelled into the joints. Grooved textures can be saw-cut longitudinally or transversely into the hardened concrete surface. This is, however, a very expensive procedure and is usually only used for rehabilitation after a concrete-surfaced pavement has lost its original texturing due to traffic wear. It is important to randomise groove spacing, to minimise any single-frequency 'humming noise' created by the texture. 10.7 Asphalt Surfacing On Concrete Pavements Assuming that it is suitable for the local environment, it can be argued that the best type of road pavement combines (a) the inherent strength of concrete for the main pavement body (no transverse joints), with (b) the flexibility and easier maintenance of an asphalt surfacing (to provide a skid-resistant surfacing that can be planed off and replaced with minimal road user delays). This type of pavement exists as Continuously Reinforced Concrete Pavements (CRCP) with a thin (approximately 30 mm thick) asphalt surfacing or a Continuously Reinforced Concrete Base (CRCB). A CRCB is basically a CRCP, but with a thinner concrete slab and a structural asphalt surfacing and base layer (approximately 100 mm thick) included in the design. Jointed concrete pavement with an asphalt surfacing On a jointed concrete pavement, an asphalt surfacing does not generally work well. This is because daily thermal movement and the impact of traffic on joints causes the asphalt to crack and spall above the joints, requiring frequent maintenance. Once the asphalt has cracked, a quick repair option is to use another asphalt overlay. This cycle can repeat itself until there are multiple asphalt overlays, all cracked above the joints; this is an expensive waste of material. Use of the saw-cut and seal (SCS) technique (Jordan et al., 2008) on jointed concrete pavements has been shown to be effective in preventing reflection cracking above transverse joints, although it can be expensive and time consuming. With SCS, a thin asphalt surfacing (30 - 70 mm thick) is laid and then a joint groove is cut into the asphalt (to partial depth) directly above all transverse joints, which are pre-marked before overlay. The asphalt joint grooves are then filled with a flexible joint sealant material, allowing each concrete joint to open and close without damaging the asphalt. This technique requires great accuracy in sawing above the (hidden) joints and, when the surface is eventually replaced, the whole process (and cost) has to be repeated. Use of a surface dressing (chip seal) is not recommended on a jointed concrete pavement, as any dislodged aggregate (which will increase over time) can enter the joints and cause the joint to lock up, and this could lead to significant pavement issues. 130 Design of Rigid Pavements 6 5 7 8 4 3 2 1 9 10 10.8 Key Points 1. Concrete is made of three main components: cementitious binder (mainly cement), aggregate (coarse and fine) and water. Chemical admixtures can also be used to retard setting, increase workability, etc. 2. When water is added to the concrete mix, chemical reactions take place during 'curing'. This is one of the most important stages in concrete construction. The quantity of water and curing conditions are essential for strong chemical bonds to form. If they are not, then weaker concrete will be formed. 3. During the curing process, concrete shrinks. In unreinforced concrete, transverse cracks form at 3 - 5m intervals. To make these cracks neater and easier to seal, a straight, transverse saw-cut is made in the semicured concrete every 4.5 m or so, causing the crack to start at this line of weakness, forming a 'contraction joint'. This is basically a full depth shrinkage crack that divides the concrete into individual slabs, but the crack has a straight top that can be neatly sealed. Problems can (and frequently do) occur at the joints. In reinforced concrete (e.g. CRCP), more frequent fine transverse cracks are formed at 0.5 - 2m intervals, but these are held tightly together by the steel reinforcement and the pavement generally acts as one long slab, 4. Hardened concrete expands/contracts and warps (curls up/down) with temperature/moisture changes. This movement must be allowed for, using expansion joints to avoid damaging adjacent bridges, etc. 5. The following six factors are considered the most influential on concrete pavement performance: • Concrete Pavement Type: There is a significant relationship between construction cost and performance, e.g. a more expensive CRCP pavement will outperform a cheaper JUC pavement. • Foundation: Most concrete pavements need a uniform, non-erodible foundation (a cement-bound material sub-base is recommended). A CRCP can tolerate a weak/uneven foundation. • Moisture (Water): Good drainage is essential to avoid water being trapped in the pavement, which can damage the foundation, shoulders, asphalt overlays, etc. Dowel bars and steel reinforcement exposed to moisture, can corrode and lead to spalling, cracking and locked joints. • Construction Quality: Performance is often related to construction quality. Skilled staff, good supervision/ inspection and quality control during construction are essential. • Traffic: Overloaded vehicles and HGV configuration can significantly affect concrete road performance. HGVs should be kept away from outer (unsupported) pavement edges, by making slabs wider or adding tied concrete shoulders. Transverse joints are especially susceptible to traffic-related damage. • Maintenance: The correct type and timing of maintenance is important e.g. a failed concrete slab should be replaced with concrete, not asphalt, or the adjacent slabs are also likely to crack. 6. The main types of concrete pavement discussed in this chapter are: • Jointed Unreinforced Concrete Pavement (JUCP) • Jointed Reinforced Concrete Pavement (JRC) • Continuously Reinforced Concrete Pavement (CRCP) • Continuously Reinforced Concrete Base (CRCB) • Some of the tables include Roller Compacted Concrete (RCC) for comparison purposes, but design details for RCC are not included here as it is less widely used. 7. The choice of concrete pavement type will depend upon many factors, including: • Budget. Some types of concrete pavement cost more as they contain steel reinforcement, etc. • Traffic Levels. Table 10-1 (Section 10.4.2) shows suitability of pavement type to traffic levels. • Ride quality required. e.g. ride quality of a paver laid CRCP is good, but RCC is poor without overlay. • Plant availability. CRCP requires a concrete paver, while RCC can be laid with an asphalt paver and JUC can be hand laid. • New build or rehabilitation of existing pavement. If not new build, then other types of concrete pavement such as Ultra Thin Reinforced Concrete Pavement (UTRCP) could be considered. • Availability of local labour. This could favour labourintensive options such as JUC. • Environmental. The most suitable type of concrete pavement can depend upon local environmental factors, e.g. CRCP could suit areas prone to differential settlement, sulphate resisting concrete for concrete exposed to seawater. 8. Some of the key features of concrete pavements (contraction joints, expansion joints, dowel bars and tie bars) are explained in Section 10.6. It is important that these are understood, including how they relate to the different types of concrete pavement. The concrete pavement thickness designs given in Section 10.5 for JUCP, JRCP and CRCP are from the Austroads 'Guide to Pavement Technology, Part 2: Pavement Structural Design' (2019). 131 Pavement Rehabilitation Approaches 6 5 7 8 4 3 2 1 9 10 11 11 Pavement Rehabilitation Approaches 11.1 Introduction and Scope All roads deteriorate with time, as a result of traffic and environmental effects. The deterioration may be relatively easy to correct or may require major works, depending on the causes, and extent, of deterioration. Paved roads in tropical and sub-tropical climates often deteriorate in different ways to those in the more temperate regions of the world, because of the relatively harsh climatic conditions. In addition, roads are often subject to accelerated failures caused by high axle loads, including overloaded axles, inadequate funding for maintenance and variable quality of construction. Identifying the correct causes of pavement deterioration is of paramount importance. Thus, the basic principle is to evaluate, or assess, the road to diagnose the cause (or causes) of deterioration and the severity of the deterioration so that the correct remedial treatment can be designed and applied. This chapter presents guidance on the rehabilitation of flexible pavements. The rehabilitation of rigid pavements has been described in the rigid pavements section (Chapter 10). Before commencing any rehabilitation activities, a traffic study must be undertaken, as described in Chapter 2 of this Road Note. 11.2 Functional Condition Assessment 11.2.1 General Functional assessment refers to the assessment of performance parameters that affect ride quality and, eventually, structural adequacy. These parameters include cracking, ravelling, surface rutting, potholing and roughness. It is important that this assessment is undertaken meticulously. This is because the road might be structurally adequate, with defects observed being confined to the surfacing, with no detrimental effect on the structural capacity of the pavement. In such cases, any maintenance intervention will be restricted to the repair or replacement of the surfacing. The assessment process begins with a desk study to gather information on the type of pavement, age, the most recent maintenance activities undertaken, the materials used, any data held in the pavement management system (e.g. roughness surveys, traffic data) and any other information to aid understanding. This is followed by a preliminary survey, typically a drivethrough, to broadly classify different sections based on the level of defects. The next step is to carry out a detailed surface condition survey, as described in subsequent sections. When the uniform sections are relatively short, the detailed condition survey is best carried out over the entire length of the section. Where resources are limited, however, several representative one-kilometre lengths of road can be used to identify the cause of pavement distress. The length of road investigated by this method should represent no less than 10% of each section. Before the detailed surface condition survey is carried out, the section, or representative one-kilometre length, should be permanently marked into 'blocks' of equal length. For inter-urban roads, the maximum block length should be either 50 or 100 m, but this length may be as short as 10 m if the road is severely distressed. To simplify analysis of the data collected during the field surveys, three important principles should be adopted. Indeed, without them the analysis of the data to identify the cause, or causes, of failure can be very difficult. 11.2.2 Where to Test When a road is failing it is, perhaps, quite natural to concentrate investigations on the failed areas, but this is not always the best option, especially if structural failures are occurring. This is because such areas will display cracks, ruts, potholes and so on. Water will have already entered the structure through the failures, so the properties of the pavement materials will have changed considerably., This makes it impossible to identify the primary cause of the problems. The areas that will prove to be the most informative will be those that are beginning to show signs of failure, because they are likely to display only one form of failure at an early stage. This will reveal the primary, or main, reason for the failure. During the detailed surface condition survey, the nature, extent, severity and position of the following defects are recorded: • Cracking; • Potholes and patching; • Edge failures and shoulders; • Rut depth; • Deformation, excluding rutting; • Surfacing defects, e.g. bleeding, fretting, stripping; • Surface texture and aggregate polishing. A spreadsheet with a form for use in visual condition surveys/assessments is available as part of this Road Note. Many roads agencies have their own standard forms and rating systems that are mandatory to these agencies. In some cases, where differential loading exists between lanes, condition surveys should be undertaken by lane. Indices are then computed for each defect (usually a product of severity [scale of 0 to 5] and extent [scale of 0 132 Pavement Rehabilitation Approaches 6 5 7 8 4 3 2 1 9 10 11 to 5], as in the spreadsheet provided) to determine the appropriate intervention criteria. Intervention trigger levels are dependent upon specific road agencies, usually related to their budgets and targeted levels of service. TRL recommends that an index of any of the defects, of less than 10, requires only simple appropriate maintenance activities for the defect under consideration, such as pothole patching for potholes, crack sealing for cracks and edge repairs for edge breaks; an index of 10 - 16 indicates the need for moderate intervention, such as a reseal of the surfacing; an index greater than 16 indicates the need for either an overlay or milling and inlay to restore function. It is, however, important that defects are not considered in isolation. The use of the performance charts enables comparison and decisions based on consideration of all defects and their interrelationships. 11.2.3 Variability A road pavement is a very variable structure. Although the materials from which it is made are required to meet certain specifications, the range of values of their properties within those specifications is wide. The largest element of variability is usually the strength of the subgrade, which varies along both spatially and from month to month. Good pavement design deals with such variability, and pavements are designed with different levels of reliability. Reliability is essentially the probability of a road reaching its design life in terms of traffic without reaching a defined failure condition. For main roads, this may be 95%, 98% or even higher. In practice, this means that, from a statistical point of view, a very small proportion of the total length of the road is likely to reach the failure condition before the end of the design life. Thus, the failure condition that defines the life of the pavement represents a relatively small amount of failure in terms of road area. Consider, for example, deep shear failures in the road base. The deep ruts that result are unsightly and dangerous, and increase road roughness considerably. It requires only two or three such areas, each extending for, say, 3 m in every 100 m of road, for the road to be in very poor condition, well beyond a normal failure condition. Such a level of deterioration may amount to only about 2% of the road area and less than 10% of the road length. Thus, pavement evaluation relates to identifying the behaviour of the worst areas of the road, which are often a small percentage of the overall area. Average values of parameters are of little use; the 5th or 10th percentile is required. 11.2.4 Correlate Measurements Associated with the variability of the road is the necessity of making point-specific measurements such as rut depths, deflections, Dynamic Cone Penetrometer (DCP) readings (and test pits) at a precise location. In other words, at the testing point at each chainage, each of these measurements should be taken within a few centimetres of one another, (although there will be relatively few of these). This is because the combined information from a single point is many times more valuable than data taken from different locations. Rut depth provides a good illustration of this. A rut is usually very variable in depth and the deepest part may only extend for a metre or so, at very few chainages along a section. A deep rut like this is, however, symptomatic of the deterioration that may occur elsewhere along the road, although it initially appears at the weakest and most vulnerable section. The values of deflection and DCP at this point, compared with the values at other points, where the rut depth is low, provide valuable clues as to the cause of the rutting and the probable behaviour of the road in the future. 11.3 Structural Condition Assessment 11.3.1 General The critical step is the assessment of the strength, or traffic-carrying capacity, of the existing pavement. In some cases, the residual strength will be very low because the deterioration will be far advanced and the thickness of any strengthening overlay required would be excessive. In this situation, an overlay is unlikely to be the best option and reconstruction would be required. If the pavement is to be reconstructed with new materials, only the subgrade of the existing pavement will remain. The existing pavement layers may, however, be reprocessed to form the foundation for the new pavement. Thus, reconstruction does not differ from designing an entirely new road, as described in Chapters 8, 9 and 10. Provided the structural deficiency is not too large, however, an overlay is likely to be the best solution. Ultimately, an economic comparison between overlay and reconstruction would be required before a final decision is made. The timing of the taking of in situ pavement measurements does not necessarily reflect the worst conditions or the design conditions. It is therefore essential that all in situ measurements are converted to design condition values. The modulus of the asphaltic layers should be converted to the equivalent values at the design temperature (usually 35°C for tropical climates). For unbound pavement layers and the subgrade, strength data should be adjusted (to reflect the worst condition that the pavement will endure) according to the in situ density and the design moisture content, using correlations from laboratory tests. The required structure at each measurement chainage (i.e. where subgrade strength has been measured either through sampling and testing of test pit material, or in situ by DCP and correlated with laboratory values) should be determined from the required traffic carrying capacity and the subgrade strength determined. The difference between this calculated value and the existing structural capacity is the structural deficiency, which should be used to indicate: • where the road requires reconstruction of some form; • where overlaying is the best solution; • the thickness of overlay required. 133 Pavement Rehabilitation Approaches 6 5 7 8 4 3 2 1 9 10 11 11.3.2 Deflection Tests The strength of a road pavement is inversely related to its maximum vertical deflection under a known dynamic load. Table 11-1 lists the more common deflection devices, their loading regimes and output. The recommended frequency of deflection tests for project purposes is every 50 m for trunk and primary roads, and every 100 m for other roads. These should be made along the outer wheel path. The deflection tests are used to determine uniform sections for overlay design. For a section to be considered a uniform section, the coefficient of variation (CoV) of the deflection measurements must not exceed 20%. Otherwise, spot treatments are required, to bring the CoV down to 20%, or re-section should be carried out. The maximum deflection under a moving wheel load is an indicator of the elastic properties of the pavement and therefore a good indicator of its overall load spreading ability. Although this is not a direct measure of strength it has been shown to correlate well with the long-term performance of pavements under traffic. For example, if a road is under-designed for the traffic it is carrying, for any reason, (e.g. due to an incorrect assessment of subgrade strength or traffic loading), the stresses in the lower Figure 11-1: Schematic of a correlation between deflection and rut depth (example only) layers of the pavement will be too high and the pavement will deteriorate through the development of ruts. Under such circumstances, the deflection will correlate with rut depth, as shown schematically in Figure 11-1, and such a correlation provides an indication of the reasons for failure. In the evaluation of pavements, the radius of curvature (RofC) of the deflection bowl could provide a good parameter, especially in detecting hairline cracks on the asphalt surface. The higher the radius, the stronger the pavement, whereas the lower the radius, the weaker the pavement and the likelihood of hairline cracks on the asphalt surface. In the late 1950s and early 1960s, Dehlen of the South African CSIR, developed a small instrument for measuring the minimum RofC. He found that the point of contraflexure of the deflection bowl in granular layers was as little as 125 mm from the peak. Horak (2008) published an equation for obtaining the RofC from FWD deflections. Comparisons of the RofC measured with the FWD and the value obtained with the Dehlen meter showed that the FWD values were approximately 3 times the Dehlen values. The FWD suggested that the pavement was much stronger than indicated by the Dehlen meter. Therefore, if an FWD is to be used for this purpose then a shift factor would be required to the value of RofC obtained from the FWD. Table 11-1: Deflection measuring methods Device Type of applied load Output Comments Deflection beam, and the Dehlen Curvature Moving truck wheel Maximum deflection only, or deflection bowl, and Radius of Curvature for the Dehlen Meter. Inexpensive, and comparatively slow. Health and safety aspects could hinder their use on high volume roads. Deflectograph Moving truck wheel Deflection bowl (partial) Essentially an automated deflection beam. Travels at 5 km/hr but takes a measurement every 2 m. Falling Weight Deflectometer and Light Weight Deflectometer Impact Deflection bowl Accurate and reliable but has to be stopped for 2 - 3 minutes for a reading to be taken, so is sometimes inconvenient on main roads. 134 Pavement Rehabilitation Approaches 6 5 7 8 4 3 2 1 9 10 11 There are advantages in using deflection equipment capable of measuring deflection bowl parameters other than the maximum deflection. The Falling Weight Deflectometer (FWD) is the most popular. It has the advantage of being able to apply impact loads which more accurately simulate the effect on pavements of heavy vehicles moving at normal traffic speeds than the slowly moving load applications associated with the deflectograph or the deflection beam. Full analysis of deflection bowl data is dependent on a suitable model to calculate the response of the pavement to the applied load. Most analysis programs are based on the assumption that the pavement behaves, in the first instance, as a multilayer structure made up of linearly elastic layers. Using such a model, it is possible to calculate the 'effective' elastic modulus of each pavement layer from knowledge of the shape of the deflection bowl. This 'back-analysis' procedure requires accurate deflection data extending from the central maximum deflection to deflection values at radial offsets of as much as 2.1 m. The linear elastic model is, however, a very simple model of road pavements. Road materials display properties that do not comply with the assumptions of the model. For example, the elastic modulus of unbound materials is not constant; it depends on the stresses to which the material is subjected at each point in the structure and some materials do not behave in a linear way even when variations in only one variable are considered. This is a particularly important consideration for the subgrade, because the modulus of the subgrade has a very strong influence on the shape of the entire deflection bowl. Errors or inaccuracies in the assumptions made, here, give rise to errors in the calculation of the moduli of all other layers. A further consideration is the capability of the computer programs to handle complex structures. The more layers there are, the more difficult it is for the programs to identify a suitable unique solution. The acceptability of the results of the pavement analysis depends more on the skill of the analyst than the sophistication of the analysis program. As part of the Strategic Highway Research Program in the USA, guidelines for estimating pavement layer elastic moduli by backcalculation from deflection bowl data were developed (FHWA-RD-01-113 (2002) 'Back-calculation of layer parameters for LTPP test sections, Volume II: Layered elastic analysis for flexible and rigid pavements'). These guidelines provide a reasonable basis for the back-analysis of road pavements, but it should be borne in mind that there are many examples of very poor interpretation of deflection bowl data and of many serious and expensive errors resulting from over reliance on the back-analysis programs. The alternative to back-analysis is the use of agencydeveloped criteria for acceptable levels of deflection at the centre of the FWD loading plate, deflection at 450 mm from the centre of the loading plate and deflection at 1,500 mm from the centre of the loading plate. These are known as surface curvature indices. They are empirical in nature and are therefore applicable to pavements with similar conditions to those from which the criteria were developed. An example is the criteria developed by Horak (2008). Basically, the FWD measures the deflection bowl accurately, but its proper and reliable automatic interpretation requires more sophisticated analysis programs than are currently available. Therefore, good analysis relies on the skill of the analyst, who will make use of the deflection data, but only as one of the various data sets that are available. Nevertheless, the value of central maximum deflection is essential for analysing road pavements and to determine which sections are weaker, or stronger, than others. The Dehlen Curvature Meter The minimum radius of curvature in the deflection bowl beneath a rolling wheel load is a very useful parameter for assessing the quality of the upper layer of a pavement, particularly pavements with a granular base and thin bituminous surfacing. Research carried out by Dehlen (1962) of the South African CSIR showed that the point of contraflexure of the deflection bowl was very close to the point of peak deflection could be within 125 mm of it. In addition, the shape of the bowl around the peak deflection was parabolic. He developed a small curvature meter (see Figure 11-2) for measuring the minimum radius of curvature which can be used with a deflection beam. These two parameters can provide an estimate of the modulus of the upper structural layer of the pavement. The FWD cannot be used to determine the radius of curvature because the dropping weight produces a different shape of deflection bowl and the nearest sensor is 200 mm from the axis of the loaded steel plate, which is well outside the point of contraflexure. Comparisons of the radius of curvature measured with both instruments indicate that the FWD overestimates the radius by a substantial factor that varies from road to road and within a single road. An estimate of the modulus of the upper structural layer of the pavement can be determined from the following equations (Equation 11-1, Equation 11-2, and Equation 11-3) which were developed in the 1970s from a simple linear elastic model (Grant and Walker, 1972). MR = 0.00074*(d*Rc)2.12 E subgrade = 67.42/((d*(MR)0.25) E base = E subgrade x MR Where: MR is the modular ratio E subgrade is the modulus of the subgrade (MPa) E base is the modulus of the base (MPa) d is the peak deflection (mm) Rc is the radius of curvature (m) Equation 11-1 Equation 11-2 Equation 11-3 135 Pavement Rehabilitation Approaches 6 5 7 8 4 3 2 1 9 10 11 11.3.3 Dynamic Cone Penetrometer Tests The DCP is an instrument that can be used for the rapid measurement of the in situ strength (at the time of measurement) of existing pavements constructed with unbound materials. The DCP may be used to estimate the thickness and strength of each pavement layer, including the subgrade and the actual modified structural number (SNCA) determined for each DCP measurement. Measurements can be made to a depth of approximately 800 mm or, when an extension rod is fitted, to a depth of 1,200 mm. Where pavement layers have different strengths, the boundaries between them can be identified and the thickness of each layer estimated. Software is available for the analysis of DCP data; for example, UKDCP 3.1, which is available free of charge from TRL. DCP tests are particularly useful for identifying the cause of road deterioration when it is associated with one of the unbound pavement layers, e.g. shear failure of the roadbase or sub-base. A comparison between DCP test results from sub-sections that are just beginning to fail, and those that are sound, will quickly identify the pavement layer that is the cause of the problem. Figure 11-2: The Dehlen Curvature Meter In some circumstances, it is convenient to convert the individual pavement layer thicknesses and strengths measured in the DCP test to a simple numeric that represents the combined strength of the pavement layers. This is done by calculating the required Structural Number (SNR), as shown in Equation 11-4. SNR = a1 h1 + a2 h2 + a3 h3 Where: h1 , h2, h3, etc. are the thicknesses of each layer, in inches a1 , a2, a3 etc. are the strength coefficients for each layer The layer coefficients are related to standard tests for the pavement materials and are fully described in the 'AASHTO Guide for Design of Pavement Structures' (1993). These are shown in Table 11-2. To take into account variations in subgrade strength, the required modified structural number (SNCR) can also be calculated (Hodges et al., 1975), as shown in Equation 11-5. SNCR = SN + 3.51 (log10 CBR) - 0.85 (log10 CBR)2 – 1.43 Where: CBR is the estimated equivalent soaked (or at another design moisture content) in situ CBR of the subgrade at each DCP test point. If it is suspected that road failures are related to the overall structural strength of the pavement, the Modified Structural Number of different sub-sections can be readily compared, to identify the weakness. With modern construction equipment, however, a well-compacted (≥ 98% MDD) crushed rock roadbase or sub-base cannot be penetrated by a DCP, in which case only deflection tests, or deflection tests combined with destructive tests, may be used for structural assessment. Equation 11-4 Equation 11-5 Source: Harold Bofinger. 136 Pavement Rehabilitation Approaches 6 5 7 8 4 3 2 1 9 10 11 Table 11-2: Pavement layer strength coefficients Layer Layer Type Condition Coefficient (ai) Surfacing Surface dressing 0.1 New asphalt concrete wearing course(1) MR35 = 1,200 MPa 0.30 MR35 = 1,500 MPa 0.35 MR35 = 2,000 MPa 0.40 MR35 > 2,350 MPa 0.45 Roadbase Asphalt concrete As above As above Granular unbound Default ai = (29.14 CBR – 0.1977 CBR2 + 0.00045 CBR3 )10-4 GB 1 (CBR > 100%) 0.145 GB 2 (CBR = 100%) 0.14 GB 3 (CBR = 80%) 0.13 With a stabilised layer underneath 0.135 With an unbound granular layer underneath 0.13 GB 4 (CBR = 65%) 0.12 GB 5 (CBR = 55%) 0.107 GB 6 (CBR = 45%) 0.1 Bitumentreated gravels and sands Marshall stability = 2.5 MN 0.135 Marshall stability = 5.0 MN 0.185 Marshall stability = 7.5 MN 0.23 Sub-base Cemented(2) Equation ai = 0.075 + 0.039 UCS – 0.00088(UCS)2 CB 1 (UCS = 3.0 – 6.0 MPa) 0.18 CB 2 (UCS = 1.5 – 3.0 MPa) 0.13 Granular unbound Equation aj = 0.028LN(CBR) + 0.0107 GS (CBR = 30%) 0.105 GC (CBR = 15%) 0.08 Cemented(2) CB 3 (UCS = 0.7 – 1.5 MPa) 0.1 Notes: 1. MR35 is the resilient modulus by the indirect tensile test at 35°C. 2. Unconfined Compressive Strength (UCS) is quoted in MPa at 14 days. Modified from Source: Watanatada et al., 1987. 137 Pavement Rehabilitation Approaches 6 5 7 8 4 3 2 1 9 10 11 11.3.4 Destructive Sampling and Material Testing When the results of the condition survey indicate that the properties of the asphalt surfacing could be the cause of differential performance between sub-sections, then this should be confirmed by further testing. A sufficient number of 150 mm diameter core samples need to be taken from each sub-section to ensure that representative values for the composition and properties of the asphalt surfacing are obtained. Prior to testing, the cores must be examined to establish the following: • the thickness of each bound layer; • the degree of bonding between asphalt layers; • the occurrence of any stripping; • the type (top-down or bottom-up) and depth of cracking. Where only the thickness of the asphalt surfacing is to be measured, then 50 - 100 mm diameter cores are satisfactory. Similar cores can be used for transverse core profiles, which are used to confirm whether shoving is the result of shear failure in the surfacing or in one of the lower unbound pavement layers. When deflection measurements and DCP results indicate that either the thickness, or the properties, of the lower pavement layers are the cause of the differential performance, then test pits are needed to obtain additional material information to confirm these results. All these investigations are used both to provide an explanation for the present behaviour of the pavement, and to provide information for its rehabilitation. Each test pit will provide information on the thickness of each pavement layer and properties of the material. These can then be compared to specified values. 11.3.5 Performance Charts It is very helpful, during the diagnostic process, to use a variety of different data sets and to compare the results. This can provide valuable insights into modes of deterioration and the rehabilitation required. For example, cracking, rutting and roughness recorded during both the windscreen (reconnaissance) survey, and the detailed condition survey, should always be displayed in the form of performance charts. A performance chart is a graphical representation of an aspect of pavement condition plotted against chainage. It is an invaluable aid to identifying both the cause (or causes) of deterioration, and the scale of the problems. For rehabilitation design, it is usually necessary to divide the pavement into homogenous sections, each of which is likely to require the same treatment throughout, as described in Section 11.4.2. These sections are usually of similar construction, strength, condition, roughness, and so on. They enable the length of road affected by each form of deterioration to be quantified and, most importantly, enable identification of which characteristics are interrelated. An example of the use of performance charts is provided by Figure 11-3, for a 20 km section of paved road with a mechanically stabilised gravel roadbase and a thin bituminous surfacing. The initial form of deterioration was rutting, which was associated with shoving whenever the failure became severe. Although there was some cracking that coincided with high values of rutting, there was no cracking in areas of less severe rutting, suggesting that the rutting preceded the cracking. In addition to the rutting, substantial lengths of the surfacing showed signs of bleeding. The charts, however, show no correlation between the bleeding and the rutting, indicating that the shoving was in a lower granular layer, not the bituminous surfacing. Using performance charts similar to this, the road section under investigation is divided into sub-sections that have failures of different types and/or severity. A programme of additional tests is then prepared, to identify the causes of the differential performance between the sub-sections, and hence the appropriate treatment. There may be some cases where the complete section of road will have reached a failed condition. This might be as a result of the road pavement being under-designed, or of there being serious material problems, a lack of maintenance or extreme weather conditions. In such cases, the cause of the deterioration can often be established by comparing the thickness of the road pavement, or the material properties of the pavement layers, with relevant design standards and material specifications. Care is required, however, in the interpretation of these data. Apart from having surface defects, bituminous surfaced roads will generally deteriorate either by rutting or by cracking. It is important for the initial form of deterioration and its cause to be identified, because this determines the type of maintenance and repair that is most appropriate. For example, cracking might have led to softening of the lower layers and subsequent rutting, or rutting of the lower layers might have led to cracking. A spreadsheet that contains flow charts that assist in the diagnosis of the cause of observed defects is available with this Road Note. Uniform treatment sections are then identified with the assistance of the performance chart. 138 Pavement Rehabilitation Approaches 6 5 7 8 4 3 2 1 9 10 11 Figure 11-3: Example of performance charts Source: Redrawn from TRL ORN 18, 1999 139 Pavement Rehabilitation Approaches 6 5 7 8 4 3 2 1 9 10 11 11.4 Drainage and Surface Effects 11.4.1 Drainage Rectification Localised pavement failures are often caused by the poor design, or maintenance, of side and cut-off drains and cross-drainage structures. When side drains and culverts silt up, water ponds against the road embankment, eventually weakening the lower pavement layers. Conversely, if the water velocity in the side drain is too high it erodes the road embankment and shoulders. More general failures occur when there is no drainage within the pavement layers themselves. A common example of this is rutting, accompanied by cracking of the surface. Paved roads do not remain waterproof throughout their life and, if water is not able to drain quickly, it weakens the lower pavement layers and results in rapid road failure. Pavement deterioration as a result of poor drainage may, however, not be obvious in the dry season; hence, discussions with local people may be necessary to learn of conditions in the wet season. Erosion and siltation are the principal forms of deterioration of the side drains and mitre drains, and the extent and severity of such deterioration should be recorded as shown in the visual condition assessment forms. The effectiveness of any scour checks must also be recorded. Culverts may be blocked, partially blocked or clear. If blocked, they will almost invariably be contributing to deterioration of the pavement. They may also be causing erosion because of inadequate or damaged inlets or outlets, and they themselves may be damaged. All such data should be recorded, because they will be needed for estimating repair costs. The sub-drainage condition of the pavement should also be evaluated, since it has a great influence on how well the entire pavement will perform. Removal of excess water from the pavement cross section will increase the strength of the pavement layers and subgrade and reduce deflections. Appropriate sub-surface drainage features are discussed in Chapter 7. 11.4.2 Treatment of Surface Defects There are some surfacing defects that, if localised, can be treated, at this stage, without the need for further testing. Recommended treatments for these types of pavement distress are summarised in Table 11-3 for thin bituminous seals. For bituminous mixes, defects that are limited to the surfacing, and not structural in nature, can be treated as summarised in Table 11-4. Table 11-3: Surfacing defects - roads with thin bituminous seals Defect Extent Maintenance treatment Notes Fretting/Ravelling < 10% Local patching A fog spray may be sufficient to rejuvenate the surface and prevent further fretting. > 10% Surface dressing or slurry seal Loss of stone, bleeding and fatting-up < 10% No action Local application of heated aggregate may be required if poor skid resistance is a problem. > 10% Additional tests required A new surfacing may be required Loss of texture and/or polishing of aggregate < 10% No action > 10% Additional tests required A new surfacing may be required Potholes Any Patch Potholes are the result of other failures such as cracking and deformation, and additional tests will usually be necessary Edge failures Any Patch the road and reconstruct the shoulder Cracking Any Crack sealing Either seal individual linear cracks or if several interconnected cracks then apply a surface treatment such as slurry seal or surface dressing 140 Pavement Rehabilitation Approaches 6 5 7 8 4 3 2 1 9 10 11 Table 11-4: Surfacing defects - roads with AC surfacings Defect Extent Maintenance treatment Notes Fretting or stripping < 10% Local patching Application of a proprietary rejuvenator may prevent further fretting. > 10% Patching followed by surface dressing or slurry seal Bleeding or fatting-up < 10% No action Local application of heated fine aggregate may be required if poor skid resistance is a problem. > 10% Additional tests required A new surfacing may be required Loss of texture and/or polishing of aggregate < 10% No action > 10% Additional tests required A new surfacing may be required Potholes Any Patching Potholes are the result of other failures such as cracking and deformation, and additional tests will usually be necessary Edge failures Any Patch the road and reconstruct the shoulder Cracking Any Crack sealing Either seal individual linear cracks or if several interconnected cracks then apply a surface treatment such as slurry seal or surface dressing 11.5 Bituminous Overlays 11.5.1 General The principle of overlay design is that if the failure of the existing pavement is not too far advanced, it should be possible to strengthen the road to extend its life. If the deterioration is far advanced, then a more substantial form of rehabilitation will be required. For example, if the asphalt layer is severely cracked or rutted, then milling and inlay should be applied, instead of an overlay. Inspection of test pits and cores will reveal whether rutting and/or cracking are confined to the wearing course. Test pits and any cores taken will also reveal the depth (thickness) of the wearing course affected. If the structural assessment indicates that the structure is adequate to carry traffic for the new design life, then an inlay (milling to the affected depth) should be used. Otherwise, an overlay is still required. Prior to overlaying, the defects should be corrected. For cracked sections, crack sealing or strain-alleviating membrane interlayers (consisting of a seal of 10 mm aggregate or larger, with the binder application heavier than for a surface dressing, and sometimes incorporating geotextiles/geo-grids) should be applied prior to application of overlays. Where geotextiles/ geogrids are used, the supplier should be contacted for design and construction of the layer. For low to moderately cracked asphalt layers, a stress absorbing membrane (usually proprietary) may be applied before an overlay, so as to arrest any reflection cracking. Any material milled off the road should be considered for re-use (i.e. recycling) for lower pavement layers on other projects. There are three general methods of overlay design: 1. A structural number and deflection approach; 2. A deflection and rut depth approach; 3. An analytical/mechanistic approach based on reducing estimated critical stresses to safe levels. Method "1." is recommended because it caters for both elastic characteristics and strength characteristics, in a combined manner. Method "2." requires a basic level of calibration. Method "3." requires detailed calibration of performance models. 141 Pavement Rehabilitation Approaches 6 5 7 8 4 3 2 1 9 10 11 11.5.2 The Structural Number and Deflection Method 11.5.2.1 General This method uses a combination of structural numbers and pavement deflection. The process of designing rehabilitation for each uniform section of road is as follows: 1. Estimate the design traffic (Chapter 2). 2. Determine the target structure (structural number) that will carry the design traffic. 3. Evaluate the existing pavement to determine its 'residual strength' (structural number) and pavement deflection. The latter is carried out at the same time as the residual strength, i.e. a deflection test and a DCP test are conducted at the same point. 4. Calculate the deficiency between the residual strength and the required strength. 5. Calculate the strengthening requirements. 6. Rationalise the design thicknesses. 11.5.2.3 Evaluate the existing pavement A DCP may also be used (in place of sampling and laboratory testing for every measurement point) and the computed CBRs converted to equivalent values at design moisture content values (usually soaked or saturated). The test pits should have been excavated at exactly the same locations where some of the DCP measurements were made, to enable the subgrade CBRs to be converted accurately. The in situ density of the subgrade should be measured at each trial pit, and a sample of the subgrade taken for laboratory determination of the soaked CBR at the in situ density. These data can then be used to estimate the equivalent CBR value at each DCP measurement point. To conduct DCP tests, the asphalt layer first needs to be cored out. The DCP may not penetrate pavements incorporating crushed rock bases and sub-bases. In such cases, the designer should use the second overlay approach, which uses deflections and a few test pits only. In order to consider both strength properties and elastic properties, the structural capacity of the existing road is calculated using a combination of the structural number approach and deflection measurements. To do this, the Structural Number (SN or modified structural number, SNC) values are plotted against central deflection values measured at the same point, resulting in a graph similar to that shown in Figure 11-4. The central deflection can be obtained from FWD or Benkelman beam measurements corrected for temperature effects. The graph shows that, at any particular value of deflection, there is likely to be a range of structural number values. It is the lowest structural number value for a particular deflection that determines the 'effective' strength of the pavement, (SNeff or SNCeff). To determine this value for every test point, a curve must be fitted to the data bounding the lowest SN (or SNC) values, as shown in Figure 11-4. In this way, the SNCeff (or SNeff) value can be determined for each test point. The structural deficiency at each test point is then calculated as follows (Equation 11-6): Structural Deficiency = SNCR - SNCeff Where: SNCR (or SNR) is the structural number required at each test point. This is computed by selecting an appropriate pavement structure from the catalogues presented in Chapter 9 and computing the structural number as shown in Equation 11-1 and Equation 11-2. The subgrade strength is that determined at each test pit or DCP test point. It must be emphasised, here, that both the required structural number (SNCR) and the existing structural number (SNCeff) must be calculated for each test pit or DCP test point. If the SNCR is greater than the SNCeff, then an overlay is required and an appropriate structure can be chosen from Table 11-5. If the SNCR is less than SNCeff, then only surface defects should be treated as described in Section 11.4.2. Equation 11-6 Figure 11-4: Relationship between Structural Number and central deflection (example) 142 Pavement Rehabilitation Approaches 6 5 7 8 4 3 2 1 9 10 11 Table 11-5: Structural Numbers (SNR) for rehabilitation design or new pavement design Subgrade Class T2 T3 T4 T5 T6 T7 T8 T9 T10 S1 (<3) 2.77 2.86 3.07 3.27 4.66 5.00 5.34 5.62 5.93 S2 (3-4) 2.33 2.40 2.59 2.80 4.31 4.55 4.85 5.15 5.48 S3 (5-7) 1.88 1.95 2.12 2.32 3.93 4.11 4.28 4.63 4.97 S4 (8-14) 1.57 1.63 1.78 1.95 3.50 3.68 4.03 4.37 4.71 S5 (15-30) 1.20 1.26 1.40 1.56 3.19 3.37 3.63 3.97 4.32 S6 (>30) 0.80 0.88 1.01 1.15 2.78 2.96 3.36 3.70 4.05 11.5.2.4 Strengthening requirement / overlay thickness The required overlay thickness is calculated accurately on a point-by-point (for each measurement point) basis as follows (Equation 11-7): Overlay thickness at test point (mm) = 25.4*(SNCR - SNCeff)/a1 Where: a1 is the strength coefficient for the asphalt overlay. It is then necessary to re-examine whether the existing selection of uniform sections can be improved (with a better coefficient of variation). The overlay thickness to be used for each uniform road section is obtained by selecting the appropriate percentile (usually 90th percentile for 90% reliability) of the thickness distribution. Adjustments to this calculation are required from a statistical point of view, to ensure that an appropriate level of reliability is used. Weak areas that appear to need a very thick overlay should be patched before the overlay is applied. If the patching is carried out properly, the work should then be strong enough to require little or no additional strengthening. These areas should be excluded from the calculation of the overlay thickness percentiles. Conversely, the structural deficiency of some areas of the 'uniform' section of pavement may be negative, apparently indicating that they do not require additional strengthening. Although these areas might be strong currently, the durability of the surfacing, as a result of ageing, is likely to be just as low as that of the rest of the pavement. Hence, either an overlay or another surface treatment (depending on available budget) is also required in these areas. If the sections not requiring strengthening are relatively small and randomly distributed, so that changing the overlay thickness is not practicable, (which will be the case if the 'uniform' sections have been selected properly), then these areas should also be excluded from the calculation of overlay thickness percentiles. By excluding the aforementioned areas in the calculation of overlay thickness percentiles, the true reliability of the rehabilitated pavement will be slightly higher than that determined by calculation, because these areas will be stronger. This provides a small additional safety factor. The newly defined 'uniform' sections are analysed separately to determine the appropriate overlay thickness. For each one, a cumulative overlay thickness distribution is plotted and the appropriate percentile selected. If the structural deficiency is close to zero and predominantly negative, the road may merely display a poor profile (i.e. a high IRI value) as a result of surfacing defects and require only a thin overlay to improve ride quality and to provide a new durable surface. The minimum thickness of thin overlays is governed by the aggregate grading of the overlay material. Where the mix has a maximum stone size of 25 mm, the overlay should be 65 mm thick; where the maximum stone size is 19 mm, the material can be laid with a minimum thickness of 47 mm (50 mm is used for ease of construction). In general, if the mean structural deficiency lies in the range between 0 and 0.6, a thin overlay is also required. If the mean structural deficiency lies between 0.6 and 2.5, then a thick overlay is necessary. The need for partial or full reconstruction is less easy to define, but it is highly likely if the magnitude of structural deficiency is greater than 2.5. Under such circumstances, the visual condition data, DCP data and test pit data need to be re-assessed. From the design point of view only, full reconstruction is relatively straightforward. Recycling of any asphalt-based pavement materials should also be considered in a full reconstruction option. The design of roads that require reconstruction should take account of the design recommendations set out in Chapters 8, 9 and 10. Equation 11-7 143 Pavement Rehabilitation Approaches 6 5 7 8 4 3 2 1 9 10 11 11.5.2.5 Rationalisation of the design thickness The final step is to consider 'buildability' and eliminate an excessive frequency of changes in the type of rehabilitation. All defined uniform sections for overlay should be as long as possible, commensurate with the class of the road. Thickness changes should be very gradual, to avoid contributing to long wavelength roughness or undulations that are very uncomfortable on highspeed roads. Unevenness specifications apply. 11.5.3 Deflection and Rut Depth Method 11.5.3.1 General Maximum deflection is used by several road authorities to estimate the carrying capacity of a road. This is a simpler method than the method described above. This method works primarily where the pavement is failing because it is too thin for current traffic levels, and where the individual pavement layers themselves are not failing. In the diagnostic process of determining the cause of failure, this type of failure is characterised by a reasonable relationship between deflection and rut depth, as shown in Figure 11-5 (example). Appropriate deflection criteria can be developed as follows: If 15 mm of rutting is defined as the failure criterion, then the deflection associated with this level of rutting at a 90% confidence level (i.e. a low risk of early failure) can be read from Figure 11-5. Since the traffic level is also known, this provides a calibration point for a revised version of Figure 11-6. It is assumed that the relationship between deflection and traffic capacity is always of the same type as in Figure 11-6, and is of the same slope (i.e. parallel with the existing general relationship). Figure 11-7 illustrates the process and shows the revised relationship between deflection and trafficcarrying capacity. The process of designing the rehabilitation for each uniform section of road is then as follows: 1. Measure and correct deflections for temperature effects. 2. Plot the performance chart and calculate representative deflections. 3. Estimate the traffic-carrying capacity of the existing pavement. 4. Compute the overlay thickness required. Figure 11-5: Rut depth / deflection correlation (example) Source: TRL ORN 18, 1999 Figure 11-6: Standard deflection and traffic carrying capacity (example) Figure 11-7: Calibration of deflection-life criterion Source: TRL ORN 18, 1999 144 Pavement Rehabilitation Approaches 6 5 7 8 4 3 2 1 9 10 11 11.5.3.2 Measure and correct deflections Deflections can be measured with an FWD or a Benkelman deflection beam. The loading and measurement conditions should be standardised for all such surveys, to simplify analysis and comparison. For the FWD, an applied load of 50 kN on a loading plate of radius 0.15 m is commonly used. For a Benkelman beam survey, an axle load of 62.3 kN or 80 kN is used. Measurements should be made in both wheel-paths of the slow lane on dual carriageways and in both lanes of a two-lane road. The following strategy is recommended: • Deflection tests and rut depth measurements are carried out using a basic pattern of 50 or 100 m spacing; • Additional tests should be undertaken on any areas showing surface distress; • When a deflection value indicates the need for a significantly thicker (more than 50 mm) overlay than is required for the adjacent section, the exact length of road involved should be determined by additional tests. After all measurements have been made, they should be corrected for any temperature effect. This is because the stiffness of the asphalt depends on temperature. The temperature of the bituminous surfacing is recorded when the deflection measurement is taken, thus allowing the value of deflection to be corrected to a standard temperature. It is recommended that 30 or 35°C, measured at a depth of 40 mm in the surfacing, should be considered to be a suitable standard temperature for roads in tropical climates. The relationship between temperature and deflection for a particular pavement is obtained by studying the change in deflection at a number of test points as the temperature rises from early morning to about 5 pm in the tropics. It is not possible to produce general correction curves to cover all roads, so it is necessary to establish the deflectiontemperature relationship for each project. 11.5.3.3 Performance chart A performance chart should be plotted of the deflection profile of the road for each lane, using the larger deflection of either wheel-path at each chainage. Any areas showing exceptionally high deflections which may need reconstruction or special treatment can then easily be identified. The deflection profile is then used to divide the road into homogeneous sections in such a way as to minimise variation in deflections within each section. The minimum length of these sections should be compatible with the frequency of thickness adjustments, which can sensibly be made by the paving machine while maintaining satisfactory finished levels. When selecting the sections, the topography, subgrade type, pavement construction and maintenance history should all be considered. The final stage of the procedure is to calculate the representative deflection for each homogeneous section of the road. The proposed method tends to identify areas of very high deflections that warrant special treatment or reconstruction and therefore the distribution of the remaining deflection measurements will approximate a normal distribution. The representative deflection, which is the 90th percentile value, can then be calculated as follows: Representative deflection = mean + 1.3 x standard deviation The CoV (see Section 11.2.1) of each uniform section should be checked to ensure that it is acceptable, otherwise the uniform section lengths should be adjusted until acceptable values are achieved. 11.5.3.4 Traffic carrying capacity The traffic carrying capacity of the road, in terms of rutting, can be estimated by comparing the representative deflection of homogeneous sections with the calibrated deflection criteria curve, as shown in Figure 11-7. The traffic carrying capacity represents the total traffic loading that the road will carry from construction. Therefore, the future traffic carrying capacity is the total traffic loading minus the traffic loading that the pavement has carried up to the point of evaluation of the pavement. 11.5.3.5 Computing the overlay thickness The thickness of any necessary strengthening overlay can be determined by reducing the representative deflection of the pavement to the design deflection obtained from the calibrated deflection curve. The relationship between the thickness of a dense bituminous overlay and the reduction in deflection, under a 62.3 kN axle load, is (Equation 11-8): T = (0.036 + 0.818 Dr – Dd)/0.0027Dr Equation 11-8 Where: Dd = Design deflection (example in Figure 11-7), in mm Dr = Representative deflection (example in Figure 11-5 and Figure 11-7), in mm T = Overlay thickness, in mm This relationship is valid between representative deflection values of 0.25 - 1.2 mm and overlay thicknesses of 40 – 150 mm. If deflections are measured using a different axle load (Benkelman beam) or drop load (FWD), the results should be directly scaled to give the equivalent value under a 62.3 kN axle. 11.5.4 Mechanistic / Analytical Method This approach requires long-term calibration, for specific environments / countries and for different pavement structures. The traffic carrying capacity of an asphalt pavement is governed by how effective the pavement layers are in preventing: • Fatigue cracking of the asphalt surfacing; • Shear failure of the granular materials; • Fatigue cracking or crushing of lightly cemented materials; • Wheel-path rutting resulting from subgrade failure. 145 Pavement Rehabilitation Approaches 6 5 7 8 4 3 2 1 9 10 11 Theoretical models to predict the behaviour of granular, and lightly cemented, materials under the action of traffic are not well defined, so specifications for such layers have always been set in such a way that failures are unlikely. This has mitigated against possible risks in the use of lowerquality materials and has, theoretically, restricted the range of likely failure modes. The performance of road pavements has traditionally been dependent on the stress / strain values at two locations in the structure. The horizontal tensile strain at the bottom of the asphalt layer controls one type of fatigue cracking and the vertical compressive strain at the top of the subgrade controls rutting. The analytical approach requires a suitable mathematical model to describe the pavement (Appendix A). Almost all methods use the multilayer linear elastic model. This model requires, as input, the thickness, elastic modulus and Poisson's ratio of each layer of the pavement. These models should be properly calibrated to local conditions so that the method produces relatively accurate results. The most likely method to be used to determine the effective elastic modulus of each pavement layer is backanalysis of FWD deflection bowls. FWDs are supplied with back-calculation computer models for this purpose, and these are used to estimate the elastic moduli of all the pavement layers. Very thin layers, such as an existing seal, are normally incorporated with the underlying roadbase, or they are ignored. The computer programs supplied with most FWDs can also be used to calculate the stresses or strains at the critical points in the pavement, using the application of a standard load designed to replicate a 40 kN wheel load (80 kN axle load). These strains are then used to calculate the 'life' of the structure, using relationships between stress / strain and pavement life. The maximum permissible strains for the design traffic can be calculated from Equation A-1, Equation A-2, Equation A-3 and Equation A-4. The thickness of the asphalt (overlay) can then be adjusted in the FWD back-calculation software until the strains obtained do not exceed the maximum permissible. This is done for each FWD measurement point. The thickness rationalisation is then carried out as with the first overlay method (11.5.2.3, 11.5.2.5) and uniform sections adjusted as with the second overlay design method (11.5.3.3). Sophisticated software exists that performs all these operations in a simplified manner. It should be noted that this overlay design method does not protect against top-down cracking or asphalt rutting. Therefore, additional measures (e.g. the application of a chip seal on the overlay) would be required to prevent top-down cracking, while rut-resistant asphalt mix design (Chapter 6) would be required to minimise rutting. 11.5.5 Bonded Concrete Overlays of Asphalt Bonded concrete overlays of asphalt (BCOA) constitute a concrete pavement placed over an existing asphalt surfacing. They are usually designed as Jointed Plain Concrete Pavement (JPCP) of short slabs of 1.5 - 2.5 m lengths and a thickness of 150 - 200 mm. The design of JPCP is described in Chapter 10. Local experience is required to achieve optimum designs. The method described by Adams & Vandenbossche (2013) provides a concise approach to pavement assessment and the design of BCOA. BCOA are used to treat areas that have experienced chronic rutting or are likely to experience deep ruts of up to 50 mm, confined to the surfacing layer. An example of such areas is climbing lanes. BCOA can be constructed directly on the asphalt surface or the deformed asphalt may be milled before a BCOA is constructed upon it. When milled, care should be taken not to leave a thin layer (< 25 mm) of asphalt below, since this could cause delamination in service. The use of structural grade fibres in the concrete can be considered for overlays of 150 mm thick or less. These fibres enable the BCOA to withstand significant traffic loading. 11.6 Pavement Widening Pavement widening is often undertaken for the following purposes: • To provide a lane / shoulders for non-motorised traffic; • For safety improvement, or speed improvement, of motorised traffic; • The addition of full motorised lanes to improve capacity or improve level of service. The major pavement performance challenge associated with pavement widening is longitudinal cracking due to differential settlement at the widening joint. This can be overcome or minimised by taking the following measures: • The formation level of the widened part should be at least 150 mm below that of the existing pavement. • The materials for use in the pavement layers in the widened part should have a higher permeability (or equal at worst) than that of the existing pavement. Water-bound Macadam is an ideal choice of material for the roadbase of the widened part. The layers should be stepped with a tread width of at least 300 mm and a rise of 150 mm. • A sufficient width to accommodate a compaction roller should be used to ensure adequate compaction. If a narrower width is required, then this can be cut back after compaction is completed. • The widened section should preferably have a higher strength/stiffness than the existing. Pavement widening (and any realignments) are to be designed as new pavement using Section 9 catalogues, whilst the existing carriageway is to be rehabilitated (reconstructed/overlain) to achieve the same design strength in order to ensure compatible stiffness and mitigate the potential for differential strength and longitudinal cracking in the design. 146 Pavement Rehabilitation Approaches 6 5 7 8 4 3 2 1 9 10 11 • The stepping should be such that the existing surfacing is cut back by at least 300 mm. A stress-alleviating membrane or geogrid/geotextile 600 mm wide, with one half width covering the 300 mm and the other half resting on the new base, should be applied before construction of the new surfacing. The geogrid supplier should be consulted for the ideal choice of material, since these are manufacturer-specific. • This joint should not occur in the new expected wheel path. It is often economical to apply an overlay to both the existing and widened part immediately after the completion of widening. 11.7 Rehabilitation of concrete pavements 11.7.1 Defects and Remedies After several years in service, concrete pavements may show defects and will require some form of treatment. Some common defects and their treatments are shown in Table 11-6. The intervention criteria should be set by each agency, depending on their maintenance programme and financing. These could be based on the value of roughness or a visual condition index. In reinforced concrete pavements, it is unlikely that the cracks will be full-depth, so remedies for defects should focus on protecting reinforcement from corrosion. Table 11-6: Concrete pavement defects, causes and treatment Defect Description and Causes Remedy / Treatment Joint sealant failure The joint sealant becomes brittle and cracks, or is removed by traffic action. Usually as a result of poor sealant type selection or natural ageing. Remove sealant and renew application Joint Stepping A difference in level / height of adjacent slabs. This is usually caused by inadequate support or poor dowelling of slabs Rectification of drainage, grinding to level difference between slab heights, replacement of affected slabs, resealing joints and sealing cracks Slab rocking Vertical rocking of the slab under the action / passage of traffic. Usually caused by inadequate / no level support provided during construction, or erosion under the slab, or poor drainage. Remove slab, correct drainage, provide adequate support using lean concrete and construct new slab. This is why adequate support of slabs and erosion protect Loss of texture Texture created during construction is lost, usually as a result of abrasion by traffic. Grinding, blasting or regrooving Surface cracking and eventual spalling Minor cracks, usually caused by shrinkage. Groove crack and apply sealants Full-depth corner cracking Cracks that develop on the corners of slabs. Usually on the outer corners as a result of inadequate support, erosion or inadequate dowelling. Cut out corners and provide adequate support and dowel, then apply highbond concrete Full-depth slab cracking Deep cracks, usually transverse or longitudinal, or with no particular pattern. Usually a result of traffic fatigue, low-strength concrete, a single very high load or reflection cracking. Slab replacement if only a few slabs are affected; overlay when many slabs are affected. 11.7.2 Overlays of Concrete The overlay of concrete pavements may involve the cracking and seating of slabs to avoid reflection cracking; or rubblisation; or simply an application of either concrete or asphalt overlay on the existing concrete pavements. When asphalt overlays are used on concrete pavements, this is generally for the purpose of providing uniformity in levels and for providing strength and texture. Based on design Chart D in Chapter 9 (at traffic T10 and Foundation Class F4), an overlay thickness of 100 mm will usually suffice, provided that: • all joints are adequately sealed; • the overbanding of cracks and joints is carried out before the application of the overlay; • there is an application of stress-absorbing membranes at slab joints, or saw-cutting of the overlay above the joints and application of an appropriate sealant to mitigate reflection cracking. Concrete overlays on concrete pavements are designed as new pavements, following the procedure described in Chapter 10. The rubblised concrete or the cracked and seated pavement are treated as the maximum substrate support class possible, in the design method. If the concrete pavement has not been rubblised or cracked and seated, then it can be de-bonded by application of a 25 mm thick asphalt before applying the concrete overlay. 147 Pavement Rehabilitation Approaches 6 5 7 8 4 3 2 1 9 10 11 11.8 Key Points 1. Rehabilitation (overlay) and reconstruction projects are now increasing in number and length, compared to totally new pavement designs. This is especially so for secondary and primary roads. 2. This chapter focuses on rehabilitation design, rather than reconstruction. Reconstruction design is similar to 'new' pavement design, discussed in Chapters 8, 9 and 10. 3. If rehabilitation is undertaken in a timely manner, it saves roads agencies' expenditure on reconstruction that would otherwise have been necessary. 4. Routine network survey data from pavement management systems can help identify roads that are candidates for rehabilitation. Roads, or sections, that show a 90th percentile rut depth of 10 mm or more, or a roughness of 6 IRI or more, 10% structural cracks or certain deflection criteria, are candidates for rehabilitation, but national and road agencies have bespoke conditions. 5. Once these roads or sections are identified, the next step in this process is to conduct a traffic assessment and determine the design traffic, as discussed in Chapter 2. 6. This is followed by a detailed visual and structural condition assessment, and defect diagnosis. 7. The diagnosis may show that only surface defects or defects associated with poor drainage exist. In such a case, the treatment options in Table 11-3 and Table 11-4 should be used. Note that an overlay or a reseal may still be required, to restore surface texture, for example, or to arrest cracking. 8. Three methods of overlay design are presented, in Section 11.5, in case of the pavement being found to be structurally deficient. 9. Sometimes deterioration is too advanced, in which case reconstruction should be considered. For example, if rutting exceeds 20 mm, or roughness is greater than 8 IRI. The cost of reconstruction is often significantly higher than that of rehabilitation. This is why it is necessary to carry out rehabilitation in a timely manner. 10. Three methods of overlay design are presented in this chapter: • The Structural Number and Deflection Method. This is the recommended method in this Road Note, due to the fact that it takes into account both the strength, and the elasticity, of the pavement materials. • The Deflection and Rut Depth Method. This is another good method, but it requires a minimal level of calibration. • The Mechanistic or Analytical Method. This method is highly efficient but requires a detailed calibration to local conditions to be carried out, using a suitable mechanistic model. Some mechanistic models for calibration that can be used in tropical countries are presented in Appendix B. Commercial software is now widely available for undertaking design using this approach, but any model used should be calibrated to local conditions. 11. Bonded concrete overlays of asphalt can be used, especially in cases where the existing pavement has a severely rutted asphalt layer. The overlay should be designed as JPCP, as discussed in Chapter 10. 12. The rehabilitation of concrete pavements for the level of traffic applicable to this Road Note is presented in Section 11.7. For the rehabilitation of pavements to carry more than 80 MESA, other guidelines should be sought. 13. A spreadsheet has been provided to accompany this Road Note, to assist with visual condition assessment and defect diagnosis. 148 Economic Considerations 6 5 7 8 4 3 2 1 9 10 11 12 12 Economic Considerations 12.1 Introduction and Scope This design guide documents the many options available to the designer during pavement, rehabilitation and surfacing design. Factors such as traffic loading, environmental issues, available material and practical considerations typically influence the types of pavement layer and surfacing that are considered during the design process. Even after consideration of these factors, several design options remain in any given location. Economic analysis is used to select between the viable alternatives and options, to ensure the best possible use of available resources, given the constraints of materials and budget. The important elements of economic analysis include: • Understanding the full Life-Cycle Cost (LCC). The initial construction cost of a road is only a small portion of the costs that the road agency may incur while owning the road. The road and surface design decision will determine the subsequent cost to the agency for resurfacing, rehabilitation and maintenance. LCC is used to compare the costs of different design options over the long term, typically over 20 - 30 years. It should be noted that, for specific projects, there could be significant economic benefits in opting for stage construction; for example, instead of constructing a pavement with 100 mm-thick asphalt surfacing for a design period of 20 years, a design with 60 mm could be used initially with 40 mm added as an overlay after 10 years. This is useful where there is uncertainty relating to traffic forecasts. • Each design option may yield different outcomes or benefits, thus requiring economic analysis to compare the different costs of options in relation to the benefits each provides over the long term. Road user costs and road safety benefits may be considered during the analysis. • Economic analysis helps with trade-offs between different, and sometimes opposing, objectives or tendencies. For example, when designing for the lowest LCC and aiming to achieve the minimum embodied carbon for the road design, economic analysis can be used to decide on the best balance between these two considerations. This section briefly introduces the economic considerations used when comparing design options, given different situations and objectives. Several economic analysis techniques are used in road network and transport system analysis. This section considers only the analysis techniques that are typically used for a decision on pavement and rehabilitation designs for single projects. For road programme and scheme assessments, the reader is referred to asset management and programme management guidelines such as the World Bank HDM-4 series. 12.2 Key Inputs For Economic Analysis 12.2.1 Costs All direct and indirect costs have to be included in economic analyses. It is also important for designers to disclose the costs that are included and excluded. Typical initial construction costs and LCC items included in an economic analysis are: • Land and property acquisition costs; • Planning, scheme assessment and design fees; • Construction costs, including material, plant, labour and supervision; • Future maintenance, periodic treatments and rehabilitation costs within the analysis period; • Operating costs; • Costs associated with environmental impact assessment and mitigation; • Initial and future all-hazard adaptation costs; • Additional provisional and contingency allowances. All costs are calculated in the local currency of a project. In some cases, the economic analysis considers the currency of an external funder, such as a donor agency. Future costs are discounted to the current value of money, according to Section 12.3. It is occasionally required that flexible pavement design option should be compared with concrete pavement design options. This comparison is highly dependent on material availability of bitumen versus cement, and is therefore site specific. For an analysis period of greater than 20 years, it often results in lower life-cycle costs for concrete pavements, but a higher initial cost for the same. A good reference of this computation is TRL Research Report 381 (https://assets.publishing.service.gov.uk/ media/57a08dcd40f0b64974001a40/RR381.pdf). 12.2.2 Benefits When considering different road design options or implementation strategies, the trade-off analysis between the options must consider cost differentials and the benefits (or disbenefits) that one option offers compared with another. These benefits may include savings in future agency costs or savings in road user costs. Three categories of benefits used in road design economic analysis are: a) Benefits derived directly from typical market values within a region or country: • vehicle operating costs; • value of work travel time; • savings in future maintenance and operation costs; • accident cost of the vehicle and damage to the road and road furniture. 149 Economic Considerations 6 5 7 8 4 3 2 1 9 10 11 12 b) Benefits with an assigned monetary value (governments or recognised authorities could assign these within regions) • value of human life or serious injuries; • delay costs - the value of travel time (including work and non-work trips); • vehicle emission costs; • embodied carbon (e.g. carbon emissions associated with construction, material and maintenance). (See Section 13.1). c) Benefits that are sometimes difficult to quantify / intangible benefits • cultural benefits; • aesthetic values; • community preferences; • ecological impacts. Different techniques could be used to incorporate intangible benefits, such as willingness to pay, or government accepted values. An alternative to using a monetary value for intangible benefits is to use a different decision method, such as Multicriteria Analysis (See Section 12.5) Where country accepted values are not available for the economic analysis, the designer is referred to accepted practices such as the World Bank's Highway Design and Maintenance (HDM-4 ) Series (Bennett & Greenwood, 2001). 12.2.3 Economic Prices and Standard Conversion Factors (SCF) Both vehicle operating costs and construction and maintenance costs must be in economic price terms, excluding all taxes and subsidies, expressed at a given date. In some countries, Standard Conversion Factors (SCF) are published and used to convert financial construction and maintenance costs into economic prices. Typically, the SCF might be around 0.85 for converting construction and maintenance costs. It is not common to have an SCF for vehicle operating costs, because the rate of taxation will vary significantly between components such as fuel, tyres and vehicles. 12.2.4 The Economic Discount Rate The Economic Discount Rate, sometimes referred to as a Social Discount Rate, is similar to, (but not the same as), a financial interest rate or 'Bank Rate' used by governments to borrow money. It represents a forecast decline in value over time; a pound, or dollar, is worth less in the future than it is today. This both represents a social preference, and the fact that funds can be invested to produce a higher return later. Over the last thirty years, it has been standard practice to adopt relatively high discount rates (typically around 10 - 12%) for development projects. In 2016, however, the World Bank issued new guidance, recommending that, for countries growing at around 3% per capita per year, the rate should be 6%. The World Bank pointed out that, in the period from 1990 to 2010, the annual average per capita growth for World Bank client countries was 2.5 %. A higher rate may be justified where there are exceptionally high growth rates, with a lower rate preferred where the long-term prospects for growth are limited (World Bank, 2016). 12.2.5 Salvage Value Residual (or salvage) values may be incorporated into the analysis when a substantial economic value remains at the end of the analysis period. This is recorded as a negative cost (i.e. a benefit), but it will need to be multiplied by the appropriate discount factor. When the discount rate is high and the planning time horizon is long, then residual values will usually make little difference to the overall viability of a project. Nevertheless, the issue may be worth considering. As an example, for a 6% discount rate, the discount factor after 20 years is 0.3305. If a 20% residual value is estimated for an investment, then this would be the equivalent of reducing the investment costs by 6.6%. 12.3 Life-Cycle Cost Analysis Figure 12-1 illustrates the whole-of-life cost for a road section. Direct agency costs include initial construction costs, preservation treatments and rehabilitation and maintenance costs. Depending on the purpose of LCC analysis, road user costs may also be considered. The figure shows that, as a road ages and deteriorates, routine maintenance costs increase. Similarly, road user costs will increase with deteriorating conditions, mainly due to increases in roughness. The future costs of a road pavement will vary, depending on the selection of the initial design, the environmental conditions and traffic volume. For that reason, the LCC analysis has to be completed using road-specific information. Figure 12-1: Whole-of-life cost for a road 150 Economic Considerations 6 5 7 8 4 3 2 1 9 10 11 12 Present Value (PV) is the value of all future costs and benefits during the economic analysis period, discounted to the present. Reasons for discounting future costs and benefits are to account for the time-value of money and, in some cases, to allow for adjusting the risk of an investment (e.g. for Private Public Partnership (PPP) projects). The Present Value is given by (New Zealand Transport Agency, 2011): Where: PV = Present Value FV = Future Value r = discount rate, as a fraction n = number of periods (e.g. years) to the future cost The discount rate typically varies from country to country. Where donor funding is used, the donor organisation may have its own recommended discount rate. Countries use the discount rate as a monetary tool to incentivise the construction sector, to either delay, or encourage, short-term investments. Low discount rates favour high shortterm capital investment, while high discount rates will delay major capital investment to a future date. Interest rates are normally not used in road construction economic analysis, but there may be circumstances where the interest rate may be of concern, such as when investments are financed through private loans. PV = FV X 1 (1 + r) n Equation 12-1 12.4 Economic Analysis Tools And Decision Criteria Specialised software tools are not required when conducting an LCC analysis for a single road project. Pavement management tools should, however, be considered for the LCC analysis of a more complex project or analysis of a road programme for an entire network. The World Bank HDM-4 system provides a good example of such tools, but other commercial products are available. Table 12-1 lists a number of economic analysis techniques that are typically used during the assessment of road projects. The selection of the techniques is a function of the purpose of the economic assessment being made. More than one technique may be useful, to provide different perspectives of the economic performance of an intended project, or comparisons between different design options. For further information on economic analysis techniques, the reader is referred to economic analysis handbooks and guidelines such as de Palma et al. (2011). 12.5 Ranking / Multi-Criteria Analysis Multi-criteria Analysis (MCA) is often used when decisions, projects and design alternative outcomes are not easily quantifiable in monetary terms, or when there may be too many to solve using traditional economic analysis. Another popular context for using MCA is where decisions are made with community preferences as the main input, enabling an assessment of multiple factors. MCA analysis takes the weighted sum of a normalised score for different considerations to facilitate the comparison of options. MCA is calculated as follows (New Zealand Transport Agency, 2011): Where: Vi = the value of alternative i Wj = the weighting that applies to criterion j qij = the normalised score of alternative i in relation to criterion j Table 12-1: Economic analysis techniques Economic Analysis Technique Description Application Net Present Value (NPV) NPV is the difference between the Present Value of costs for the baseline alternative (e.g. maintenance only) and the Present Value for an alternative design option over a period of time. NPV is typically used when only considering agency costs. • Project economic feasibility • Mutually exclusive projects • Project timing Net Present Value over Cost (NPV/C) The ratio of the NPV to the cost of an alternative. • Project economic feasibility • Project under a budgetary constraint Internal Rate of Return (IRR) IRR is a discount rate that makes the Net Present Value (NPV) of all cash flows equal to zero in a discounted cash flow analysis. • Project economic feasibility • Project Screening Benefit-Cost Ratio (B/C or BCR) The BCR is the ratio between the relative costs and benefits of a project. • Project economic feasibility • Mutually exclusive projects • Project ranking Incremental Benefit Costs (IBC) IBC expresses the differential benefits over the differential costs for two mutually exclusive alternatives. • Programme selection across a road network • Project feasibility. Vi = ∑m j= 1 wj ×qij Equation 12-2 151 Ancillary Considerations 6 5 7 8 4 3 2 1 9 10 11 12 13 13 Ancillary Considerations 13.1 Carbon Footprint of Road Pavements All modes of transport together account for 19% of overall Greenhouse Gas Emissions (GHG); of this, 75% is attributed to the road transport sector (World Bank, 2021). As a result, most countries enact legislation and policies to incentivise a modal shift toward more sustainable transport options. This shift will, however, take time, so all sources of GHG emissions should be considered in emission reduction strategies. This section briefly provides some principles and considerations for road design, construction and maintenance. The reader is referred to specific tools and guidelines for more details on undertaking carbon emissions calculations for road projects. Table 13-1: Carbon footprint source for stages of the road life-cycle 13.1.1 Types and Sources of Emissions GHG from natural origins include water vapour (H2O), carbon dioxide (CO2), methane (CH4) and nitrous oxide (N2O). Human-introduced GHG include CO2, CH4, N2O, sulphur hexafluoride (SF6) and chlorofluorocarbons (CFCs). Of these, CO2 is of greatest concern, given the transport sector's high dependency on fossil fuels. In the transport sector, direct, or 'tailpipe', emissions refer to emissions from vehicles, whereas embodied carbon is the carbon footprint for creating, maintaining and operating infrastructure such as roads. For carbon footprint calculations, the entire life-cycle of the road needs to be considered. Table 13-1 provides a list of emissions sources that are considered during each life-cycle stage of a road. Life-cycle Stage of Road CO2 Emissions Sources to Consider Construction and Major Rehabilitation i. Removal of Vegetation • Loss of carbon sequestration • Direct combustion from using wood as fuel • Emissions from deforestation plant ii. Construction Materials • Extraction of raw materials • Manufacturing or processing • Transportation and distribution iii. Construction Energy • All emissions from energy used to drive the on-site process, including electricity • Fuel used by all construction plant • Embodied carbon of fuel and electricity supply to the site (including fuel production and generation and transport of fuel to the site) iv. Construction Plant and Vehicles • Embodied carbon in the manufacturing and maintenance of plant and vehicles v. Additional Emissions from Vehicles during Construction. • Traffic delays – additional emissions due to congestion • Idle time emissions in temporary lane closures (stop-go traffic control Road Operation i. Fossil Fuels • Combustion of fossil fuels - direct or tailpipe emissions • Embodied carbon of fuel production and distribution • Carbon footprint from non-renewal electricity generation (e.g. coal) to drive electric vehicles ii. Vehicles • Embodied carbon in vehicle manufacturing (Note: this also includes the manufacturing of electric vehicles) Road Maintenance (Routine and Periodic) iii. Construction Materials • Extraction of raw materials • Manufacturing or processing • Transportation and distribution iv. Construction Energy • All emissions from energy used to drive the on-site process, including electricity • Fuel used by all construction plant • Embodied carbon of fuel and electricity supply to the site (including the fuel production and generation and transport of fuel to the site) v. Construction Plant and Vehicles • Embodied carbon in the manufacturing and maintenance of plant and vehicles vi. Additional Emissions from Vehicles during Construction • Traffic delays – additional emissions due to congestion • Idle time emissions in temporary lane closures (stop-go traffic control) Source: Adapted from ADB, 2010 152 Ancillary Considerations 6 5 7 8 4 3 2 1 9 10 11 12 13 Figure 13-1: Total CO2 emissions over a 40 year period for a 1 km long and 13 m wide road during construction, maintenance and operation (lighting, traffic lights, winter treatment) Source modified: from Stripple, 2001 13.1.2 Typical Emission Levels from Different Road Types The level of emissions from each road project will differ greatly, depending on the country and the project's specific location. For this reason, each project's emission, or carbon footprint, calculations should be undertaken separately. Figure 13-1 provides an example of a comparison of the carbon footprint for different design options on a given section of road. It is notable that direct vehicle emissions significantly exceed embodied emissions. The figure also shows that the on-going maintenance of roads has a significantly higher carbon footprint than the original construction. Table 13-2 shows emission intensities from different material and construction activities. The emission intensities are calculated using three different rating tools. The table shows a relatively strong correlation between the tools, for most items, but the tools rate different materials and construction plants. Rating tools are discussed in the following section. 13.1.3 Carbon Footprint Calculation / Rating Tools Sustainability rating tools are used to assess the overall sustainability of projects, most of them according to the United Nations' Sustainability Goals. Carbon footprint is just one of the rating considerations, thus making these tools more appropriate for major project sustainability assessments. Specific tools have also been developed to assess the carbon footprint associated with road construction, maintenance and operation. Calculation and rating tools differ in terms of the approach used to underpin their assessment techniques and of the scope and boundaries of their assessments. Figure 13-2 presents a comparison of the main sustainability rating tools and their specific biases for the different project stages. It shows that a tool such as 'Envision' (Shealy & Klotz, 2014) focuses on the planning and design stages, while 'Infrastructure Sustainability (IS)' aims to include most of the road's life-cycle. Table 13-2: Emissions intensities for three calculation tools Material and Product Unit Emission Intensity (kg eq. to CO2/Unit) VicRoads CHANGER Egis Calculator Steel t 2,650 2,346 3,190 Cement t 670 825 (25%) 776 Concrete (15% cement) m3 258 Concrete (30% cement) m3 496 Concrete (cement, sand, aggregate) t 163-269 249-351 Hot mix asphalt (5% bitumen) t 10 29.40 54 Aggregate t 8 10.32 11 Transport Medium truck (diesel) veh. km 0.83 0.71 Heavy truck (diesel) veh. km 1.58 1.36 PTAC 6.1-10.9 t ton. km 0.60 0.53 PTAC 11-21 t ton. km 0.30 0.27 Energy Diesel litre 2.90 3.93 2.94 Electricity kW.k 1.31 0.80 0.08 Source: Adapted from World Bank, 2011 153 Ancillary Considerations 6 5 7 8 4 3 2 1 9 10 11 12 13 Some prominent carbon emission rating tools used in transport include: • Greenroads (Greenroads, 2011) • ROADEO (World Bank, 2011) • Pavement Embodied Carbon Tool (asPECT) – UK-TRL and Highways Agency (Reeves et al., 2020) Typically, each country will require a recognised emission rating tool for road projects. In the absence of a recognised or specified tool, the designer can choose a tool most suitable for the type of pavement considered. Figure 13-2: Comparing sustainability rating tools in terms of their biases in relation to project stages Source: Griffiths, Boyle & Henning, 2018 13.2 Process For Introducing New Materials Periodically, new pavement technologies are introduced into areas where they have not previously been used. These technologies cannot be expected to perform in the same way in all regions where they are applied. This might be due to differences in the natural variation of materials, climatic factors, traffic and loading characteristics and construction quality control and standards, among other things. For this reason, it is essential that experimental sections for purpose of adapting these technologies in new areas should be constructed. Conducting experiments minimises the risk of premature failures and severe losses during full-scale application. A new technology's performance during these experiments should be monitored for at least five years and compared with the performance of roads from where the technology originates. Performance should be monitored consistently so that an initial trend can be established. If the trend does not match that observed in the technology's country or region of origin, then technical adjustments should be made and new experimental sections constructed and monitored. Shift factors and calibration equations may be required, to achieve the same level of performance. For example, adjusting the strength of the new material by a given percentage could lead to equal or better performance, while reducing a parameter could minimise overdesign. 154 Appendicies 6 5 7 8 4 3 2 1 9 10 11 12 13 14 Appendix A: Mechanistic-Empirical Pavement Design Introduction Empirical pavement design methods have the major advantage that they are tried and confirmed to work successfully under certain conditions. As long as those conditions are replicated correctly, a pavement will perform well. The major draw-back is that they could be conservative in certain cases and they may not perform successfully outside the range of parameters under which they were developed. The mechanistic-empirical method attempts to answer these concerns. It should be viewed as an important component in the accumulation of useful knowledge to improve pavement design and not as a rival or alternative method of design. Any theory concerning the behaviour of road pavements describing how the pavement responds to the stresses and strains to which it is exposed would have to be an approximation and the Multi-Layer Elastic Theory (MLET) is no exception. The theory is based on the following assumptions: 1. The pavement layers behave as linear elastic materials (i.e. for each layer, the stress and strain are linearly related (i.e. stress, σ = E x ε, where E is the elastic modulus and is a constant); 2. The pavement layers are homogenous (i.e. the value of E is the same throughout each layer and there are no discontinuities (e.g. no cracks); 3. The layers are of infinite extent in the horizonal directions (i.e. there are no boundaries). These assumptions are not strictly accurate and therefore the model cannot be expected to predict actual behaviour without additional information. Figure A-1: Stress/strain locations for mechanistic-empirical analysis 1 2 3 4 5 Wheel The Principle The principle of mechanistic-empirical design is that the stresses and strains that occur within the pavement as a result of external loading, primarily by traffic, can be calculated by a suitable theory. The way in which the materials respond to these stresses is then calculated based on knowledge obtained from studies in which the materials have been subjected to similar stresses and strains in the laboratory. The performance of the materials is then expressed in terms of suitable equations (models). The performance criteria are usually 'fatigue'- type relationships, linking the value of the stress or strain with the number of times that the stress or strain can be repeated before 'failure' occurs. This latter process is essentially empirical; there is nothing fundamental in the equations used to describe the response of the materials to the imposed stresses. Location 1: Within the surfacing or the roadbase. At this location, the shear strength of the roadbase or surfacing must be high enough to prevent failure at the top of the pavement, where the stress from the wheels is at a maximum. This can also occur within the sub-base layer. Location 2: At the bottom of the bituminous surfacing, stabilised roadbase or sub-base. The stress at this location is only a critical design stress if the surfacing, stabilised roadbase or sub-base is a stabilised material lying on top of a layer of much less stiffness. Location 3: On top of the subgrade and/or capping. The vertical stress or strain at this location is a critical design parameter, because the purpose of the pavement is primarily to protect the subgrade. Therefore, controlling the stress or strain at this position is of the greatest importance. 155 Appendicies 6 5 7 8 4 3 2 1 9 10 11 12 13 14 Experience has shown that it is often Locations 2 and 3 that are critical, so these are discussed below. The asphalt fatigue criterion (Equation A-1), developed in Australia (Austroads, 2009), is recommended, because it has emerged from an evolving research programme and is, therefore, based on the best available data. Furthermore, the climatic conditions in Australia are suitably tropical. The fatigue equation for cement-bound layers in Austroads (2009) is recommended if required. The fatigue law for asphalt is: Where: Vb = proportion of bitumen by volume in the mixture, as a % Smix = elastic modulus of mixture in MN/m2 µε = horizontal microstrain in the asphalt N = number of strain repetitions to failure The use of this equation requires knowledge of the elastic modulus of the asphaltic concrete and the volume of bitumen it contains. Furthermore, the predicted 'life' of the asphalt is extremely sensitive to the value of both of these factors, and both are sufficiently variable to ensure that accurate predictions of 'life' are extremely difficult to make, hence the need for local calibration. Alternatively, assumptions can be made that will ensure a sufficient factor of safety. Despite the apparent sophistication of such methods, there are a number of problems. For example, it has proved quite difficult to develop subgrade strain criteria for different subgrades. The subgrade at the AASHO Road Test, which was conducted in the 1960s, was very weak and the criterion developed there is very conservative. Most subgrades are stronger and less prone to failure, and recent research has shown that the range of subgrade criteria can cover three orders of magnitude in terms of traffic. Despite this, the default criterion in most analytical methods is the same for all subgrades and this is usually based on the original criterion developed from the AASHO Road Test. The recommended criteria for most tropical soils, however, are based on more recent research (Janoo & Cortez, 2003), and are as follows (Equation A-2, Equation A-3, Equation A-4): Strong subgrades (Class S6): N = (15,000/μϵ)^7.5 Medium strength subgrades (Classes S3, S4, S5): N = (6,000/μϵ)^7.5 Weak subgrades (Class S2): N = (3,400/με)^7.5 Where: µε = horizontal microstrain in the asphalt. N = number of strain repetitions to failure. Location 4 and 5: In the middle of the granular layers (roadbase and sub-base). These are locations where shear failure can occur. Increasing the thickness or strength minimises the likelihood of shear failure, although shear failure is unlikely to occur if the strain criterion at Location 3 is satisfied. Steps in the mechanistic-empirical procedure: 1. Determine design traffic. 2. Determine design subgrade strength (in terms of resilient modulus). 3. Select trial pavement structure (with material properties). 4. Analyse strains, (use software such as KenPave and Rubicon Toolbox), at critical locations of trial pavement. 5. Analyse strains at critical locations in structures known to perform well empirically or compare with strains in the fatigue and subgrade criteria described in the subsequent paragraph. 6. Compare strains according to computations from 4 and 5. 7. If strains are higher, then select another trial structure and repeat analysis until strains are lower. Multilayer Linear Elastic Layer Model Models to calculate stresses and strains include multilayer linear elastic models (MLEM), finite element models (FEM) and artificial neural network models (ANNs). There is no accurate and easy-to-use theoretical model available. Most pavement materials behave in a complex manner and predicting performance accurately is difficult. The only model that can be used with ease is the multilayer linear elastic layer model (MLEM). This model assumes that the pavement layers comprise uniform linearly elastic material (i.e. stress = E x strain, where E MN/m2 is the elastic modulus and is a constant for each pavement layer of infinite extent in the horizontal plane, and of a thickness usually denoted by h mm). Thus, the information required to use the model to calculate the stresses and strains in the pavement are the elastic modulus (E MN/m2), Poisson's ratio (ν) and thickness (h, mm) for the materials in each pavement layer, plus the vertical loading stress created by a wheel load. This is usually assumed to be applied as a uniform vertical pressure (σ MN/m2) acting on a circular area of radius a m or, more usually, as two circular areas to represent the two wheels at each end of a typical truck axle. The dynamic effects of a moving wheel are not considered. The elastic properties of common flexible materials are presented in Appendix B. The calculations cannot be carried out by hand, but several computer programs are available to do so and many are free. A popular example of this is KenPave, written by the University of Kentucky. Others include Rubicon Tools, from South Africa, WESLEA, from Auburn University, in the USA and CIRCLY, which is used in Australia. These programs do not yield identical results, although the differences are not usually serious. More sophisticated finite element programs are also available, especially from research institutions. N = 6918 x (0.856 x Vb + 1.08) 5 µε x Smix 0.36 Equation A-1 Equation A-2 Equation A-3 Equation A-4 Appendix A: Continued 156 Appendicies 6 5 7 8 4 3 2 1 9 10 11 12 13 14 Correct Application of Mechanistic Methods Many performance models exist for the application of the mechanistic design method. They do not often agree with one another because of the factors considered in their development. Therefore, to ensure that realistic values are obtained, the designer should calibrate the models presented in the above equations to reflect the local conditions that are relevant to the project environment. The calibration can be achieved in two ways: 1. Comparing strains and stresses to the values of the same in similar empirical pavement structures. 2. Applying a suitable shift factor to the equations that gives similar results to measured values. This calibration is useful in determining the required pavement structure to protect the subgrade and to prevent bottom-up cracking. It should be noted, however, that the models do not generally represent top-down cracking, which is a common defect in the tropics. To overcome this, additional safeguards need to be applied, such as the application of bituminous surface treatment on top of asphalt surfacing, or timely maintenance. Calibration with Similar Empirical Structures The strains and stresses in an empirical pavement structure, known to perform well for a given subgrade and traffic, are computed at the critical stress locations (Figure A- 1). To extend the applicability of such a structure for higher traffic or for different axle load spectra, the layer thicknesses or/and strengths are altered until the strains and stresses are reduced to values less than, or equal to, those of the empirical structure. It is important to note that this is applicable for similar structures and materials and should not be used for dissimilar materials such as cement-treated roadbase versus a granular roadbase. Calibration of Calculated Strains and Stresses to Measured Values, Using Shift Factors Although the models described above (Equation A-1, Equation A-2, Equation A-3, Equation A-4) can be used to calculate the stresses and strains imposed on the pavement layers by any loads, primarily the wheel loads of traffic, it is by no means certain how accurate these calculations are. Thus, although the model can predict general trends, making use of its full potential requires 'calibration' based on measured behaviour. Good performance can indicate the values of stress and strain that can be tolerated by a pavement but, unless they are actually measured, the accuracy of the model in predicting them cannot be determined. Adjusting the model to agree with the measured values of stress and strain is generally referred to as 'calibration'. Such a calibration will not be unique, since it will depend on the pavement design and the materials of the layers, and so it will only apply to similar pavements. Separate calibrations are required for pavements comprising other materials. Only when the pavement fails, or is near to failure, is it possible to determine the critical values that relate the maximum stresses and/or strains to its long-term performance, but this also requires that the relevant stresses and strains are actually measured. The success of this process depends largely on the mode, or modes, of failure that are occurring. Traditionally, two principal modes have been considered, namely failure at subgrade level and fatigue failure of the main AC uppermost layer. This is logical, because the whole point of the pavement is to protect the subgrade. As a result of the emphasis on this mode, relationships between the strain on the subgrade and the number of times that such a strain can be repeated (i.e. the subgrade strain criterion) have been developed, although there has been considerable disagreement between laboratories. Fortunately, a recent comprehensive study by Lyne Irwin and Vincent Janoo and their team, in an accelerated pavement test facility, has shown how the subgrade strain criterion relates to subgrade properties and how the MLET is useful for predicting the stresses and strains. The relationships are much less conservative than those derived from the AASHTO Road Test of the 1960s, which was complicated by the freeze-thaw cycles of the subgrade at the site. Nevertheless, the findings of the AASHTO Road Test have been used for many years, in spite of clearly not being applicable to tropical environments. Fatigue failure of the main AC uppermost layer is caused by horizontal stress at the lower surface of the layer, which develops as the AC 'bends' under load. Unfortunately, studying AC fatigue is notoriously difficult, because laboratory studies cannot mimic the behaviour of the road, where the life of the material is many times longer than in the accelerated loading that must be used in the laboratory to obtain a result within a reasonable time. Thus, fatigue criteria measured in the laboratory have to be extrapolated by several orders of magnitude, to reflect performance in the real road. In addition, the dependence of this AC fatigue on the composition of the AC itself, on climate (primarily temperature) and on traffic (both volume and loading) is too complicated to model, making it very difficult to predict behaviour. Therefore, MLET cannot be calibrated to enable it to be of use in the design of AC layers, except, perhaps, in determining a single maximum critical value of the stress that causes fatigue failure, and that must therefore never be exceeded, if the AC is to have any chance of a long life. Calculating this horizontal stress at the lower surface of the AC layer is relatively straightforward, but identifying this critical value is difficult, because this depends on so many factors, some of which cannot be easily assessed or predicted. The critical value can only be determined from measurements on real pavements, provided that this form of traditional fatigue actually occurs and is recognised. Appendix A: Continued 157 Appendicies 6 5 7 8 4 3 2 1 9 10 11 12 13 14 Recent studies have generally indicated that another form of deterioration of AC is usually responsible for its eventual performance, (namely, ageing and embrittlement with various possible stresses and strains, leading to cracking from the top downwards), but this is also difficult to predict. Other modes of deterioration are much less common. Generally, they are most likely to occur because of a construction / manufacturing fault and are therefore not obviously the result of an excessive stress or strain that might be predicted using MLET. For many years, deterioration was simply measured by surface roughness, cracking at the surface and the depth of ruts; skid resistance was often added to this. These characteristics were usually combined in an additive form, to define the PSI or Present Serviceability Index. Some of these deterioration characteristics could be predicted separately, and maybe using MLET, provided that the mechanisms could be defined. This is, however, often not possible, because of the interactive nature of the characteristics. For example, rutting observed at the surface could depend on any of the pavement layers, or all of them, and the mechanisms could differ from pavement to pavement. Identifying the relationship with MLET for the variety of deterioration mechanisms remains impossible, which results in the variability of road performance that is currently observed. The easiest method of quantifying performance has been to simply relate it to traffic. Given the scarcity of actual measurements of stresses and strains in real pavements and the inaccuracies and simplifications of the MLET, it is perhaps surprising that MLET is often used successfully. First, the 'errors' in the MLET itself are usually systematic, rather than random. This means that the relative differences in the results for different pavements are much more meaningful than the absolute values and that, if the method is calibrated by comparison with measured performance, sensible conclusions may be drawn. This assumption requires that the calibration is 'correct' and this also means that the performance of the pavements used for calibration must be thoroughly understood. Second, most pavements will not differ much from those that should have been used to calibrate the MLET model. Thus, provided that the model has been calibrated for the specific type of structure that is being considered, the model has a good chance of predicting the relative performance of similar pavements with reasonable accuracy. It must be emphasised, however, that this does require a good calibration. In particular, the relationship between stress or strain and allowable repetitions must have the correct form e.g. the slope of any fatigue line must be accurate. To summarise, MLET is useful for determining likely subgrade deterioration and to modify designs for different traffic levels and different subgrades, but for any other deterioration modes it is not required, unless the deterioration mechanism depends on a specific stress or strain. Appendix A: Continued 158 Appendicies 6 5 7 8 4 3 2 1 9 10 11 12 13 14 Appendix B: Materials Moduli For Mechanistic-Empirical Design Resilient Modulus In most pavements in tropical and sub-tropical countries, the main structural element consists of granular layers, with relatively thick roadbase and sub-base layers placed over the subgrade. For economic reasons, the asphalt cover is thin, and has a limited structural function, and the granular roadbase and sub-base layers provide the bulk of the bearing capacity. It is very important to properly characterise the behaviour of the unbound pavement layers of the layered pavement structure to predict pavement responses. Material properties such as the resilient modulus are an essential part of the framework of a mechanistic / analytical pavement design approach. Moreover, it is important to understand the fundamental behaviour of unbound pavement materials, particularly those in the upper layers. It is also important to characterise their mechanical response, to facilitate verification and quality control testing for well-used pavements or higher standard road classes. Such knowledge will also be beneficial to the use of unconventional materials such as recycled materials. The theory of elasticity traditionally defines the elastic properties of a material by the modulus of elasticity, E, and the Poisson's ratio, ν. When dealing with unbound granular layers, the elastic modulus, E, is replaced by the resilient modulus to describe the stress-dependent elastic (i.e. recoverable) behaviour of a material subjected to repeated loading. Granular materials are not truly elastic but they experience some non-recoverable deformation after each load application. The engineering parameter generally used to characterise this behaviour is the resilient modulus, MR. For pavement design, there are two recommended methods for determining the modulus of granular roadbase and sub-base layers, which, in order of preference, are direct measurement and assigning presumptive values. With direct measurement, the resilient modulus is measured in a triaxial cell, using repetitive loading. The recoverable portion of the axial deformation response is used in calculating the resilient modulus, which is defined as the ratio of the repeated axial deviator stress to the recoverable strain, (see Equation B-1). Where: MR = resilient modulus σd = applied repeated deviator stress εr = axial recoverable strain As the modulus is sensitive to stress level, moisture and density conditions, it is essential that laboratory test conditions closely approximate those that will occur in practice. For the assignment of presumptive values, the resilient modulus for unbound granular roadbase and sub-base layers are given in Table B-1. For capping granular materials, the equation below (Equation B-2) may be used for the estimation of the resilient modulus of the granular material, based on its thickness and the resilient modulus value of the supporting layer or subgrade material. MR = 0.2 (h)0.45 x MRsupport Where: h: thickness of granular layer, in mm MR: resilient modulus of the granular capping layer (MPa) MRsupport: (effective) resilient modulus of the supporting layer (MPa) It is universally recognised that the modulus of unbound pavement materials is stress dependent. The modulus of unbound granular materials must be appropriate for the range of stresses under which they are likely to operate. In addition to stress levels, the modulus depends on density, moisture content, confining pressure, grading and the angularity of particles. In addition to all of these, the modulus in a granular layer depends on the strength of the support on which it rests and the thickness of the granular layer; the stronger the underlying layer, the stiffer the granular layer. Table B-1 presents factors affecting the resilient modulus of unbound pavement materials and the effect of increasing each factor. MR = σd εr Equation B-1 Equation B-2 Table B-1: Factors affecting the resilient modulus of unbound pavement materials Factor Effect of increasing the factor Proportion of coarse angular particles Increase Density Increase Compaction moisture content Increase up to the optimum value, then a decrease. In-service moisture content Decrease Age / temperature / rate of loading No change Stress level: Mean normal stress Increase Shear stress Decrease Source: Austroads, 2004 159 Appendicies 6 5 7 8 4 3 2 1 9 10 11 12 13 14 The recommended ranges in Table B-2 may be used as a guide when assigning modulus values to unbound pavement materials in pavement design, when more reliable information is unavailable. Poisson's ratio values of unbound pavement materials between 0.1 and 0.5 have been shown to have little influence on pavement thickness requirements. Commonly, Poisson's ratio is assumed to be 0.35. To consider the stress effect on the roadbase layer, the thickness range of the overlaying asphalt over the roadbase should be considered in the selection of the modulus value of the roadbase materials. Note that higher modulus values are recommended for high-standard, quality freshly crushed rock (GB1,A). High-quality crushed rock roadbases are those that: • are produced from sound and durable rocks; • have a high level of durability and strength; • are produced in a highly processed and controlled manner, to stringent tolerances and with high-standard placement; • are subject to a high level of quality control For unbound granular materials, there is also strong evidence that the modulus in the vertical direction is Table B-2: Suggested modulus (MPa) of unbound roadbase and sub-base material Material Code Material description Recommended modulus range (typical value) (MPa) Thickness of overlaying material over the roadbase ≤ 100 mm > 100 mm GB1,A High-quality, freshly crushed rock 300 – 700 (500) 200 – 600 (400) GB1,B Normal standard crushed rock, gravel or boulders 200 – 500 (400) 150 – 400 (350) GB2 Dry-bound and water-bound Macadam 200 – 500 (350)* 150 – 400 (300)* GB3 Natural coarsely graded granular material, including processed and modified gravels 150 – 400 (300) 100 – 350 (250) GS1 Crushed rock, gravel or boulder, or high-quality natural gravel 150 – 400 (250) GS2 Natural gravel 100 – 300 (200) GC Gravel or gravel-soil 100 – 150 (125) G8 Soil 60 – 120 (90) *The designer is advised to undertake further assessment to establish the reference values. different from that in the horizontal direction, (i.e. they are anisotropic). In the analytical design procedure, the vertical modulus of unbound granular materials is often taken as being equal to twice the horizontal modulus; conversely, the horizontal modulus can be considered to be half of the vertical modulus Moduli of Various Materials The best way of estimating the resilient modulus is to measure it in the laboratory, using Repeat Load Triaxial Machines for soils and unbound materials and using flexural tests for asphalt and cement concrete materials. Nevertheless, below are estimates of the moduli of various materials. It should be noted that the moduli of soils and unbound (or lightly bound) materials are significantly affected by variations in moisture content, whereas the modulus of asphalt concrete is affected significantly by temperature variation. The moduli of subgrade soils up to CBR 15% can be estimated from the formula of Powell et al. (1984): E = 17.6*CBR0.64 Where: E is the moduli in MPa and CBR is the California Bearing Ratio. Appendix B: Continued 160 Appendicies 6 5 7 8 4 3 2 1 9 10 11 12 13 14 Table B-3: Elastic moduli for water-bound Macadam layers Material Code Layer thickness (mm) Dry condition (30% saturation) Moist condition (60% saturation) Good support1 Weak support2 Good support1 Weak support2 WM1 100 1200 800 1100 640 > 100 1080 620 1010 550 WM2 100 1000 600 900 440 > 100 880 420 790 330 Notes. 1. Well supported by an intact cemented-treated sub-base that creates confinement of the water-bound Macadam layer. 2. Relatively weak support provided by a granular, or equivalent granular, sub-base layer. Source: DoT, South Africa (1996). TRH4: Structural design of flexible pavements for interurban and rural roads. Technical Recommendations for Highways. Pretoria. UCS (Mpa) for pre-cracked condition Pre-cracked condition Post-cracked condition PHASE 1 PHASE 2 PHASE 3 Stage 1: Intact (MPa) Stage 2: Shrinkage cracking (MPa) Stage 3: Trafficassociated cracking, transitional phase with micro cracking (MPa) Stage 4: Broken up in equivalent granular state (MPa) Dry condition Wet condition 6 - 12 400 - 600 50 - 400 3 - 6 3000 - 14000 2000 - 2500 500 - 800 300 - 500 50 - 300 1.5 - 3 2000 - 10000 1000 - 2000 500 - 800 200 - 400 20 - 200 0.75 - 1.5 500 - 7000 500 - 2000 400 - 600 100 - 300 20 – 200 Source: Modified after Theyse, Beer & Rust, 1996 Table B-4: Range of elastic modulus values for HBMs As a guide, the values presented in Table B-4, below, can be used to estimate the elastic modulus of HBMs. A Poisson's ratio of 0.35 is assumed. Alternatively, the unconfined compressive strength of laboratory samples or extracted cores can be converted to elastic modulus or resilient modulus using the equations in Table B-5 and Poisson's ratios in Table B-6 (sourced from Transportation Officials, 2008). Material Relationship for modulus Test Methods (psi) (MPa) Lean concrete and cement treated aggregate E = 57000(fc )0.5 E = 57000/145 (fc )0.5 AASHTO T22 Lime-cement-fly ash E = 500 + qu E = 1/145 (500 + qu) ASTM C593 Soil cement E = 1200(qu ) E = 1200(qu )/145 ASTM D1633 Lime-stabilised soil Mr =0.124(qu)+9.98 Mr = 1/145 (0.124(qu )+ 9.98) ASTM D5102 E = Elastic modulus, Mr = resilient modulus, fc = compressive strength (cube), qu = unconfined compressive strength (cylinder). Source: Transportation Officials, 2008 India IRC-37-2018 Manual uses: E = 1000*UCS, where UCS is the 28-day unconfined compressive strength (MPa) of the cementitious granular material. Table B-5: Equations for elastic modulus of various HBMs Appendix B: Continued 161 Appendicies 6 5 7 8 4 3 2 1 9 10 11 12 13 14 The temperature of asphalt surfacing at 20 mm depth is important for the choice of bitumen to be used in the mix. The temperature can be estimated from air temperature using the following equation (Huber, 1994): T20mm=(Tair – 0.00618lat2 + 0.2289lat + 42.2)(0.9545) – 17.78 Where: T20mm is the asphalt temperature in °C at 20 mm depth from the top of the asphalt surfacing Tair is the air temperature in °C lat is the latitude in decimal degrees of the site location Local calibration of the equation is required in order to obtain accurate predictions. The equation (Chen, Bilyeu, Lin & Murphy, 2000) for the conversion of a modulus at one temperature to the modulus at another temperature is shown below. ETW= ETC / [(1.8TW + 32)2.4462 x(1.8TC + 32) –2.4462] Where: ETW = Adjusted modulus of elasticity at Tw (MPa) ETC = measured modulus of elasticity at Tc (MPa) TW = temperature to which the modulus of elasticity is adjusted (°C) TC = the mid-depth temperature at the time of FWD data collection (°C) Chen, D.H., Bilyeu, J., Lin, H.H. & Murphy, M. (2000) Temperature Correction on Falling Weight Deflectometer Measurements. Transport Research Record. Washington, DC, USA. Huber, G.A. (1994) Weather Database for the Superpave Mix Design System. National Research Council. SHRP - A– 648A. Washington, DC, USA. Table B-6: Range of Poisson's ratios for various HBMs Material Range of Poisson's ratios Lean concrete and cementstabilised aggregate 0.1 - 0.2 Lime-fly ash materials 0.1 - 0.15 Soil cement 0.15 - 0.35 Lime-stabilised soil 0.15 - 0.2 Sources: Theyse, H.L., De Beer, M. & Rust, F.C. (1996) Overview of South African mechanistic pavement design method. Transportation Research Record, 1539(1), pp.6-17. Transportation Officials (2008) Mechanistic-empirical pavement design guide: a manual of practice. AASHTO. Washington, DC, USA. Table B-7: Estimated moduli of asphaltic materials Material Use Elastic moduli Poisson's ratios Asphaltic Concrete Wearing course 1500 – 2000 0.35 Base course 3000 - 4700 0.35 EME2 Basecourse & roadbase 6500 - 8000 0.35 Dense Bitumen Macadam Wearing course 2500 - 3500 0.35 Base course 2500 - 3500 0.35 Hot Rolled Asphalt Wearing course 2000 - 3000 0.35 DBM and HRA roadbase Road base 2500 - 4000 0.35 Thin wearing course Wearing course 1800 - 2000 0.35 Stone Mastic Asphalt Wearing course 2000 – 2500 0.35 Sand bitumen mixes Road base 1500 - 2500 0.35 Grouted Macadam Wearing course 4000 - 6000 0.2 - 0.35 Note: Resilient modulus of 150 mm diameter DBM specimens at 35°C is given by Mr = 11.088*ITS-3015.8 (R2 = 0.68), where ITS is Indirect Tensile Strength, in kPa. The Viljoen Temperature Models Ts(max) = Tair(max) + 24.5 (cosZn )2.C Where: Ts(max) = the daily maximum asphalt surface temperature in °C Tair(max) = the daily maximum air temperature in °C Zn = Zenith angle at midday C = Cloud cover index With: C = 1.1 if Tair(max) > 30°C C = 1.0 if monthly mean air temperature < Tair(max) < 30°C C = 0.25 if Tair(max) < monthly mean air temperature cos(Zn) = sin(latitude)*sin(declination)+cos (latitude)*cos(declination) Declination = -23.45°.cos[360°/365.(N+10)] N = day of the year (with 1st of January = 1) To predict the pavement temperature at a depth of 20 mm, at any time of day, the equation is: Td(max) =Ts(max) +0.93 Where: Td(max) = Maximum daily asphalt temperature at depth d in °C Ts(max = Daily maximum asphalt surface temperature in °C, from Equation Appendix B: Continued 162 Appendicies 6 5 7 8 4 3 2 1 9 10 11 12 13 14 Appendix C: Chapter 1 References (Introduction) 1. Austroads (2018) AGPT04K. Selection and design of sprayed seals. Pavement Technology Series. Sydney, Australia: Austroads. 2. Chesher, A. and Harrison, R. (1987) Vehicle operating costs: evidence from developing countries. The Highway Design and Maintenance Standards Series. Washington, DC, USA: The International Bank for Reconstruction and Development. 3. Millard, R.S. (1993) Roadmaking in the tropics: materials and methods. Transport Research Laboratory state of the art review. London, UK: Her Majesty's Stationery Office. 4. Parsley, L.L. and Robinson, R. (1982) The TRRL Road Investment Model for developing countries (RTIM 2). TRRL Laboratory Report LR 1057. Crowthorne, Berkshire, UK: Transport and Road Research Laboratory. 5. Paterson, W.D.O. (1987) Road deterioration and maintenance effects: models for planning and management. The Highway Design and Maintenance Standards Series. Washington, DC, USA: The International Bank for Reconstruction and Development. 6. Rolt, J., Otto, A., Mukura, K., Reeves, S., Hine, J. and Musenero, L. (TRL Limited) (2020) Rural Road Note 01. A guide on the application of pavement design methods for low volume rural roads, 1st Edition. London, UK: ReCAP for UK Aid. 7. Smith, H.R., Rolt, J. and Wambura, J.H.G. (1990) 'The durability of bituminous overlays and wearing courses in tropical environments' in, Proc. 3rd Int. Conf. on the Bearing Capacity of Roads and Airfields, The Norwegian Institute of Technology, Trondheim, Norway. 8. Texas Department of Transportation (TxDoT) (2010) Seal coat and surface treatment manual. Texas, USA: Texas Department of Transportation. 9. Transport Research Laboratory (2000) Overseas Road Note 3. A guide to surface dressing in tropical and sub-tropical countries. Crowthorne, Berkshire, UK: Transport Research Laboratory. 10. SANRA (2007) TRH3 2007: Design and construction of surfacing seals. Pretoria, South Africa: The South African National Roads Agency Ltd. 11. Strauss, P.J., Servas, V.P. and Marais, V.P. (1984) 'Unexpected surface cracking of asphaltic wearing courses' in, Proc. 4th Conf. on Asphalt Pavements for Southern Africa, Cape Town CAPSA, South Africa. 12. Watanatada, T., Harral, C.G., Paterson, W.D.O., Dhareshwar, A.M., Bhandari, A. and Sunokawa, K. (1987) The Highway Design and Maintenance Standards Model Volume 1, Description of the Hdm-111 Model Volume 2, User's Manual for the HDM-III Model Highway Design and Maintenance Standards Series. Washington, DC, USA: The International Bank for Reconstruction and Development. 163 Appendicies 6 5 7 8 4 3 2 1 9 10 11 12 13 14 Appendix D: Chapter 2 References (Estimation of Design Traffic) 1. AASHTO (American Association of State Highway and Transportation Officials) (1993) Guide for design of pavement structures. 2. Austroads (2019) AGPT02-17. Guide to Pavement Technology. Part 2: Pavement Structural Design. Edition 4.3, Nov 2019. Sydney, Australia: Austroads. 3. Bellucci, P. and Cipriani, E. (2010) 'Data accuracy on automatic traffic counting: the SMART project results' European Transport Research Review, vol. 2, no. 4, p.p. 175- 187. 4. Burnos, P., Gajda, J., Piwowar, P., Sroka, R., Stencel, M. and Zeglen, T. (2007) 'Accurate weighing of moving vehicles' Metrology and Measurement Systems, vol. 14, no. 4, p.p. 507- 516. 5. Federal Highway Administration (2018). Traffic Data Computation Method. Publication No. FHWA-PL-18-027. 6. Gajda, J., Burnos, P. and Sroka, R. (2016) 'Weigh-inMotion systems for direct enforcement in Poland' in, Proc. International Conference on Weigh-in-Motion (ICWIM'16) & PIARC Workshop, p.p. 302-311. 7. Highway Research Board (1962) The AASHO Road Test. Report 5, Pavement Research Highway Research Board Special Report No 61 E. Washington, DC, USA: National Research Council. 8. Kent County Council (2000) Road Pavement Design Guide. 9. Paterson, W.D.O. (1987) Road deterioration and maintenance effects: models for planning and management. The Highway Design and Maintenance Standards Series. Washington, DC, USA: The International Bank for Reconstruction and Development. 10. Shahri, H.N. (2017) Development of a comprehensive analysis approach for evaluating superheavy load movement on flexible pavements (Doctoral dissertation, University of Nevada, Reno, NV, USA). 11. Transport Scotland (2012) Trunk Road project evaluation. Evaluation Report for Trunk Road Projects Opened between April 05 and March 07. 12. Transport Research Laboratory (2004) Overseas Road Note 40. A guide to axle load surveys and traffic counts for determining traffic loading on pavements. Crowthorne, Berkshire, UK: Transport Research Laboratory. 13. Transport Research Laboratory (2005) Overseas Road Note 5. A guide to road project appraisal. Crowthorne, Berkshire, UK: Transport Research Laboratory. 14. Van Zyl, N.J.W and Freeme, C.R. (1984) 'Determination of relative damage done to roads by heavy vehicles' in, Proc. 4th Annual Transportation Convention, CSIR, Pretoria, 6 – 9 August 1984: Vol C-1. 164 Appendicies 6 5 7 8 4 3 2 1 9 10 11 12 13 14 Appendix E: Chapter 3 References (The Subgrade) 1. ASTM D4694-09(2020) Standard test method for deflections with a falling-weight-type impulse load device. 2. Austroads (2017) Guide to Pavement Technology Part 2: pavement structural design. ISBN 978-1-925854-69-5. Sydney, Australia: Austroads. 3. British Standards Institution (2022) BS 1377-2:2022. Methods of test for soils for civil engineering purposes. Classification tests and determination of geotechnical properties. Chiswick, UK: BSI. 4. Cook, J.R., Petts, R.C. and Rolt, J. (2013) AFCAP Report GEN/099. Low volume rural road surfacing and pavements. A guide to good practice. UK: Crown Agents for UK Aid, DFID. 5. Davis, J. (2012) Chapter 46: Ground exploration. ICE Manual of Geotechnical Engineering. Vol. 1 Geotechnical engineering principles, problematic soils and site investigation. ICE Publishing. 6. DoT, South Africa (1996) TRH4: Structural design of flexible pavements for interurban and rural roads. Technical recommendations for highways. Pretoria, South Africa. 7. Gourley, C.S. and Schreiner, H.D. (1993) Assessment of the expansiveness of soils. Unpublished TRL report. PR/ OSC/012/93. 8. Jones, L.D. and Jefferson, I. (2012) Chapter 5: Expansive soils. ICE manual of geotechnical engineering. Vol. 1 Geotechnical engineering principles, problematic soils and site investigation. ICE Publishing. 9. MoT, Vietnam (2006) Decision 52/2006/QD-BGTVT, Standard 22.TCN 211-06. Flexible pavement – requirement and instruction for design. Vietnam: Ministry of Transportation, Government of Vietnam. 10. MoWHC (2005) Road design manual, Vol. III: pavement design. Kampala, Uganda: Manual Ministry of Works, Housing and Communications, Government of Uganda. 11. Nelson, J.D. and Miller, D.J. (1992) Treatment of expansive soils. Chapter 6 in Expansive soils: Problems and practice in foundation and pavement engineering. John Wiley and Sons. 12. Norbury, D. (2010) Soil and rock description in engineering practice. ISBN 978-1904445-65-4. CRC Press, Taylor and Francis. 13. Queensland Government (2021) Pavement Design Supplement. Supplement to 'Part 2: Pavement structural design'. Queensland, Australia. 14. South African National Roads Agency (2013) South African Pavement Engineering Manual. Chapter 10: Pavement Design. ISBN 978-1-920611-10-1. Republic of South Africa. 15. Transport Research Laboratory (1999) Overseas Road Note 18. A guide to the pavement evaluation and maintenance of bitumen-surfaced roads in tropical and sub-tropical countries. Crowthorne, Berkshire, UK: Transport Research Laboratory. 16. Transport Research Laboratory (2006) UK DCP 3.1 User Manual. Measuring road pavement strength and designing low volume sealed roads using the Dynamic Cone Penetrometer. Crowthorne, Berkshire, UK: Transport Research Laboratory. 17. U.S. Dept of Interior (UDSI) (1998) Earth Manual, 3rd Edition. USA: Bureau of Reclamation. 165 Appendicies 6 5 7 8 4 3 2 1 9 10 11 12 13 14 Appendix F: Chapter 4 References (Unbound Pavement Materials) 1. Austroads (2004) Pavement Design: A Guide to the Structural Design of Road Pavements. Pavement Technology Series. Sydney, Australia: Austroads. 2. Bennert, T., Papp Jr., W., Maher, A. and Gucunski, N. (2000) 'Utilization of construction and demolition debris under traffictype loading in base and subbase applications' Journal of the Transportation Research Record, no. 1714, p.p. 33-39. Washington, DC, USA. 3. Cetin, B., Coban, H.S., Edil, T.B., Ceylan, H., Likos, W., Zheng, J. and Buss, A. (2021) Report No. NRRA202103, June 2021. Determining pavement design criteria for recycled aggregate base and large stone subbase. National Road Research Alliance (NRRA) Geotechnical Team. 4. CIRIA (1988) Laterite in road pavements. Special Publication 47. London, UK: Construction Industry Research and Information Association. 5. COTO (2020) Standard specifications for road and bridge works for South African road authorities. Chapter 4: Earthworks and pavement layers: materials. Pretoria, South Africa: SANRAL SOC Limited. 6. FHWA (2008) FHWA Report FHWA-RD-97-148. User guideline for by products and secondary use materials in pavement construction. Vancouver, Canada: FHWA. 7. Fladvad, M. and Ulvik, A. (2021) 'Large-size aggregates for road construction – a review of standard specifications and test methods' Bull. Eng. Geol. Environ., no. 80, p.p. 8847–8859. https://doi.org/10.1007/s10064-019-01683-z 8. Franklin, J.A.A., Kemeny, J.M.M. and Girdner, K.K.K. (1996) 'Evolution of measuring systems: a review' in, Franklin, J.A.A. and Katsabanis, T. (eds) Proc. FRAGBLAST 5 Workshop on Measurement of Blast Fragmentation, Montreal, Quebec, Canada, p.p. 47–52. Rotterdam, The Netherlands: A.A. Balkema. 9. Guthrie, S.W., Cooley, D. and Eggett, D.L. (2007) 'Effects of reclaimed asphalt pavement on mechanical properties of base materials' Journal of the Transportation Research Board, no. 2005, p.p. 44-52. Washington, DC, USA. 10. Kazmee, H., Tutumluer, E. and Beshears, S. (2016) 'Pavement working platforms constructed with large-size unconventional aggregates' Transportation Research Record, no. 2578(1), p.p. 1-11. Washington, DC, USA. 11. Kuo, S.-S., Mahgoub, H.S. and Nazef, A. (2002) 'Investigation of recycled concrete made with limestone aggregate for a base course in flexible pavement' Transportation Research Record, no. 1787, p.p. 99-108. Washington, DC, USA. 12. Lionjanga, A.V., Toole, T. and Newill, D. (1987) 'The development of specifications for the use of low-grade calcretes in lightly trafficked roads in Botswana' Transportation Research Record, vol. 1, no. 1106, p.p. 281-304. Washington, DC, USA. 13. Molenaar, A.A. and van Niekerk, A.A. (2002) 'Effects of gradation, composition and degree of compaction on the mechanical characteristics of recycled unbound materials' Transportation Research Record, no. 1787(1), p.p. 73-82. Washington, DC, USA. 14. Mora, C.F., Kwan, A.K.H. and Chan, H.C. (1998) 'Particle size distribution analysis of coarse aggregate using digital image processing' Cem. Concr. Res., vol. 28, p.p. 921–932. doi: 10.1016/S0008-8846(98)00043-X 15. National Association of Australian State Road Authorities (1983) Guide to the control of moisture in roads. Sydney, Australia: NAASRA. 16. Netterberg, F. and Pinard, M.I. (1991) 'Derivation of interim performance-related specifications for coarsely-graded plastic calcrete basecourse gravels' in, Proc. 10th Regional Conference for Africa on Soil Mechanics and Foundation Engineering, Maseru. 17. Newill, D., Robinson, R. and Aklilu, K. (1987) 'Experimental use of cinder gravel on roads in Ethiopia' in, Proc. 9th Regional Conference for Africa on Sod Mechanics and Foundation Engineering, Lagos, Nigeria. Rotterdam, The Netherlands: A.A. Balkema. 18. NS 3468 (2019) NS 3468:2019. Coarse materials of stone for use in civil engineering works – Specification. Lysaker, Norway: Standard Norge. 19. Pan, T. and Tutumluer, E. (2005) 'Imaging based evaluation of coarse aggregate size and shape properties affecting pavement performance' Adv. Pavement Eng., p.p. 1–15. doi: 10.1061/40776(155)3 20.Pinard, M.I., Paige-Green, P., Mukura, K., Bofinger, H., Motswagole, K.J. and Netterberg, F. (2014) AFCAP/ GEN/028/C. Guide for the Use of Sand in Road Construction in the SADC Region. 21. Poon, C.-S., Qiao, X. and Chan, D. (2006) 'The cause and influence of self-cementing properties of fine recycled concrete aggregates on the properties of unbound sub-base' Waste Management, no. 26, p.p. 1166-1172. 22.Rolt, J., Williams, S.G., Jones, C.R. and Smith, H.R. (1987) 'Performance of a full scale pavement design experiment in Jamaica' Transportation Research Record, no. 1117. Washington, DC, USA. 23.Sameshima, T. and Black, P.M. (1979) 'Clay index – a simple method of assessing the quality and performance of roading aggregate' in, Proc. New Zealand Roading Symposium, A3, p.p. 1-10. 24.Sampson, L.R. and Netterberg, F. (1989) 'The durability mill. A new performance-related durability text for basecourse aggregates' The Civil Engineer in South Africa, September 1989, p.p. 287-294. 25. Weinert, H.H. (1980) The natural road construction materials of Southern Africa. Pretoria, South Africa: Academica. 166 Appendicies 6 5 7 8 4 3 2 1 9 10 11 12 13 14 Appendix G: Chapter 5 References (Hydraulically-bound Materials) 1. Al-Khafaji, R., Jafer, H., Dulaimi, A., Atherton, W. and Weida, Z. (2017) 'Soft soil stabilisation using ground granulated blast furnace slag' 3rd BUiD Doctoral Research Conference, British University in Dubai. 2. Atkinson, V.M., Chaddock, B.C. and Dawson, A.R. (1999) TRL Report 408. Enabling the use of secondary aggregate and binders in pavement foundations. Crowthorne, Berkshire, UK: Transport Research Laboratory. 3. Asphalt Academy (2009) Technical guideline: bitumen stabilised materials, TG2. Pretoria, South Africa: Asphalt Academy, CSIR Built Environment. 4. Britpave (2004) Stabilised soils as sub-base or base for roads and other pavements, Ref. BP/08. Camberley, Surrey, UK: The British In-situ Concrete Paving Association. 5. Britpave (2005) The immediate trafficking of cement bound materials. Technical Report. Ref. BP/14. Camberley, Surrey, UK: The British In-situ Concrete Paving Association. 6. Celauro, B., Bevilacqua, A., Bosco, D.L. and Celauro, C. (2012) 'Design procedures for soil-lime stabilization for road and railway embankments. Part 1 - Review of design methods' Procedia-Social and Behavioral Sciences, no. 53, p.p. 754-763. 7. CSIR Transportek (1998) CR-98/077. Foamed asphalt mixes mix design procedure. Pretoria, South Africa: CSIR Transportek. 8. Gross, J. and Adaska, W.S. (2020) Guide to cementstabilized subgrade soils. Washington, DC, USA: Portland Cement Association and Ames, IA, USA: National Concrete Pavement Technology Center, Iowa State University. 9. Halsted, G.E., Adaska, W.S. and McConnell, W.T. (2008) Guide to Cement-Modified Soil (CMS). Skokie, IL, USA: Portland Cement Association. http://secement.org/wpcontent/uploads/2017/04/EB242.pdf 10. Hasan, H., Khabbaz, H. and Fatahi, B. (2016) 'Expansive soil stabilization using lime-bagasse ash' in, Proc. GeoVancouver. 11. Higgins, D.D. (2005) Soil stabilisation with ground granulated blast furnace slag. Report. UK: UK Cementitious Slag Makers Association (CSMA). 12. James, J. and Pandian, P.K. (2018) 'Bagasse ash as an auxiliary additive to lime stabilization of an expansive soil: strength and microstructural investigation' Advances in Civil Engineering. 13. Jenkins, K. and Ebels, J. (2007) 'Mix design of bitumen stabilised materials: best practice and considerations for classification' in, Conference on Asphalt Pavements for Southern Africa, 9th, 2007, Gaborone, Botswana. Pretoria, South Africa: CAPSA 07 Secretariat. 14. Kestler, M. (2009) Selection guide for aggregate and natural surfaced low volume roads. Forest Service, San Dimas Technology and Development Centre. 15. Manikandan, A.T. and Moganraj, M. (2014) 'Consolidation and rebound characteristics of expansive soil by using lime and bagasse ash' International Journal of Research in Engineering and Technology, vol. 3, no. 4, p.p. 403-411. 16. National Lime Association, NLA (2004) 'Lime Treated Soil Construction Manual: lime stabilisation and lime modification' NLA Bulletin, no. 326, p.p. 1-43. 17. National Lime Association, NLA (2006) Mixture design and testing procedures for lime stabilised soil. Technical Brief. Arlington, VA, Canada: National Lime Association. 18. Nidzam, R.M. and Kinuthia, J.M. (2010) 'Sustainable soil stabilisation with blast furnace slag - a review' Proceedings of the Institution of Civil Engineers - Construction Materials, vol. 163, no. 3, p.p. 157-165. 19. Osinubi, K.J., Ijimdiya, T.S. and Nmadu, I. (2009) 'Lime stabilization of black cotton soil using bagasse ash as admixture' Advanced Materials Research, vol. 62, p.p. 3-10. Trans Tech Publications Ltd. 20.Padmaraj, D. and Chandrakaran, S. (2017) 'Stabilisation of soft clay using ground granulated blast furnace slag and lime' in, 6th Indian Young Geotechnical Engineers Conference 6IYGEC2017. 21. PCA (2001) PA050.03. Soil-cement Inspector's Manual, 2nd Edition. Skokie, IL, USA: Portland Cement Association. 22.PCA (2003) IS537. Soil-cement information: reflective cracking in cement stabilized pavements. Skokie, IL, USA: Portland Cement Association. 23.Ramanujan, J., Jones, J. and Janosevic, M. (2009) 'Design, construction and performance of in situ foamed bitumen stabilised pavements' Political Science: Queensland Roads, Edition 7. 24.Rao, D.K., Pranav, P.R.T. and Anusha, M. (2011) 'Stabilization of expansive soil with rice husk ash, lime and gypsum - an experimental study' International Journal of Engineering Science and Technology, vol. 3, no. 11, p.p. 8076-8085. 25. Robbins, E.G. and Muller, P.E. (1960) 'Development of a test for identifying poorly reacting sandy soils encountered in soilcement applications. Soil stabilization by admixing Portland Cement' Highway Research Board Bulletin, no. 267, p.p. 46–50. 26.SABITA (2020) TG2. Technical Guideline: Bitumen stabilised materials, 3rd Edition. Howard Place, South Africa: SABITA. 167 Appendicies 6 5 7 8 4 3 2 1 9 10 11 12 13 14 27. SETRA (2007) Technical Guide: Treatment of soils with lime and/or hydraulic binders. France: Ministry of Transport and Infrastructure. (English Translation 2008). 28.Thompson, M.R. (1967) Factors influencing the plasticity and strength of lime-soil mixtures. Illinois, USA: University of Illinois at Urbana Champaign, College of Engineering, Engineering Experiment Station. 29. Atkinson, V.M., Chaddock, B.C. and Dawson, A.R. (1999) TRL Report 408. Enabling the use of secondary aggregate and binders in pavement foundations. Crowthorne, Berkshire, UK: Transport Research Laboratory. 30.Wang, S. (2019) Hydraulic Road Binder (HRB) and its use for subgrade stabilization in Ontario, Canada (Thesis, University of Waterloo, ON, Canada). UWSpace http://hdl. handle.net/10012/15337 Relevant Standards • BS 1924-1:2018, Hydraulically bound stabilized materials for civil engineering purposes. Part 1: Sampling, sample preparation and testing of materials before treatment. • BS 1924-2:2018, Hydraulically bound stabilized materials for civil engineering purposes. Part 2: Sampling, sample preparation and testing of materials during and after treatment. • BS EN 13282-1:2013, Hydraulic road binders. Part 1: Rapid hardening hydraulic road binders. Composition, specifications and conformity criteria. • BS EN 13282-2:2015, Hydraulic road binders. Part 2: Normal hardening hydraulic road binders. Composition, specifications and conformity criteria. • BS EN 13286-41:2021, Unbound and hydraulically bound mixtures. Part 41: Test method for the determination of the compressive strength of hydraulically bound mixtures. • BS EN 13286-47:2021, Unbound and hydraulically bound mixtures. Part 47: Test method for the determination of California bearing ratio, immediate bearing index and linear swelling. • BS EN 14227-1:2013, Hydraulically bound mixtures - Specifications. Part 1: Cement bound granular mixtures. • BS EN 14227-15:2015, Hydraulically bound mixtures - Specifications. Part 15: Hydraulically stabilized soils. • BS EN 14227-3:2013, Hydraulically bound mixtures - Specifications. Part 3: Fly ash bound granular mixtures. • BS EN 14227-4:2013, Hydraulically bound mixtures - Specifications. Part 4: Fly ash for hydraulically-bound mixtures. • BS EN 14227-5:2013, Hydraulically bound mixtures - Specifications. Part 5: Hydraulic road binder-bound granular mixtures. • BS EN 15167-1:2006, Ground granulated blast furnace slag for use in concrete, mortar and grout. Part 1: Definitions, specifications and conformity criteria. • BS EN 196-2:2013, Method of testing cement. Part 2: Chemical analysis of cement. • BS EN 197-1: 2011, Cement. Part 1: Composition, specifications and conformity criteria for common cements. • BS EN 495-1:2015, Building lime - Part 1: Definitions, specifications and conformity criteria. Appendix G: Continued 168 Appendicies 6 5 7 8 4 3 2 1 9 10 11 12 13 14 Appendix H: Chapter 6 References (Bitumen-bound Materials) 1. AECOM (2021) Filtering protocol for innovative paving materials; including waste-derived materials. https:// aecom.com/uk/wp-content/uploads/2021/06/report_ highways-england_60618808_1-979_subtask-2.pdf 2. American Society for Testing and Materials (2017) C131- 03. Standard test method for resistance to degradation of small-size coarse aggregate by abrasion and impact in the Los Angeles machine. Philadelphia, USA: ASTM. 3. American Society for Testing and Materials (2013) C535- 09. Standard test method for resistance to degradation of large-size coarse aggregate by abrasion and impact in the Los Angeles Machine. Philadelphia, USA: ASTM. 4. American Society for Testing and Materials (2012) D2872-04. Standard test method for effect of heat and air on a moving film of asphalt (Rolling Thin-Film Oven Test). Philadelphia, USA: ASTM. 5. Asphalt Institute (1991) 'Marshall mix design criteria changes' The Magazine of the Asphalt Institute, vol. 5, no. 3. Lexington, KY, USA: The Asphalt Institute. 6. Asphalt Institute (2001) 'Superpave mix design' Superpave Series No. 2 (SP 02). Lexington, KY, USA: The Asphalt Institute. 7. Asphalt Institute (2014) 'Asphalt mix design methods' MS-2, Lexington, KY, USA: The Asphalt Institute. 8. Asphalt Institute (2020) 'Construction of quality asphalt pavements' MS-22, Lexington, KY, USA: The Asphalt Institute. 9. British Standards Institution (1973) BS 4987:1973. Specification for coated Macadam for roads and other paved areas. (withdrawn). Chiswick, UK: BSI. 10. British Standards Institution (1990) BS 812-110:1990. Testing aggregates. Methods for determination of aggregate crushing value (ACV). Chiswick, UK: BSI. 11. British Standards Institution (1990) BS 812-112:1990. Testing aggregates. Method for determination of aggregate impact value (AIV). Chiswick, UK: BSI. 12. British Standards Institution (2005) BS 598-104:1990. Sampling and examination of bituminous mixtures for roads and other paved areas. Methods of test for the determination of density and compaction. (withdrawn). Chiswick, UK: BSI. 13. British Standards Institution (2015) PD 6691:2015. Guidance on the use of BS EN 13108 bituminous mixtures. Material specifications. Chiswick, UK: BSI. 14. British Standards Institution (2015) BS 8594987:2015. Asphalt for roads and other paved areas. Specification for transport, laying, compaction and product type testing protocols. Chiswick, UK: BSI. 15. Bullas, J.C. and West, G. (1991) TRRL Research Report RR 284. Specifying clean, hard and durable aggregate for bitumen Macadam roadbase. Crowthorne, Berkshire, UK: Transport and Road Research Laboratory. 16. Carswell, I., Nicholls, J.C., Widyatmoko, I., Harris, J. and Taylor, R. (2010) TRL Road Note RN43. Best practice guide for recycling into surface course. Crowthorne, Berkshire, UK: Transport Research Laboratory. https://www.trl.co.uk/ publications/road-note-43---best-practice-guide-forrecycling-into-surface-course 17. Comité Européen de Normalisation (1998) EN 1097- 3:1998. Test for mechanical and physical properties of aggregates – determination of loose bulk density and voids. European Standardisation Organisations. 18. Comité Européen de Normalisation (2009) EN 1367- 2:2009. Test for thermal and weathering properties of aggregates – magnesium sulfate test. European Standardisation Organisations. 19. Comité Européen de Normalisation (2014) EN 12607-1 :2014. Bitumen and bituminous binders – determination of the resistance to hardening under influence of heat and air – RTFOT method. European Standardisation Organisations. 20.Comité Européen de Normalisation (2016) EN 13108- 2:2016. Bituminous mixtures - material specifications – asphalt concrete for very thin layers (BBTM). European Standardisation Organisations. 21. Comité Européen de Normalisation (2016) EN 13108- 5:2016. Bituminous mixtures - material specifications - stone mastic asphalt. European Standardisation Organisations. 22.Comité Européen de Normalisation (2016) EN 13108- 9:2016. Bituminous mixtures – material specifications - Asphalt for Ultra-Thin Layer (AUTL). European Standardisation Organisations. 23.Comité Européen de Normalisation (2016) EN 12697- 22:2020. Bituminous mixtures – test methods – wheel tracking. European Standardisation Organisations. 24.Comité Européen de Normalisation (2017) EN 933- 3:2017. Tests for geometrical properties of aggregates – determination of particle shape — Flakiness Index. European Standardisation Organisations. 25. Comité Européen de Normalisation (2020) EN 1097- 8:2020. Tests for mechanical and physical properties of aggregates – determination of the polished stone value. European Standardisation Organisations. 169 Appendicies 6 5 7 8 4 3 2 1 9 10 11 12 13 14 Appendix H: Continued 26.Comité Européen de Normalisation (2021) EN 933-1:2021. Tests for geometrical properties of aggregates – determination of particle size distribution – sieving method. European Standardisation Organisations. 27. Cominsky, R.J., Huber, G.A., Kennedy, T.W. and Anderson, M. (1994) The Superpave Mix Design Manual for New Construction and Overlays. SHRP-A-407. Washington, DC, USA: Strategic Highway Research Program, National Research Council. 28.Dickinson, E.J. (1982) 'The performance of thin bituminous pavement surfacings in Australia' Proc. 11th Australian Road Research Board Conference 11(3), ARRB, Melbourne, Australia, p.p. 35-51. 29.Harris, V.A.P., Hitch, L.S. and Jowett, J.M. (1983) 'Bituminous stabilisation of fine sands construction of the Baiomori - Gashua road, Nigeria' Proceedings of the Institution of Civil Engineers, Part 1, no. 74, p.p. 277-300. London, UK. 30.Harun, M.H. and Jones, C.R. (1992) 'The performance of polymer modified asphaltic concrete on climbing lanes in Malaysia' Proc. 16th Australian Road Research Board Conference, ARRB, Melbourne, Australia. 31. Hoban, T. (1990) 'Modified bitumen binders for surface dressing' Chemistry and Industry, no. 17, p.p. 538-542. London, UK: Society of Chemical Industry. 32.Hunter, N., Self, A. and Read, J. (2015) Shell Bitumen Handbook, 6th Edition. UK: Shell Bitumen. 33.Jackson and Brien (1962) Asphaltic concrete. London, UK: Shell International Petroleum Company. 34.Nicholls, J.C., McHale, M.J. and Griffiths, R.D. (2008) TRL Road Note RN42. Best practice guide for durability of asphalt pavements. Crowthorne, Berkshire, UK: Transport Research Laboratory. https://www.trl.co.uk/ publications/road-note-42---best-practice-guide-fordurability-of-asphalt-pavements 35.Nicholls, J.C., Carswell, I., Thomas, C. and Sexton, B. (2010) TRL Report TRL674. Durability of thin surfacing systems. Part 4 Final Report after nine years monitoring. Crowthorne, Berkshire, UK: Transport Research Laboratory. https://www.trl.co.uk/publications/trl674 36.Nicholls, J.C., Harper, J.P., Green, K.L. and Prime J.M. (2011) TRL Published Project Report PPR536. Assessment of asphalt durability tests: Part 2, Comparison of wheel tracking tests using European standards. Crowthorne, Berkshire, UK: Transport Research Laboratory. https://www.trl.co.uk/ publications/ppr536 37. Nicholls, J.C., Bailey, H., Ghazireh, N. and Day, D.H. (2018) TRL Published Project Report PPR666. Specification for low temperature asphalt mixtures. Crowthorne, Berkshire, UK: Transport Research Laboratory. https://www.trl.co.uk/ publications/ppr666 38.Powell and Leech (1982) TRRL Supplementary Report SR 717. Standards for compaction of dense roadbase Macadam. Crowthorne, Berkshire, UK: Transport and Road Research Laboratory. 39.Rolt, J., Smith, H.R. and Jones, C.R. (1986) 'The design and performance of bituminous overlays in tropical environments' in, Proc. 2nd Int. Conf. on the Bearing Capacity of Roads and Airfields, Plymouth, UK. 40.SABITA (2019) SABITA Manual 35 / TRH 8. Design and use of asphalt in road pavements. Howard Place, South Africa: SABITA. https://www.ibef.net/wp-content/ uploads/2021/09/IBEF-sabita-manual-35-july-2021.pdf 41. Smith, H.R., Rolt, J. and Wambura, J.H.G. (1990) 'The durability of bituminous overlays and wearing courses in tropical environments' in, Proc. 3rd Int. Conf. on the Bearing Capacity of Roads and Airfields, The Norwegian Institute of Technology, Trondheim, Norway. 42.US Army Corps of Engineers (2021) Hot-mix Asphalt Paving Handbook 2001. Vicksberg and Maryland, USA: US Army Corps of Engineers and National Asphalt Pavement Association. 43.Vavrik, W.R., Huber, G., Pine, W.J., Carpenter, S.H. and Bailey, R. (2002) E-Circular, No. E-C044. Bailey Method for gradation selection in HMA mixture design. Washington, DC, USA: Transportation Research Board. https://onlinepubs. trb.org/onlinepubs/circulars/ec044.pdf 44.Westrack Forensic Team (2001) Superpave Mixture Design Guide: Westrack Forensic Team Consensus Report. USA: National Transportation Library, United States Department of Transportation. https://rosap.ntl.bts.gov/ view/dot/35822. 170 Appendicies 6 5 7 8 4 3 2 1 9 10 11 12 13 14 Climate-Resilient Surfacings 45. Alabaster, D., Herrington, P. and Waters, J. (2014) 'Optimising long life low noise porous asphalt' Asph. Pavements – Proc. Int. Conf. Asph. Pavements, ISAP 2014. 2014;1:221–30. 46.Apostolidis, P., Liu, X., Erkens, S. and Scarpas A. (2020) 'Use of epoxy asphalt as surfacing and tack coat material for roadway pavements' Constr. Build. Mater. [Internet]. 2020;250:118936. Available from https://doi.org/10.1016/j. conbuildmat.2020.118936 47. Dinnen, J., Farrington, J. and Widyatmoko, D. (February, 1990) 'Experience with the use of epoxy-modified bituminous binders in surface courses in England' Asph. Prof., no. 82. ISSN 1479-6341. 48.4. Leung, R.W.K., Li, D.C.H. and Pickles, A.R. (2007) 'Heaving of Airfield Pavement at Hong Kong International Airport' 2007 FAA Worldwide Airport Technology Transfer Conference, Atlantic City, New Jersey, USA. 49. Yin, F., Anand, A., Moraes, R., Tran, N. and West, R. (2021) Design and performance of Open-Graded Friction Course (OGFC) mixtures containing epoxy asphalt. Auburn. 50.Gribble, M. (2018) New Zealand Guide to Pavement Structural Design [Internet]. Wellington, New Zealand: New Zealand Transport Agency. Available from https://www. nzta.govt.nz/assets/resources/NZ-guide-to-pavementstructural-design/New-Zealand-guide-to-pavementstructural-design-V1.1.pdf 51. Henning, T.F.P., Greenwood, I.G. and Tighe, S.L. (April, 2017) Integrating climate change into road asset management [Internet]. Available from https://openknowledge. worldbank.org/handle/10986/26505 52.Herrington, P.R. (2010) Epoxy-modified porous asphalt. p. 36. New Zealand: New Zealand Transport Agency. 53.Nordic Development Fund / ADB (2018) Climate resilient roads: Cambodia Rural Roads Improvement Project. 54.NZTA P11E :2021 (2021) Specification for epoxy bound opengraded porous asphalt. Wellington, New Zealand. 55. OECD (2005) Economic evaluation of long-life pavements: Phase 1. 56. Transport Research Laboratory (2000) Overseas Road Note 3. A guide to surface dressing in tropical and sub-tropical countries. Crowthorne, Berkshire, UK: Transport Research Laboratory. 57. Turnbull, K. (2016) Transportation resilience: adaptation to climate change. National Academies Press. 58.Wu, J.P., Herrington, P.R. and Alabaster, D. (2019) 'Longterm durability of epoxy-modified open-graded porous asphalt wearing course' Int. J. Pavement Eng. [Internet], vol. 20, no. 8, p.p. 920–927. Available from https://doi.org/10.1080/10 298436.2017.1366764 Appendix H: Continued 171 Appendicies 6 5 7 8 4 3 2 1 9 10 11 12 13 14 Appendix I: Chapter 7 References (Pavement Drainage & Climate Resilience) 1. American Concrete Pavement Association (2021) Pavement Resilience. National Concrete Consortium. Available from https://intrans.iastate.edu/app/uploads/ sites/7/2021/05/6Sp21_Wathne.pdf. 2. Austroads (2018) Roads and Maritime Supplement to Austroads Guide to Pavement Technology, Part 2: Pavement structural design, Document No: RMS 11.050 Version 3.0. Available from https://roads-waterways.transport. nsw.gov.au/business-industry/partners-suppliers/ documents/austroads-supplements/agpt-part2.pdf (Accessed on 15/02/2022). 3. Armitage, N. et al. (2013) WRC Report No. TT 558/13. Alternative technology for stormwater management. The South African Guidelines for Sustainable Drainage System. Available from http://www.wrc.org.za/wp-content/uploads/ mdocs/TT%20558.pdf (Accessed on 12/01/2022). 4. Construction Industry and Information Association (2015) CIRIA C753 - The SuDS Manual. London, UK: CIRIA. 5. Cedergren, H.R. (1988) 'Why all important pavements should be well drained?' Transportation Research Record, no. 1188, Washington, DC, USA. Available from http:// onlinepubs.trb.org/Onlinepubs/trr/1988/1188/1188-006. pdf. 6. Dawson, A.R. (2009) Water in road structures. Nottingham, UK: University of Nottingham. 7. Dean, G. (2020) Boosting pavement resilience in a changing climate. A concrete pavement industry perspective. Available from https://static1.squarespace. com/static/526c7a98e4b023d8f09390ed/t/ 6009e79f5a7807638d74c8c1/1611261861260/ Boosting+Pavement+Resilience.pdf 8. Ethiopian Roads Authority (2013) Design Manual for Low Volume Roads. Part D. 9. Galbraith, R.M., Price, D.J., Easteal, R., Shackman, L., Motion, A. and Barnett, C. (2005) Scottish road network, climate change study. Summary Report. Edinburgh, UK: The Scottish Executive. 10. Hankare, A.V., Sankpal, P.B., Kumbhar, V.M. and Patil, V.B. ( ) 'Estimating flexible pavements flood resilience' International Journal of Advanced Research and Development, vol. 3, issue 2. Available from www.ijarnd.com 11. Iowa State-wide Urban Design and Specification (2011) Design Manual Chapter 6 - Geotechnical 6G - Subsurface drainage systems. Available from https://intrans.iastate. edu/app/uploads/sites/15/2020/03/6G-1.pdf 12. Marr, J.D.G. (2017) Design considerations for embankment protection during road overtopping events. Research Report. Minnesota, USA: University of Minnesota. Available from https://mntransportationresearch.org/2017/10/23/ design-considerations-for-embankment-protectionduring-overtopping-events/ 13. Mekong River Commission (2011) Roads and floods. Best practice guidelines for the integrated planning and design of economically sound and environmentally friendly roads in the Mekong floodplains of Cambodia and Viet Nam. Available from https://www.iwlearn.net/resolveuid/ dc7044454d74786c8efc71128bb3fa5f 14. Misbah, U. et al. (2017) Flexible pavements flood resilience. Available from https://www.concretepavements.org/wpcontent/uploads/2017/07/ISCPJULY_ASCE_EstimatingPavements-Flood-Resilience.pdf. 15. Nordic Development Fund (2009) Climate resilient roads, Cambodia Rural Roads Improvement Project: Results from climate change adaptation. Available from https://www. ndf.int/media/project-files/cambodia-rural-roadsimprovement-project-results-from-climate-changeadaptation.pdf. 16. Paige-Green, P. (November, 2008) Dispersive and erodible soils, Proceedings. Problem soils in South Africa, 304. South Africa: South Africa Institute of Engineering and Environmental Geologists. 17. Pittner, C. and Allerton, G. (2009) SuDS for Roads. Edinburgh, UK: WSP Development and Transportation, WSP Group. Available from https://www.tinyurl.com/ kveukel (Accessed on 10/08/2021). 18. ReCAP (2019) Manual for low volume roads, Part C - Hydrology, drainage design and roadside slope stablisation. Uganda: Uganda Ministry of Road and Highways. Available from https://www.research4cap.org/ral/SLRA-2019- ManualforLVR-PartC-200416-compressed.pdf (Accessed on 15/08/2021). 19. ReCAP (2019b) Climate adaptation: risk management and resilience optimisation for vulnerable access engineering adaptation guidelines in Africa. Available from https://assets.publishing.service.gov.uk/ media/5f9d84c68fa8f57f3b4cb096/CSIR-PGC-StHelensClimateAdaptation-RiskVulnerabilityGuideline-AfCAPGEN2014C-190926-compressed.pdf (Accessed on 10/11/2021). 20.Rolt, J., Gourley, C.S. and Hayes, J.P. (2002) TRL Report PR/INT/244/2002. Rational drainage of road pavements. Crowthorne, Berkshire, UK: Transport Research Laboratory. 172 Appendicies 6 5 7 8 4 3 2 1 9 10 11 12 13 14 Appendix I: Continued 21. Sathawara, J.K. and Patel, A.K. (n.d.) 'Comparison between soaked and unsoaked CBR' International Journal of Advanced Engineering Research and Studies. E-ISSN2249–8974. 22.UKCP18 (2019) UKCP18 science overview report. 23.Transport Research Laboratory (1993) Overseas Road Note 31. A guide to the structural design of bitumen-surfaced roads in tropical and sub-tropical countries, 4th Edition. Crowthorne, Berkshire, UK: Transport Research Laboratory. 24.UK Environment Agency (2013) Climate resilience of highways: assessment of current practice. Available from https://www.researchgate.net/publication/304158620_ Climate_Resilience_of_Highways_Assessment_of_ Current_Practice (Accessed on 16/12/21). 25. USAID (2015) Incorporating climate change adaption in infrastructure planning and design. Available from https:// www.climatelinks.org/sites/default/files/asset/ document/ROADS_PRIMER_CCA_ENGINEERING_ DESIGN.pdf (Accessed on 16/08/2021). 26.World Bank (2019) Guideline: Green roads for water road infrastructure in support of water management and climate resilience. 27. Yand, Q. et al. (2016) 'Climate resilience of highways: assessment of current practice' LJMU Annual International Conference on: Asphalt, Pavement Engineering and Infrastructure. Available from https://www.researchgate. net/publication/304158620_Climate_Resilience_ of_Highways_Assessment_of_Current_Practice (Accessed on 18/03/22). 173 Appendicies 6 5 7 8 4 3 2 1 9 10 11 12 13 14 Appendix J: Chapter 8 References (Flexible Pavement Design) 1. Brunton, J.M., Brown, S.F. and Pell, P.S. (1987) 'Developments to the Nottingham Analytical Design, Method for asphalt pavements' Proc. 6th Int. Conf. on the Structural Design of Asphalt Pavements, University of Michigan, Ann Arbor. 2. Gerritsen, A.H. and Koole, R.C. (1987) 'Seven years' experience with the structural aspects of the Shell Pavement Design Manual' Proc. 6th Int. Conf. on the Structural Design of Asphalt Pavements, University of Michigan, Ann Arbor. 3. Gourley, C.S. and Greening, P.A.K. (1999) Published Report PR/OSC/167/99. Performances of low-volume sealed roads; results and recommendations from studies in southern Africa. Crowthorne, Berkshire, UK: Transport Research Laboratory. 4. Kennedy, C.K. and Lister, N.W. (1978) TRRL Report LR 833. Prediction of pavement performance and the design of overlays. Department of Environment, Department of Transport Crowthorne, Berkshire, UK: Transport and Road Research Laboratory. 5. Leech, D. and Nunn, M.E. (1997) 'Deterioration mechanisms in flexible pavements' 2nd European Conference on the Durability and Performance of Bituminous Materials, University of Leeds, Leeds, UK. 6. Otto, A., Rolt, J., Musenero, L. and Mukura, K., TRL Ltd (2020) RAF2069A. Development of guidelines and specifications for low volume sealed roads through back analysis, Phase 3 Final Report. London, UK: ReCAP for DFID. 7. Parsley, L.L. and Robinson, R. (1982) TRRL Laboratory Report LR 1057. The TRRL Road Investment Model for developing countries (RTIM 2). Crowthorne, Berkshire, UK: Transport and Road Research Laboratory. 8. Paterson, W.D.O. (1987) Road deterioration and maintenance effects: models for planning and management. The Highway Design and Maintenance Standards Series. Washington, DC, USA: The International Bank for Reconstruction and Development. 9. Popik, M., Olidis, C. and Tighe, S. (2005) 'The Effect of Seasonal Variations on the Resilient Modulus of Unbound Materials' Annual Conference of the Transportation Association of Canada, Calgary, Alberta, Canada. 10. Powell, W.D., Potter, J.F., Mayhew, H.C. and Nunn, M.E. (1984) TRRL Report LR1132. The structural design of bituminous roads. Crowthorne, Berkshire, UK: Transport and Road Research Laboratory. 11. Rolt, J., Williams, S.G., Jones, C.R. and Smith, H.R. (1987) 'Performance of a full-scale pavement design experiment in Jamaica' Transportation Research Record, no. 1117. Washington, DC, USA. 12. Transport Research Laboratory (1993) Overseas Road Note 31. A guide to the structural design of bitumensurfaced roads in tropical and sub-tropical countries, 4th Edition. Crowthorne, Berkshire, UK: Transport Research Laboratory. Transport Research Laboratory (2006) PPR 127. Road foundation design for major UK highway. Crowthorne, Berkshire, UK: Transport Research Laboratory. 174 Appendicies 6 5 7 8 4 3 2 1 9 10 11 12 13 14 Appendix K: Chapter 10 References (Design of Rigid Pavements) 1. Abouabid, M., Dermot, C. and Martyn, J. (2017) Roller Compacted Concrete - background to the development of Highways England's design guidance and specification. AECOM, May 2017. 2. Austroads (2019) AGPT02-17. Guide to Pavement Technology. Part 2: Pavement Structural Design, Edition 4.3, Nov 2019. Sydney, Australia: 3. Austroads.Austroads (2021) AGPT04C-17. Guide to Pavement Technology. Part 4C: Materials for Concrete Road Pavements, Edition 2.1, May 2021. Sydney, Australia: Austroads. 4. Austroads (2018) Guide to Pavement Technology. Part 10: Subsurface Drainage. AGPT10-09_Edition 1.1, Aug 2018. Sydney, Australia: Austroads. 5. Colley, B.E., Ball, C.G. and Arriyavat, P. (1978) Evaluation of concrete pavements with lane widening, tied concrete shoulders and thickened pavement. Minnesota, USA: Minnesota Department of Transportation and Portland Cement Association. 6. EUPAVE (2019) Roller compacted concrete: making concrete pavements available to the whole pavement building industry. European Concrete Paving Association (EUPAVE), April 2019. 7. Jameson, G. (2013) Research Report ARR 384. Technical basis of Austroads Guide to Pavement Technology: Part 2: Pavement structural design. Vermont South, Victoria, Australia: ARRB Group. 8. Japan Road Association (1989) Manual for asphalt pavement. Tokyo, Japan: Japan Road Association. 9. Jordan, R.W., Coley, C., Harding, M., Carswell, I. and Hassan, K.E. (2008) TRL Road Note 41: Best Practice Guide for Overlaying Concrete Roads. Crowthorne, Berkshire, UK: Transport Research Laboratory. 10. Mayhew, H.C. and Harding, H.M. (1987) TRRL Research Report RR87. Thickness design of concrete roads. Crowthorne, Berkshire, UK: Transport Research Laboratory. 11. National Highways (2021) DMRB CD226. Design for new pavement construction (version 0.1.0) (formerly HD26/06). Design Manual for Roads and Bridges (DMRB). England, UK: National Highways (formerly Highways England). 12. National Highways (2021) MCHW Volume 1 - Specification for Highway Works, Series 1000 – Road pavements – Concrete materials. Manual of Contract Documents for Highway Works (MCHW). England, UK: National Highways (formerly Highways England), November 2021. 13. Packard, R.G. (1984) Thickness design for concrete highway and street pavements. Skokie, IL, USA: Portland Cement Association. 14. Roads and Traffic Authority (1992) Concrete Pavement Manual – Design and construction. 2nd Edition. New South Wales, Australia: Roads and Traffic Authority (RTA). 15. Smith, R.B. and Pratt, D.N. (1983) 'A field study of in situ California Bearing Ratio and dynamic cone penetrometer for road subgrade investigations' Australian Road Research, vol. 13, no. 4, p.p. 285-94. 16. Transport Research Laboratory (1999) Overseas Road Note 18. A guide to the pavement evaluation and maintenance of bitumen-surfaced roads in tropical and sub-tropical countries. Crowthorne, Berkshire, UK: Transport Research Laboratory. 175 Appendicies 6 5 7 8 4 3 2 1 9 10 11 12 13 14 Appendix L: Chapter 11 References (Pavement Rehabilitation Approaches) 1. Adams, T. and Vandenbossche, J.M. (2013) Bonded Concrete Overlay of Asphalt Pavements Mechanistic-Empirical Design Guide (Bcoa-Me): Assessing the need for pre-overlay repairs when construction BCOA. Pittsburgh, PA, USA: University of Pittsburgh. 2. Austroads (2009) Guide to Pavement Technology. Part 2: Pavement Structural Design. Sydney, Australia: Austroads. 3. Dehlen, G. (1962). A simple instrument for measuring the curvature induced in a road surfacing by a wheel load. Trans. S. Afr.lnstn.Civ. Engrs. 4. 4. Federal Highway Authority (2002) FHWA-RD-01-113. Backcalculation of layer parameters for LTPP test sections. Volume II: Layered elastic analysis for flexible and rigid pavements. USA: Federal Highway Authority. 5. Grant, M. C. and Walker, R.N. (1972). The development of overlay design procedures based on the application of elastic theory. Proceedings of the 3rd International Conference on the Structural Design of Asphalt Pavements, London,. 6. Hodges, J.W., Rolt, J. and Jones, T.E. (1975) TRRL Laboratory Report 673. The Kenya Road Transport Cost Study: Research on road deterioration. Crowthorne, Berkshire, UK: Transport Research Laboratory. 7. Horak, E. (2008) 'Benchmarking the structural condition of flexible pavements with deflection bowl parameters' Journal of the South African Institution of Civil Engineering, vol. 50, p.p. 2-9. 8. Janoo, V. and Cortez, E.R. (2003) National Pooled Fund Study SPR-208. Pavement subgrade performance study. Accelerated testing of A-2-4 subgrade soil at wetter than optimum moisture content. Hanover, NH, USA: US Army Cold Regions Research and Engineering Laboratory. 9. Rolt, J., Smith, H.R. and Jones, C.R. (1986) 'The design and performance of bituminous overlays in tropical environments' in, Proc. 2nd Int. Conf. on the Bearing Capacity of Roads and Airfields, Plymouth, UK. 10. Smith, H.R., Rolt, J. and Wambura, J.H.G. (1990) 'The durability of bituminous overlays and wearing courses in tropical environments' in, Proc. 3rd Int. Conf. on the Bearing Capacity of Roads and Airfields, The Norwegian Institute of Technology, Trondheim, Norway. 11. Transport Research Laboratory (1999) Overseas Road Note 18. A guide to the pavement evaluation and maintenance of bitumen-surfaced roads in tropical and sub-tropical countries. Crowthorne, Berkshire, UK: Transport Research Laboratory. 12. Watanatada, T., Harral, C.G., Paterson, W.D.O, Dhareshwar, A.M., Bhandari, A. and Tsunokawa, K. (1987) Highway Design and Maintenance Standards Series (2 Volumes). Baltimore, MD, USA: John Hopkins University Press. 176 Appendicies 6 5 7 8 4 3 2 1 9 10 11 12 13 14 Appendix M: Chapter 12 References (Economic Considerations) 1. Bennett, C.R. and Greenwood, I.D. (2001) Modelling road user and environmental effects in HDM-4. Volume 7. Washington, DC, USA: ISOHDM Technical Secretariat. 2. World Bank (2016) OPSPQ Guidance Note. Discounting costs and benefits in economic analysis of World Bank projects, May 9, 2016. Washington, DC, USA. 177 Appendicies 6 5 7 8 4 3 2 1 9 10 11 12 13 14 Appendix N: Chapter 13 References (Ancillary Considerations) 1. Asian Development Bank (2010) Methodology for estimating carbon footprint of road projects: Case Study India. Mandaluyong City, Philippines: Asian Development Bank ADB). 2. Greenroads (2011) MANUAL v1.5 © 2011. 3. Griffiths, K.A., Boyle, C. and Henning, T.F.P. (2018) 'Comparison of project performance assessed by infrastructure sustainability rating tools' Proceedings of the Institution of Civil Engineers: Engineering Sustainability, vol. 172, no. 5. doi: 10.1680/jensu.18.00003. 4. Reeves, S., Hewitt, A., Pepler, A. and Booth, C. (2020) Project Report PPR960. Review and update of the asPECT carbon footprinting tool for asphalt road pavements. Crowthorne, Berkshire, UK: Transport Research Laboratory. 5. Stripple, H. (2001) Life cycle assessment of road: a pilot study for inventory analysis. 2nd Revised Edition. Stockholm, Sweden: IVL Swedish Environmental Research Institute. 6. World Bank (2011) Greenhouse gas emissions mitigation in road construction and rehabilitation: a toolkit for developing countries. Washington, DC, USA: The International Bank for Reconstruction and Development / The World Bank Group. 7. World Bank (2021) Climate Change Action Plan 2021-2025. Washington, DC, USA: The World Bank Group. doi: 10.1596/978-1-4648-0484-7_world_bank_group. This research was funded by UKAID through the UK Foreign, Commonwealth & Development Office under the High Volume Transport Applied Research Programme, managed by DT Global. The views expressed in this guide do not necessarily reflect the UK government's official policies. hvtinfo@dt-global.com www.hvt.preview.consideredcreative.com @Transport_Links A Guide to the Structural Design of Surfaced Roads in Tropical and Sub-tropical Regions: Integrating Climate Resilience into Road Networks